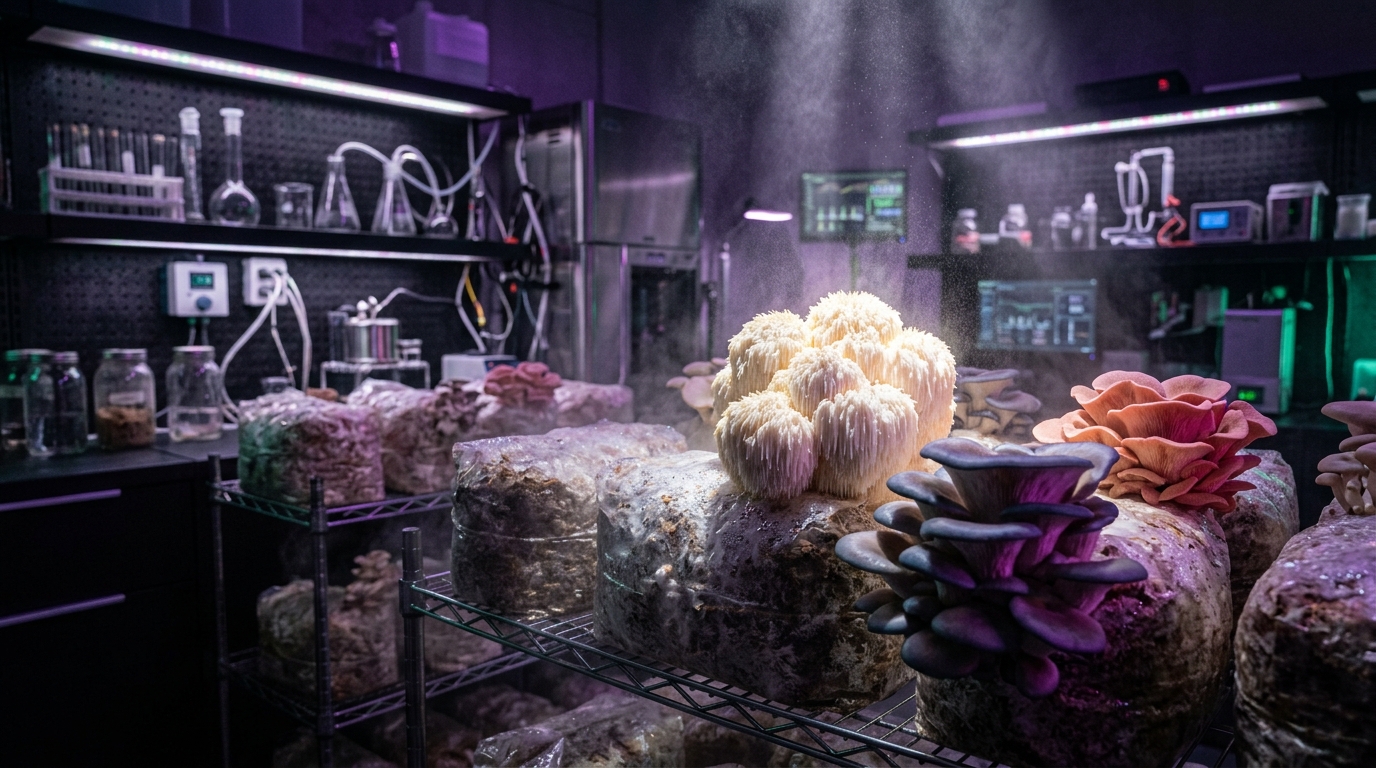
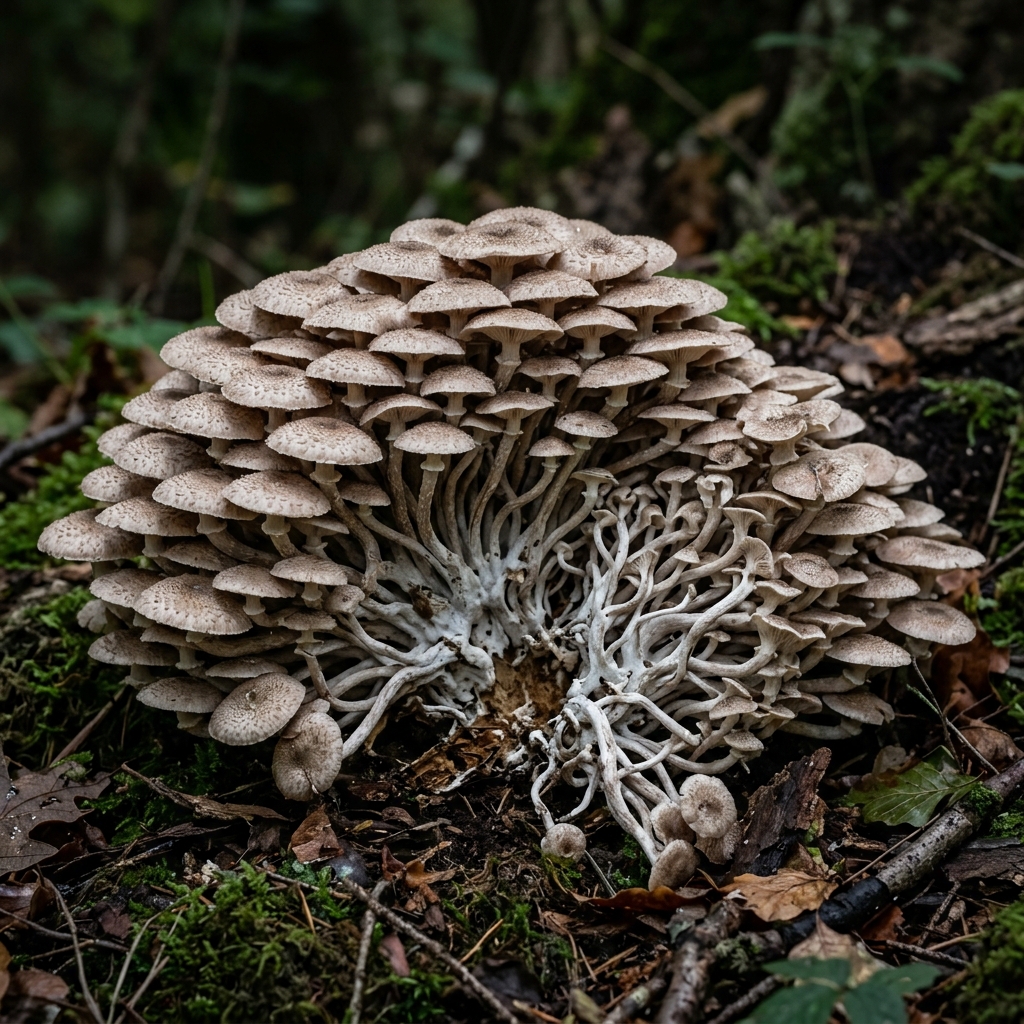
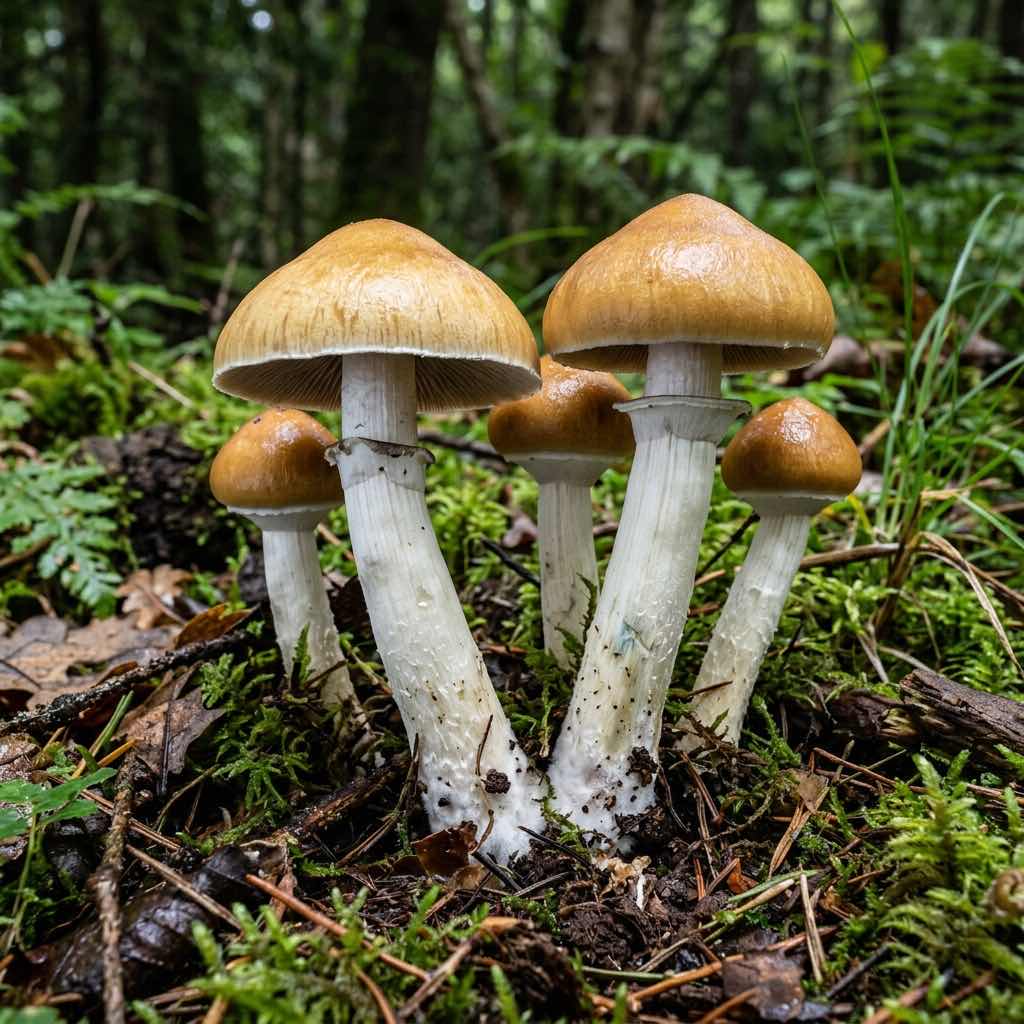
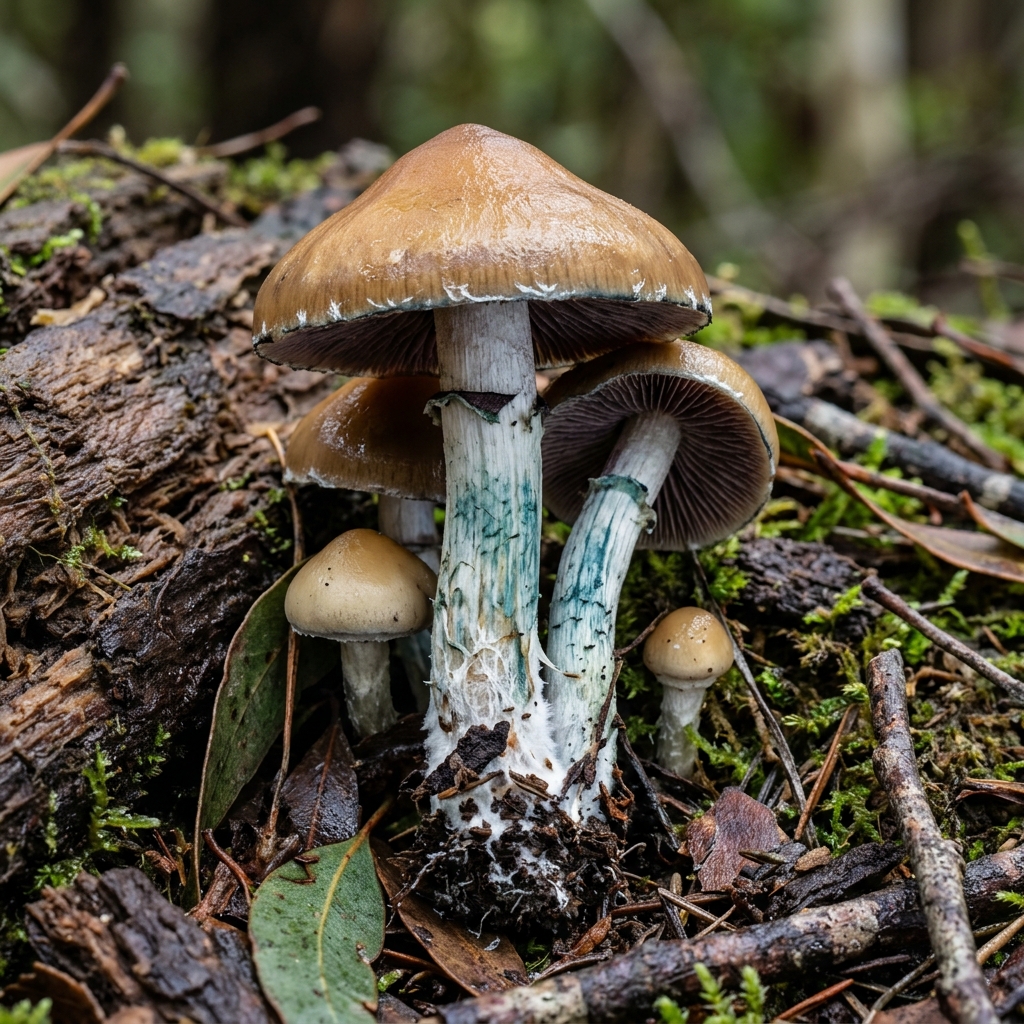
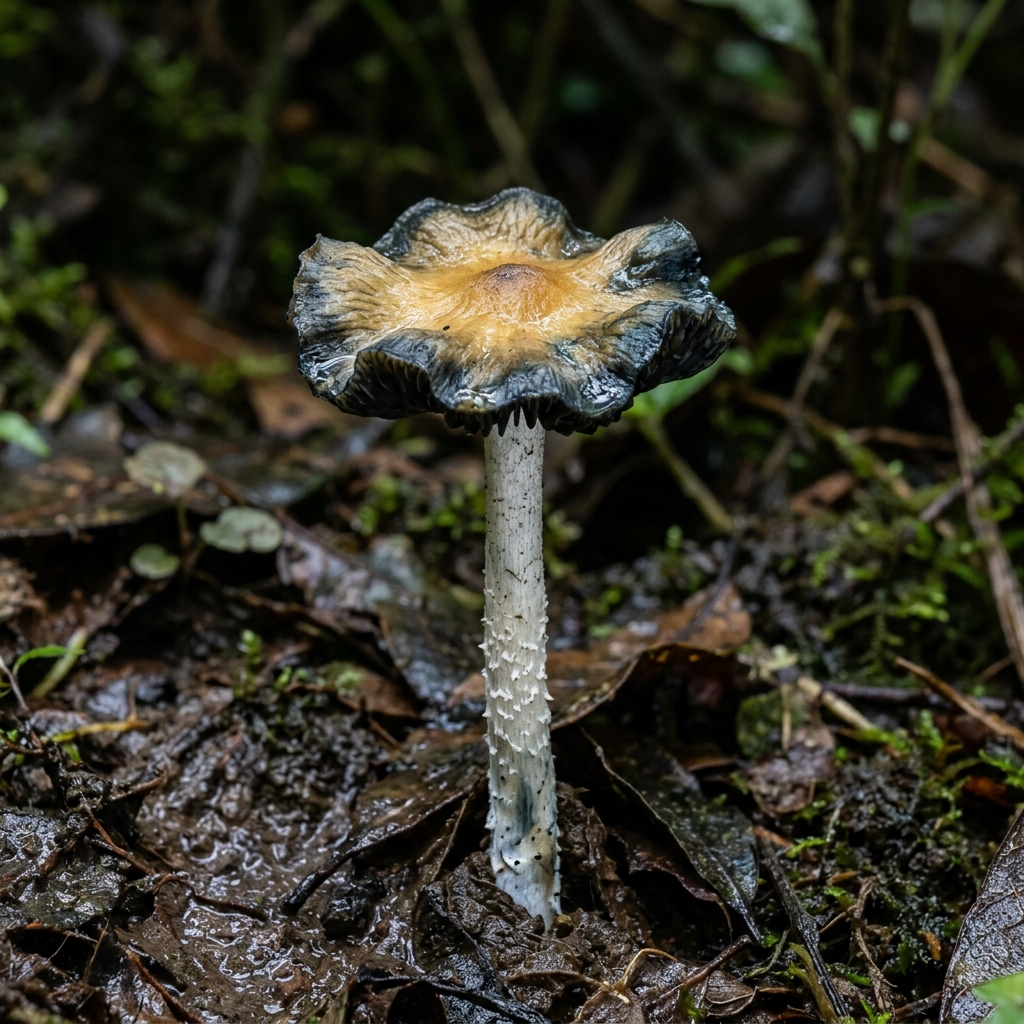
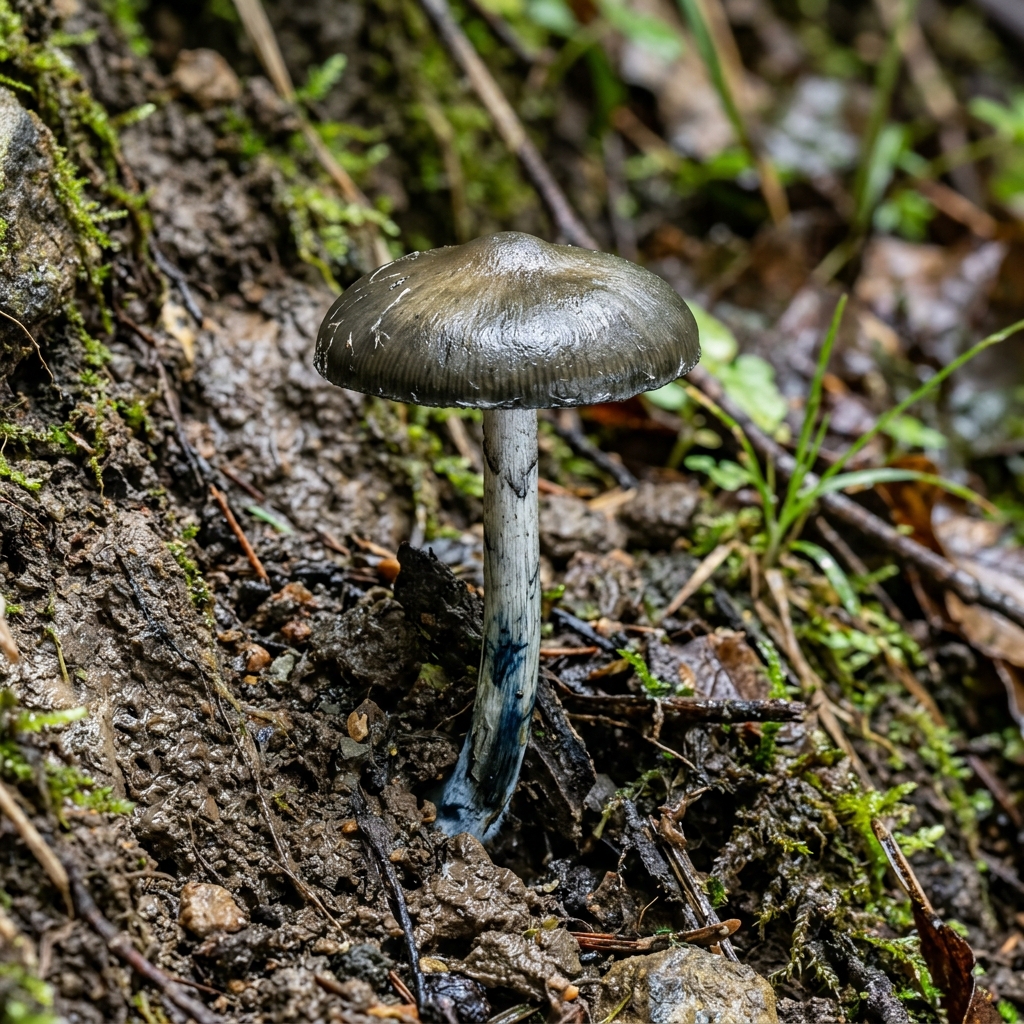
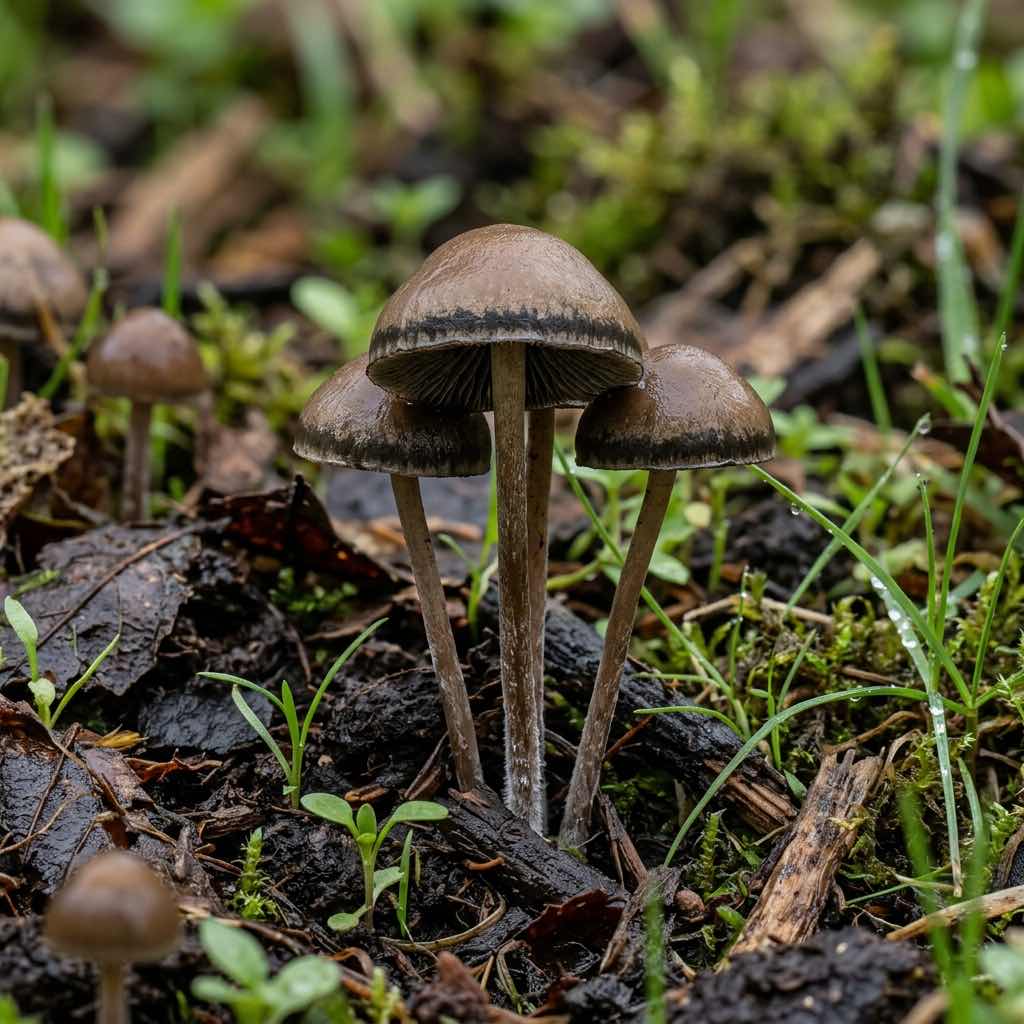
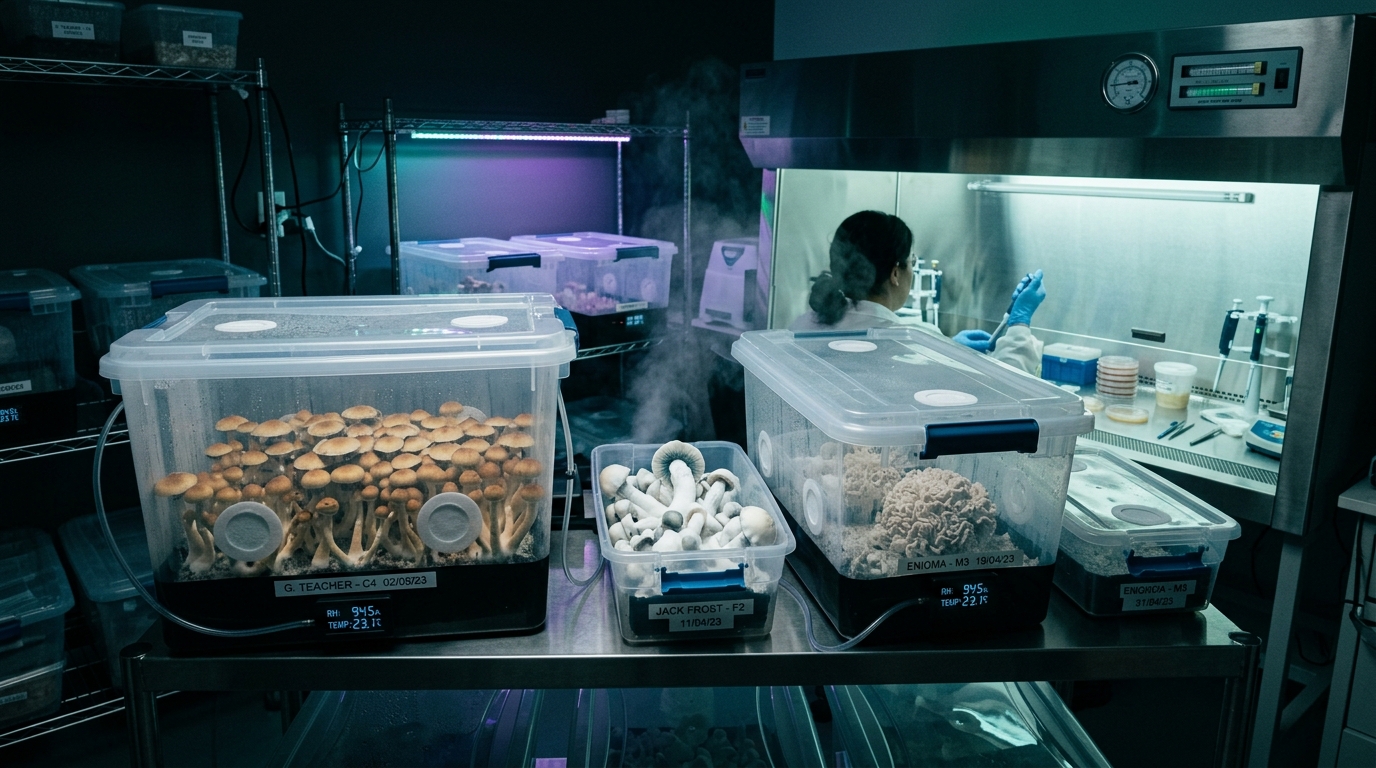
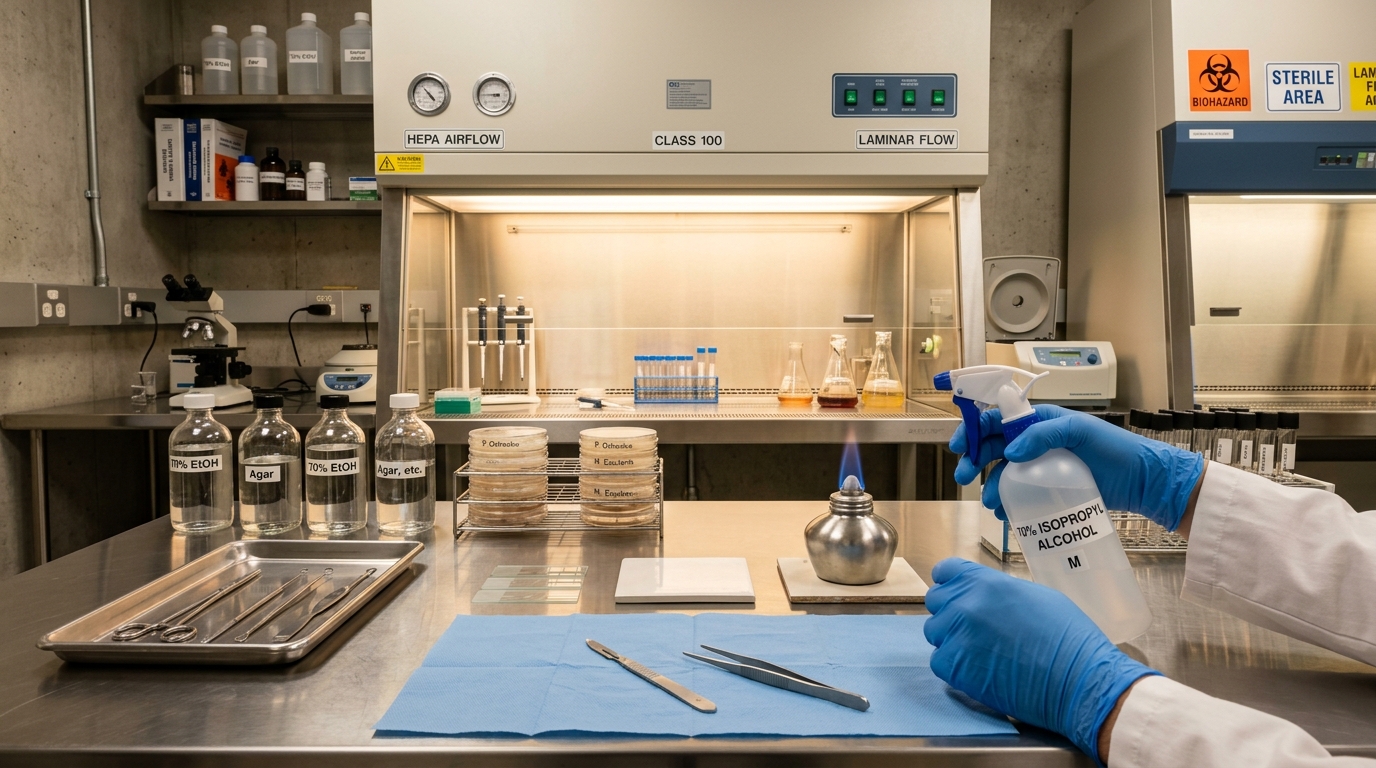
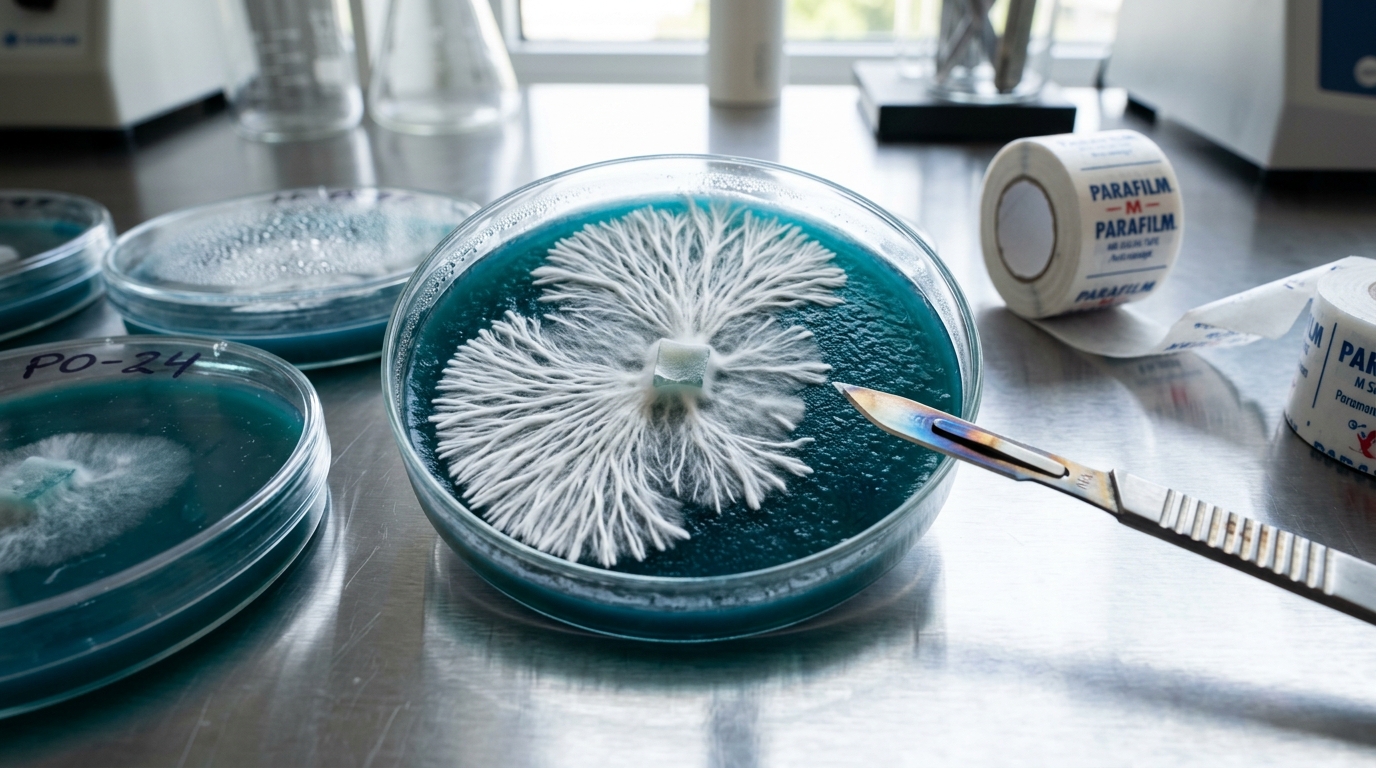
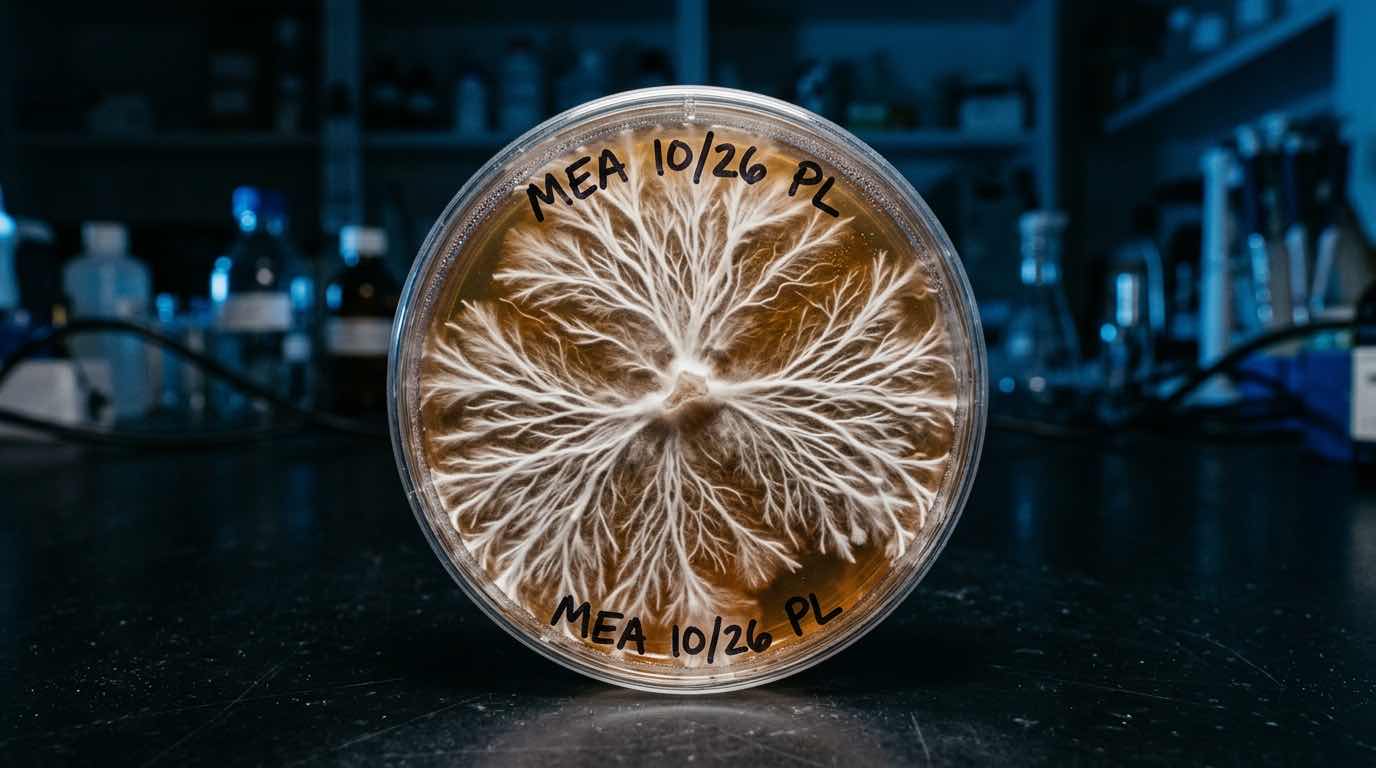
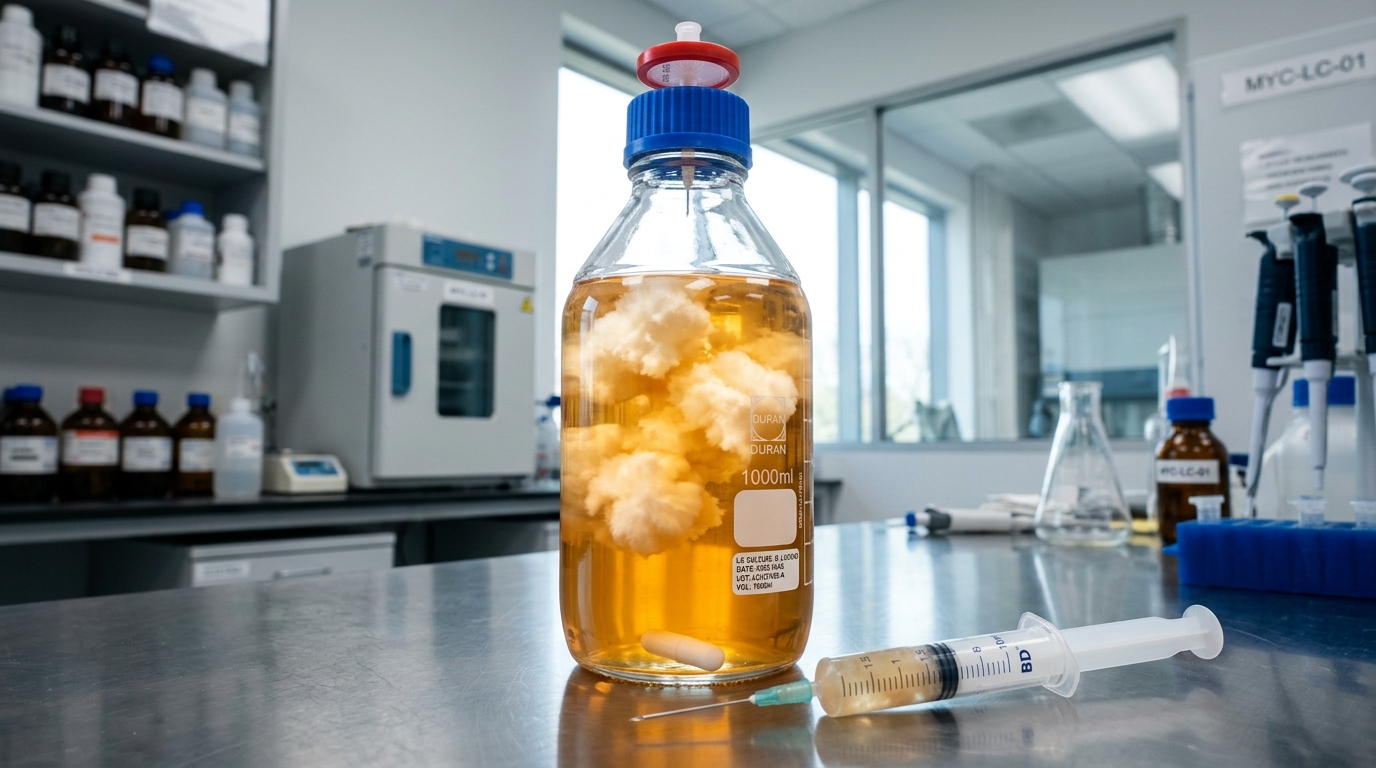
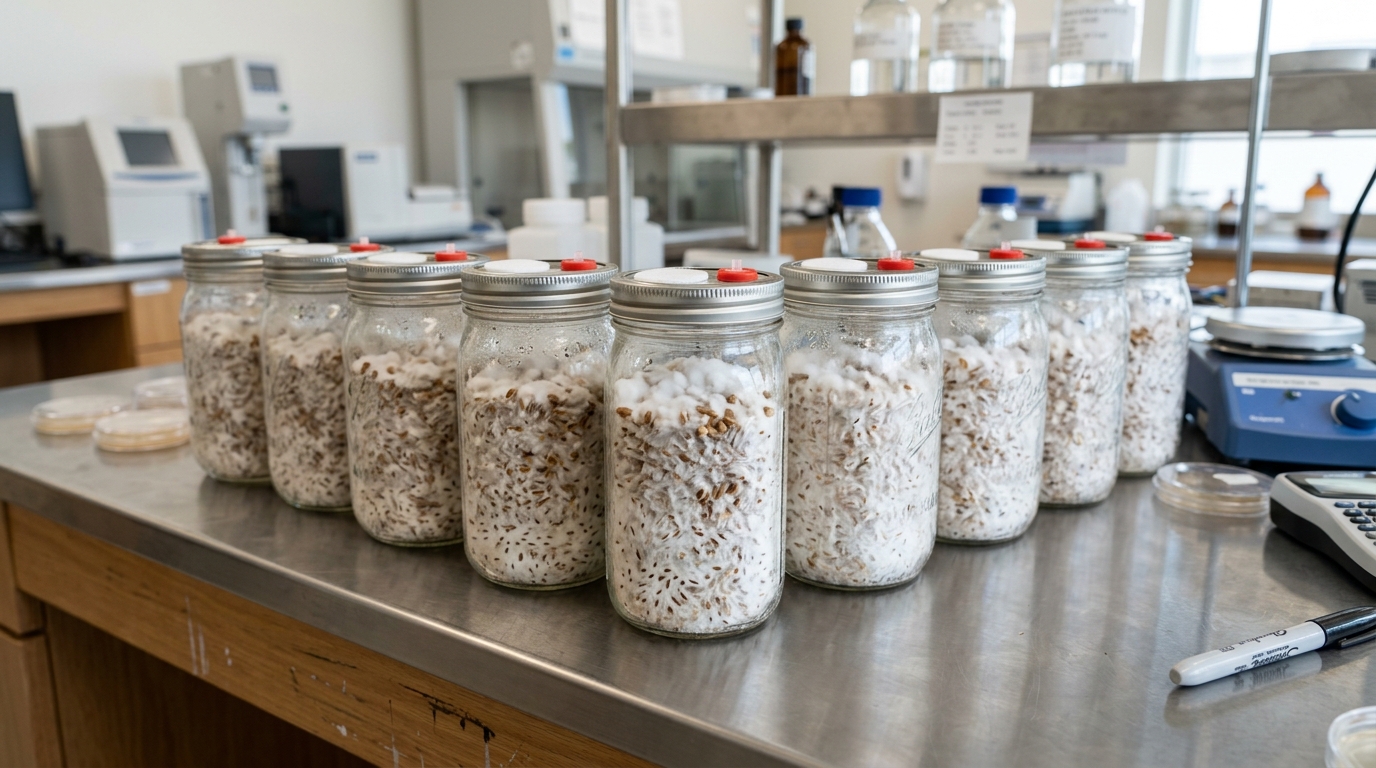
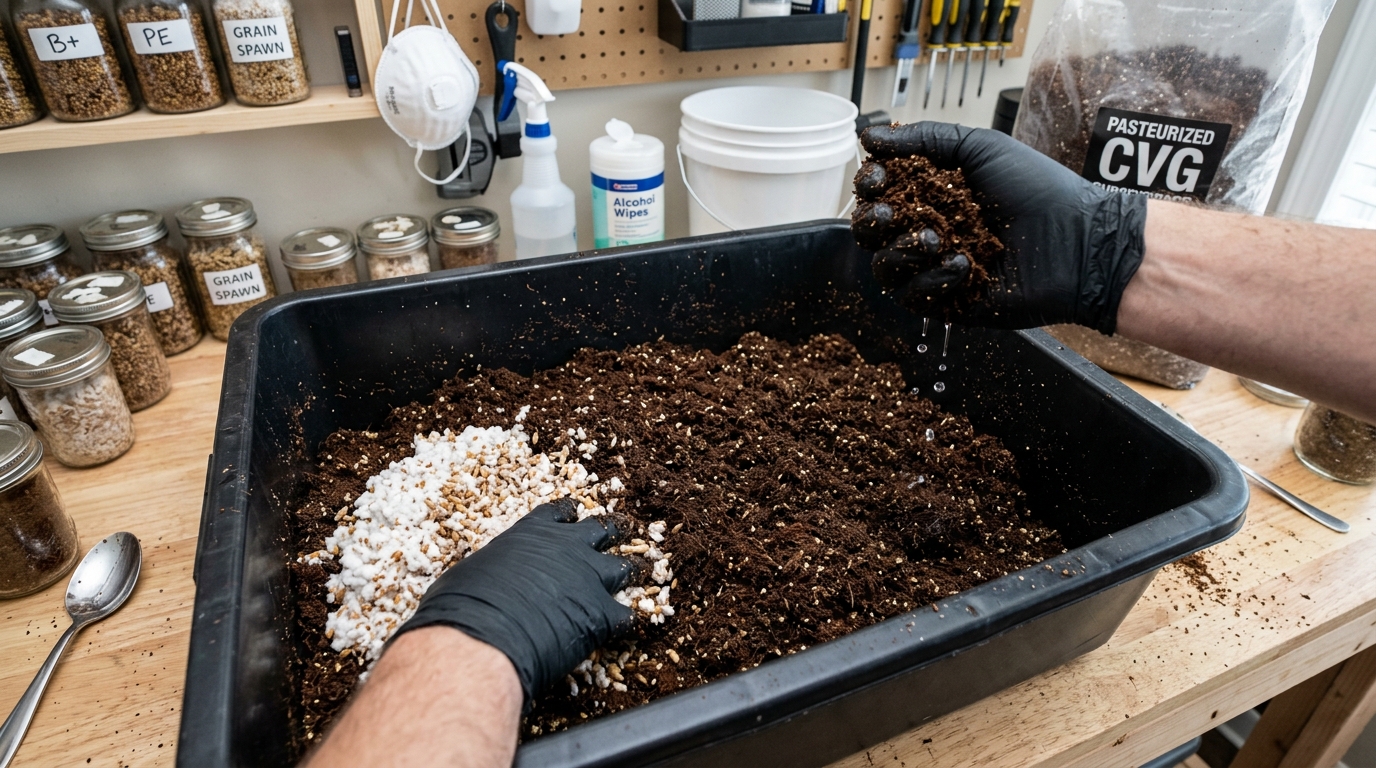
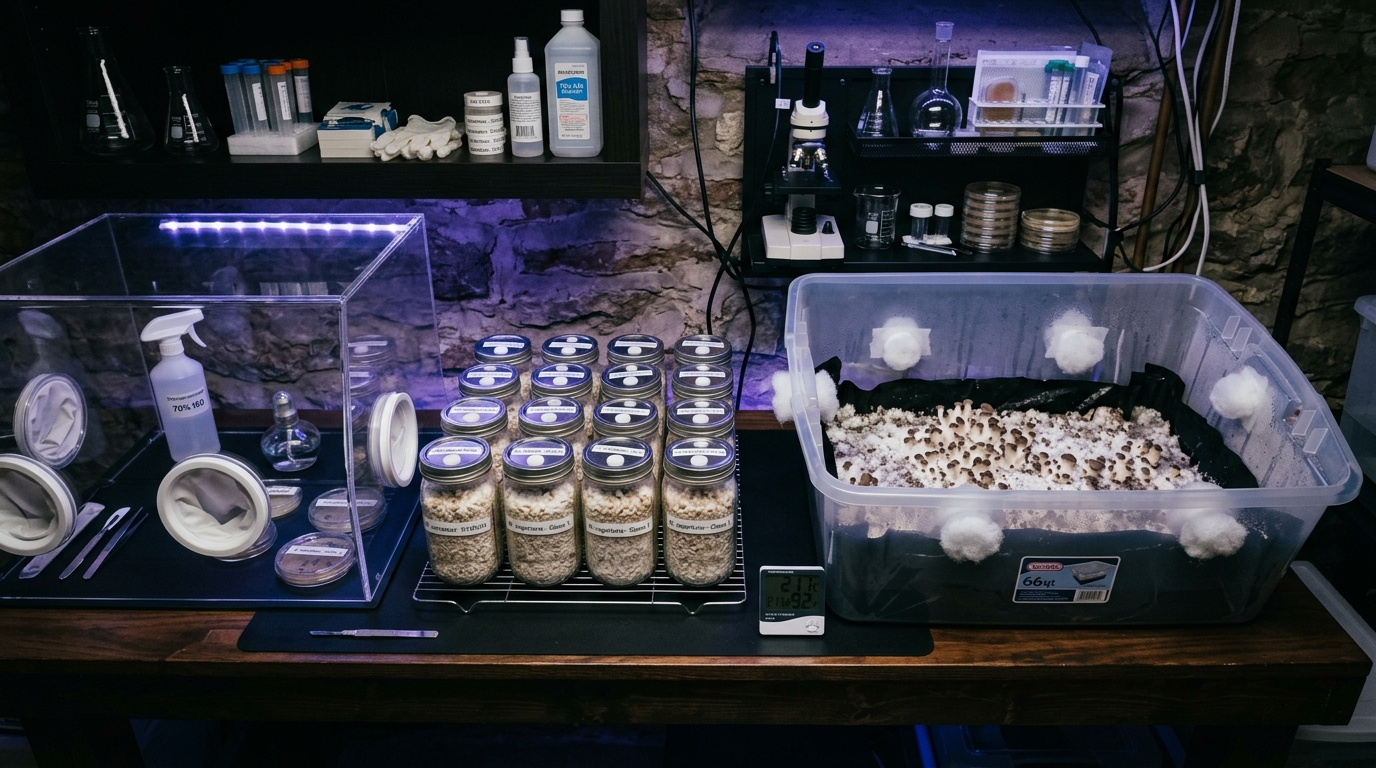
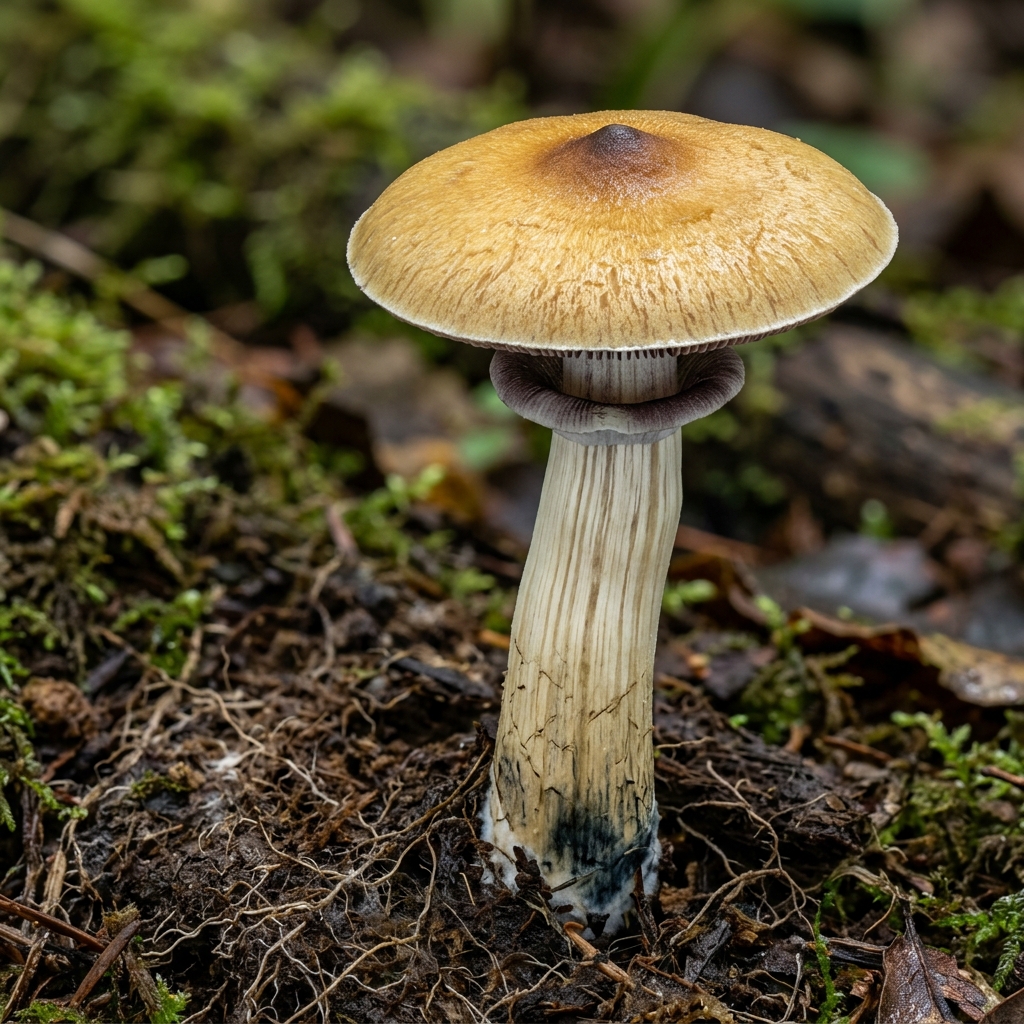
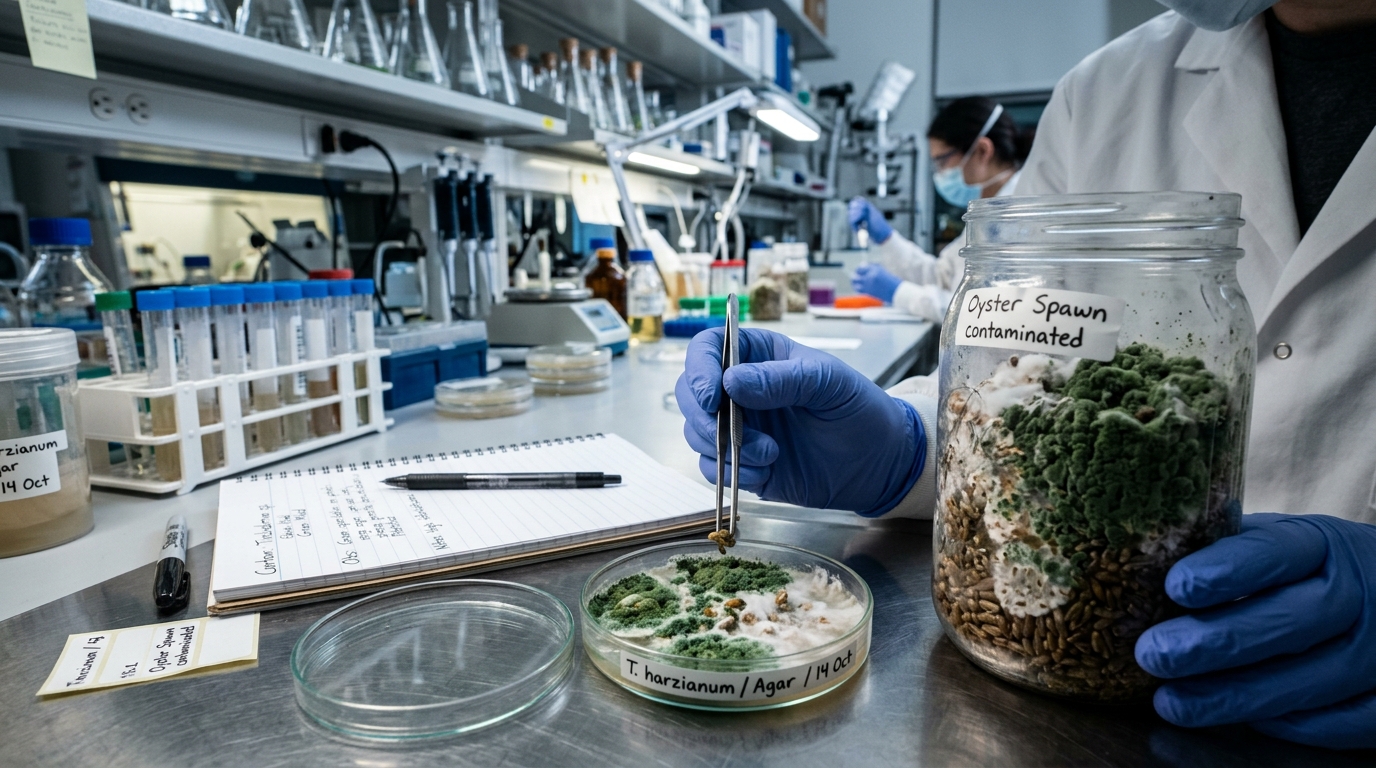
Manual técnico interactivo desde la espora hasta el cuerpo fructífero. Explora metodologías profesionales de laboratorio y micología.
The Art of Cultivation
"Mycology is 90% cleanliness and 10% mycelium. Master sterility and you will master the cycle."
3Key Phases
10Protocols
42Technical Sheets
Precision MycologyCultivation guides & protocols
Explore all mushroom cultivation
From substrate to harvest: cultivation of medicinal and gourmet species and Psilocybe strains (cubensis, natalensis and allies). Protocols for substrates and pasteurization, sterility, genetics and agar, liquid cultures and pathology. Pick a section from the menu or go to the species and strains catalog.
Practical Home Mycology Encyclopedia
Master Cultivation Guide
"Ecological guilds, master bulk substrate recipes, pasteurization methods, and step-by-step protocols for every species."
42Key Species
4Difficulty Levels
5Cultivation Systems
menu_bookPractical Home Mycology Encyclopedia (42 Species)
Master Cultivation Guide by Species
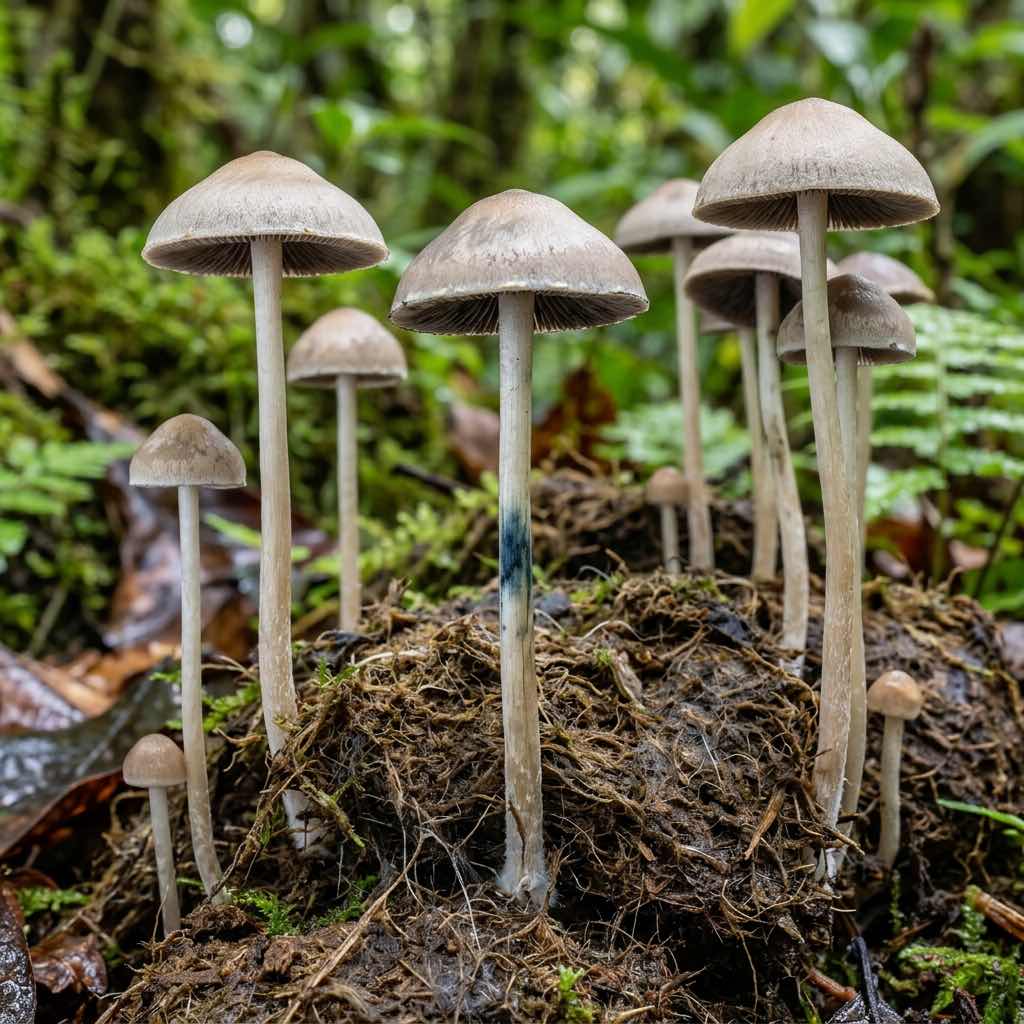
Not all mushrooms grow the same way: a wood-loving fungus like Shiitake or Lion's Mane will never fruit properly in a closed Monotub, while a dung-loving species like Panaeolus cyanescens requires shallow trays with a breathable casing layer. Learn to identify each species' Ecological Guild & Container System first, and explore each card below for its chronological step-by-step protocol, expert secrets, and exact substrate formula.
architectureThe 5 Master Cultivation Systems (By Biological Guild)
forest1. Hardwood Blocks (Master's Mix)
For: Lion's Mane, Reishi, Shiitake, Maitake, Enoki. Method: Polypropylene filter bags (0.2–0.5 µm) filled with hardwood sawdust + bran/soy hulls sterilized at 15 PSI. Side-slit or top-fruiting.
recycling2. Pasteurized Straw & Drilled Buckets
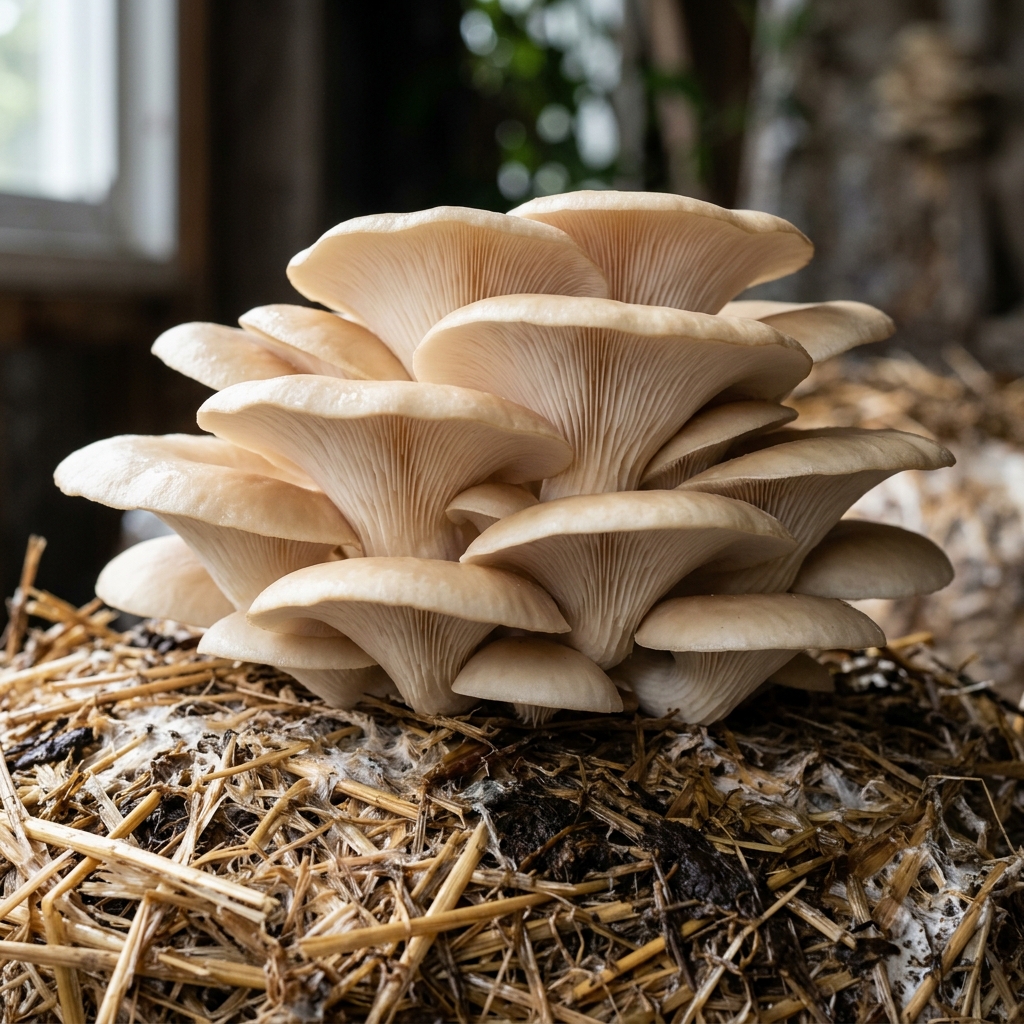
For: Oyster Mushrooms (Pearl, Golden, Pink, Phoenix) & Wine Cap. Method: Ultra-aggressive colonizers requiring no autoclave. Chopped cereal straw pasteurized in 75°C water or cold hydrated lime bath (pH > 12).
inventory_23. Monotub (Pure Coco or CVG) & Trays
For: Psilocybe cubensis, P. natalensis, Panaeolus, Button/Portobello. Method: Total versatility: from accessible brown rice (Broke Boi Tek steamed in kitchen pots without autoclave) to rye/oats. Bulk substrate with 100% pure coco coir (Bucket Tek) or classic CVG formula with optional casing layer.
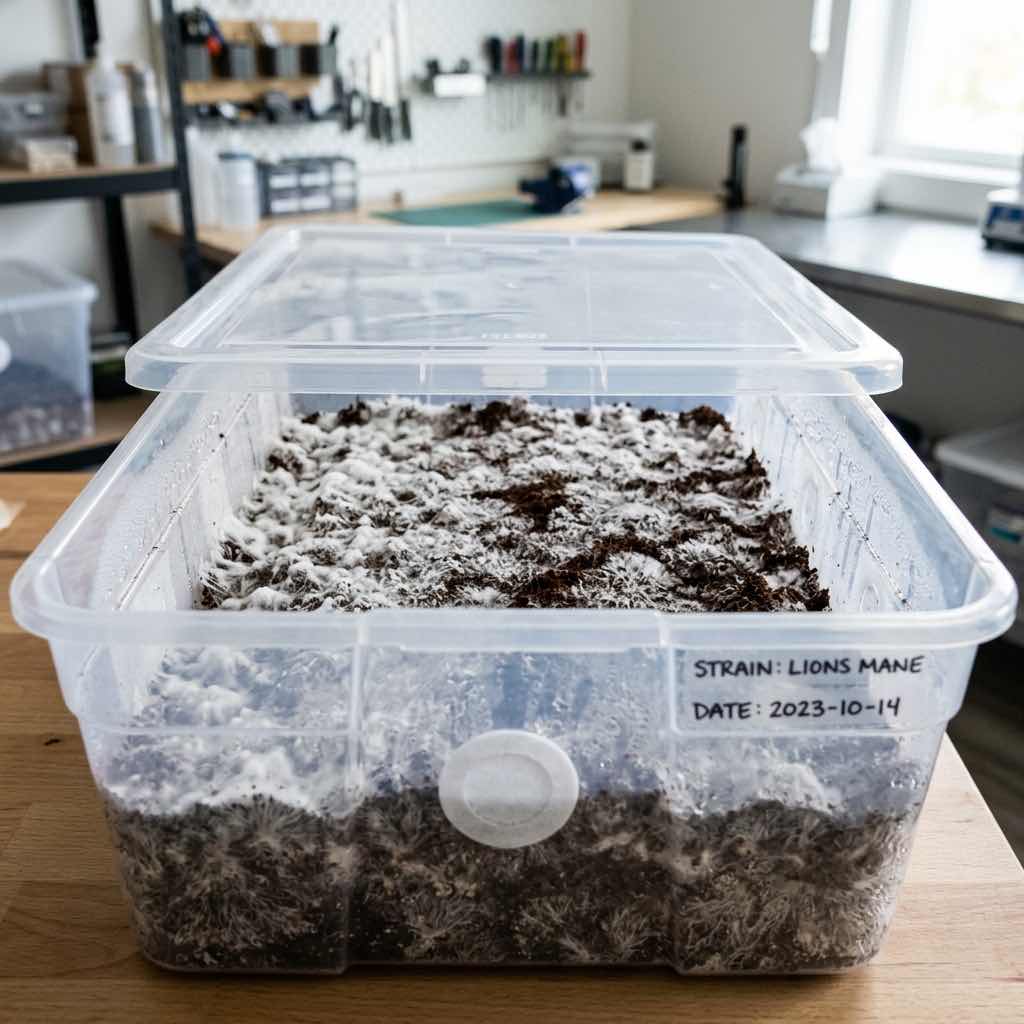
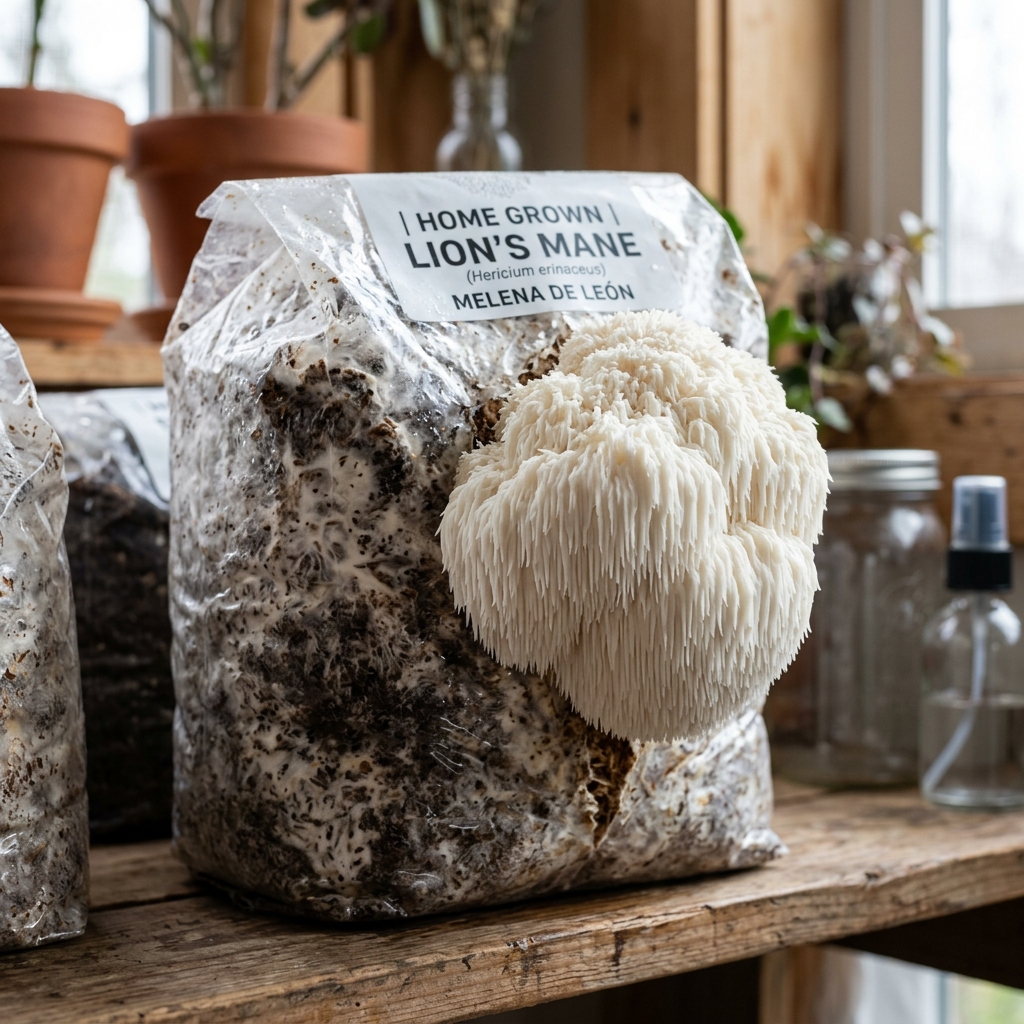
Lion's Mane is a fascinating lignicolous fungus that does not develop a cap or blades, but rather globose cascades of white spines. Its mycelium is thin and almost transparent in appearance at first, leading many novice growers to believe that the grain has not yet colonized when it is ready.
layers
Bulk Substrate & Base RecipeMaster's Mix (50% hardwood sawdust + 50% soy hulls)500g non-resinous hardwood pellets (oak, beech, holm oak) + 500g soybean hull pellets + 1.4L hot water (60% total humidity). Alternative: 80% hardwood sawdust + 20% wheat bran.
sanitizerMandatory sterilization in autoclave or pressure cooker at 15 PSI (121°C) for 120-150 minutes.Pasteurization Guideopen_in_new
Incubation21°C - 25°C
Fruiting16°C - 19°C
CO₂ Limit< 900 ppm
format_list_numberedView Step-by-Step Guide (5 phases) & Pro Tipsexpand_more
1. Phase 1: Grain Inoculum Preparation10 - 14 days
Inoculate sterilized jars of brown rice, rye or millet with 3-5 ml of Liquid Culture. Incubate at 24°C in the dark. Note: Hericium mycelium is wispy and silky; Shake after 5 days and move to a block before it begins to fruit inside the jar.
2. Phase 2: Master's Mix Block Sowing12 - 16 days
In a laminar flow cabinet or SAB, transfer 10% of colonized grain to polypropylene bags with 2.2 kg of sterilized Master's Mix substrate. Seal the bag, mix homogeneously and compact the block eliminating air pockets.
3. Phase 3: Induction and Lateral Cutting in "X"day 15 - 18
When the block is covered with dense white mycelium and begins to form small nodules, fold the top of the bag firmly to expel the upper air and make 1 or 2 clean "X" shaped cuts (2.5 cm) on the sides.
4. Phase 4: Spine Development and CO₂ Control8 - 12 days
Transfer to the fruiting chamber (Martha Tent) at 17-18°C, 90% humidity and high CO₂ extraction (<750 ppm). The pink bud will turn snowy white and develop descending spines.
5. Phase 5: Optimal Harvest and Second Waveday 28 - 32
Harvest by gently twisting the pompom from the base when the spines measure 1-1.5 cm, just before they turn yellow or release white spores. Close the cut with micropore tape, let it rest for 10 days and open a new "X" for the second wave.
Expert Grower Tips:
Don't wait to see a white block like acrylic paint: Hericium tends to form premature grain primordia; Sow as soon as it covers 100% even if it looks translucent.
Keep the plastic of the bag very tightly against the substrate to prevent fruiting inside the plastic in areas without oxygen.
Ultrasonic mist must be indirect; The water drops deposited on the pompom oxidize the brown or pink spines.
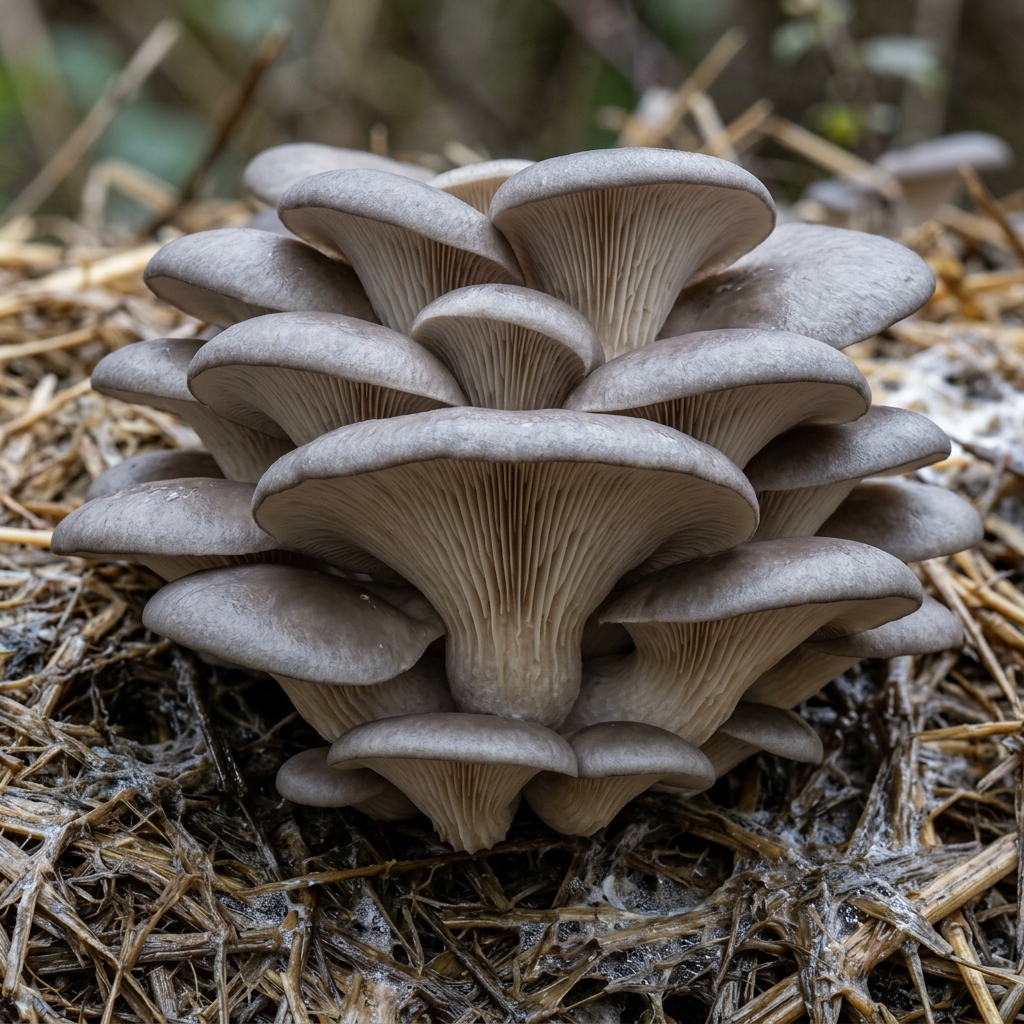
The Gray or Blue Oyster Mushroom is the undisputed queen to get started in gourmet mycology. Its rhizomorphic mycelium colonizes pasteurized straw or coffee grounds at an astonishing speed, successfully competing against environmental molds and offering crops that exceed 100% biological efficiency.
layers
Bulk Substrate & Base RecipePasteurized cereal straw or hardwood sawdustChopped wheat or barley straw (3-6 cm sections) hydrated to 70% humidity + 2% calcium carbonate or agricultural gypsum.
sanitizerThermal pasteurization in water at 65-75°C for 90 minutes, or cold alkaline pasteurization with hydrated lime (2g/L of water at pH 12.5 for 16 hours).Pasteurization Guideopen_in_new
Incubation20°C - 26°C
Fruiting12°C - 18°C
CO₂ Limit< 1000 ppm
format_list_numberedView Step-by-Step Guide (5 phases) & Pro Tipsexpand_more
1. Phase 1: Straw Pasteurizationday 1 (12 - 16h)
Immerse the chopped straw in a drum with water and hydrated lime (0.2% calcium hydroxide, pH >12) for 14 hours, or pasteurize it in hot water at 70°C for 90 minutes. Drain on a clean mesh screen for 2 hours until only 1 or 2 drops fall when you squeeze a handful.
2. Phase 2: Sowing by Layers (Spawning)day 2
In a 10-15L polypropylene bucket with 10 mm side holes covered with micropore tape (or in tubular bags), alternate 5 cm layers of moist straw with handfuls of colonized grain (proportion 10% by weight) firmly pressing each layer.
3. Phase 3: Rapid Incubation10 - 14 days
Keep the buckets or bags at 22-24°C. The cottony white mycelium will bind all the straw into a compact block and begin to appear through the breathing holes.
4. Phase 4: Thermal Shock and Mass Oxygenation5 - 7 days
Remove the tape from the fruiting holes and expose to 14-16°C with indirect light (12h/day), 88% humidity and constant ventilation. In 48 hours, dense clusters of blue-gray primordia will sprout, doubling in size every 24 hours.
5. Phase 5: Whole Cluster Harvestday 18 - 21
Pluck the entire bunch in one clean twist just as the edge of the larger caps goes from curled down to horizontal (before they curl upward and send up clouds of white spores).
Expert Grower Tips:
Cold pasteurization with slaked lime (Calcium Hydroxide Ca(OH)₂, never quicklime or carbonate) saves gas/electricity and leaves an alkaline pH that blocks Trichoderma for 2 weeks.
The more blue/white light it receives during fruiting, the darker, meatier and more flavorful the oyster mushroom cap will be.
Always trim off the standing remains from the previous harvest so that they do not rot before the second wave.
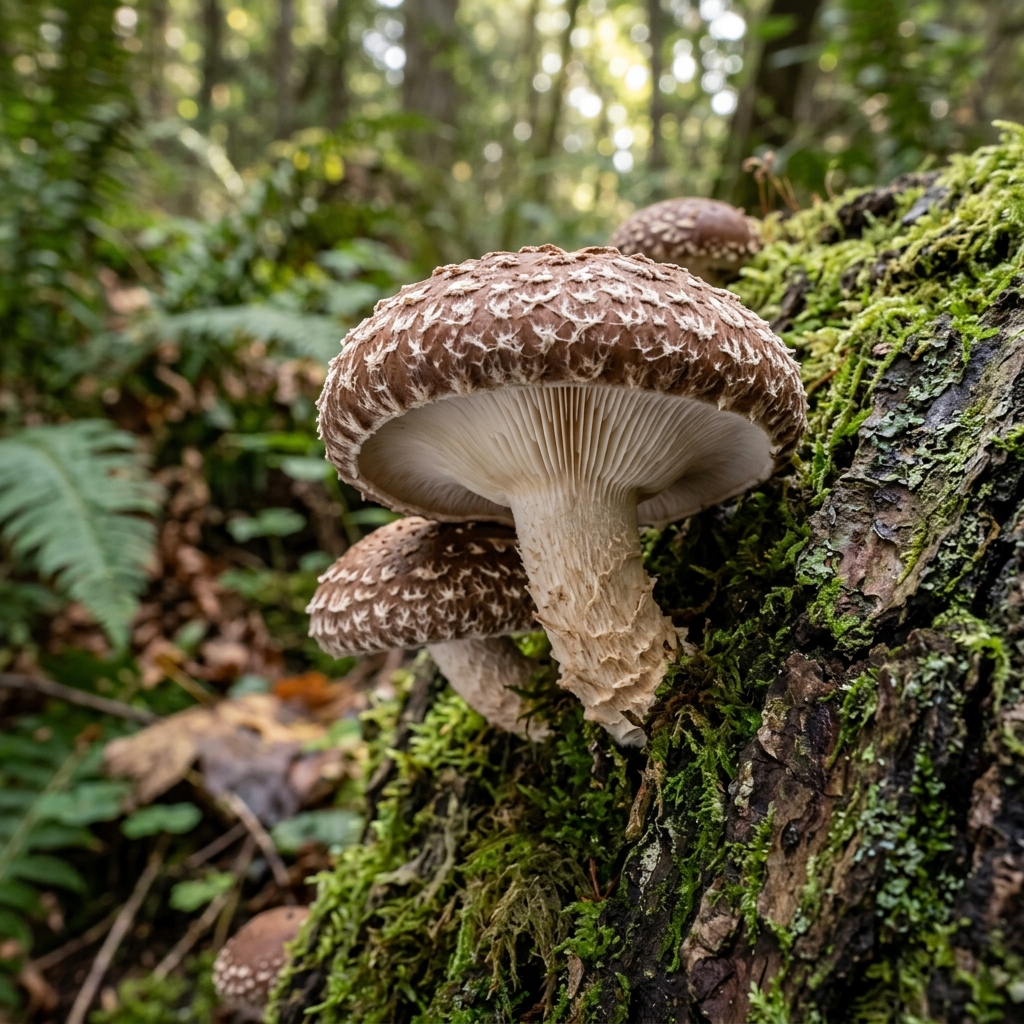
Primary Hardwood Saprophyte (Oak/Chestnut/Beech)Bare blocks after browning phase or inoculated trunks
Shiitake cultivation is a mycological art. Unlike other mushrooms that fruit as soon as the block is white, Shiitake goes through three incubation phases (whitening, nodule formation "popcorning" and brown protective oxidation "browning") before stripping the block completely as if it were an artificial trunk.
layers
Bulk Substrate & Base RecipeOak/beech sawdust supplemented with wheat bran (80/20)80% hardwood sawdust (never coniferous) + 18% wheat or rye bran + 2% agricultural gypsum at 60% humidity.
format_list_numberedView Step-by-Step Guide (5 phases) & Pro Tipsexpand_more
1. Phase 1: White Colonization of the Blockday 1 - 25
Inoculate blocks of oak sawdust supplemented with 10% colonized grain. Incubate at 22-24°C until the entire block is white.
2. Phase 2: Popcorning (Blistering and Texturing)day 25 - 45
The mycelium will begin to form white, popcorn-like lumps and bumps. It is essential not to move or hit the bags at this stage.
3. Phase 3: Browning (Protective Brown Bark)day 45 - 70
With some indirect ambient light inside the incubation room, the block exudes amber liquid and its surface oxidizes turning chocolate brown like tree bark.
4. Phase 4: Total Stripping and Physical/Cold Shockday 70
When 80% of the block is brown and firm to the touch, cut and remove the ENTIRE plastic bag. Pat the block firmly (simulating falling branches in the forest) and bring it to 16-17°C and 90% RH.
5. Phase 5: Fruiting, Harvesting and Frozen Soaking7 - 10 days
In 4 days, dozens of Shiitakes will sprout on all sides of the bare block. Lower the humidity to 78% the last few days to achieve the precious white cracking ("Donko"). After harvesting, let the block dry for 10 days and immerse it for 12 hours in ice water for the 2nd wave.
Expert Grower Tips:
Never remove the plastic while the block is still white: without its protective brown skin ("browning"), it will dehydrate and become covered in green mold within 48 hours.
The drop in humidity from 90% to 75% halfway through cap development causes the brown cuticle to grow more slowly than the white interior flesh, creating the mythical "Hana-Donko" cracked pattern.
Umbelliferous Root Saprophyte / LignocellulosicVertical bags open at the top (Top-Fruiting) or Bottles
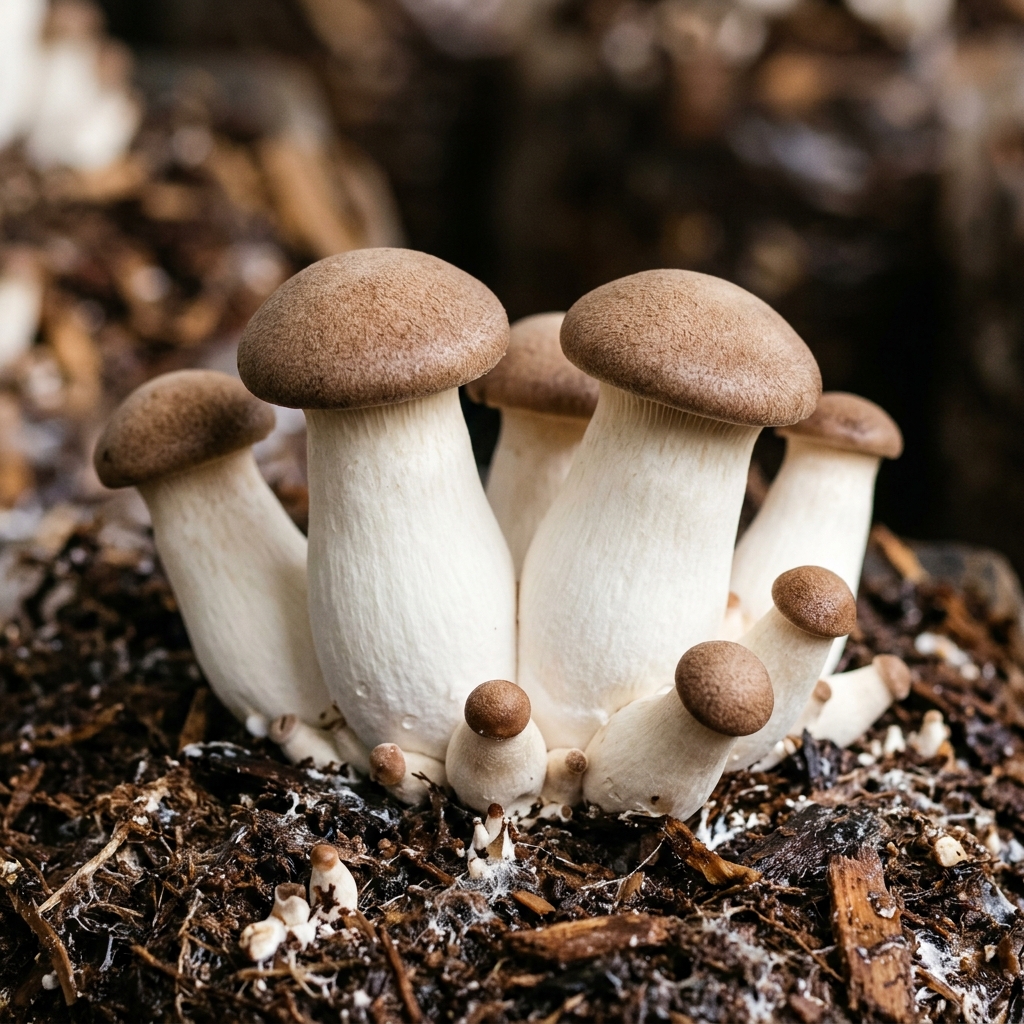
The King Oyster Mushroom is the meatiest and most sought-after mushroom of the Pleurotus genus. Unlike side-cluster oysters, it is grown by opening the top of the bag and maintaining moderately high CO₂ levels to achieve those thick, solid trunks that cut like scallops.
layers
Bulk Substrate & Base RecipeMaster's Mix or Sawdust enriched with 20% wheat bran80% hardwood sawdust + 19% wheat bran or soy flour + 1% gypsum at 62% humidity.
format_list_numberedView Step-by-Step Guide (5 phases) & Pro Tipsexpand_more
1. Phase 1: Grain and Substrate Rich in Nitrogen18 - 24 days
Inoculate blocks of sawdust supplemented at 20% with bran or soy. P. eryngii is a demanding eater: in simple straw it produces small mushrooms, but in supplemented sawdust it produces colossi of 200g per specimen.
2. Phase 2: Post-Colonization Consolidation5 days extra
Once the block is 100% white at 23°C, let it rest for an additional 5 days before opening it so that the mycelium can deeply digest the lignin.
3. Phase 3: Cold Shock and Superior Cut (Top-Fruiting)2 - 4 days
Lower the temperature to 14-16°C. Cut the top of the bag leaving a plastic "chimney neck" about 10cm high above the surface of the substrate to retain moisture and a soft cushion of CO₂.
4. Phase 4: Selection of Primordia (Culling)8 - 10 days
When dozens of small brown-headed buttons appear, you can leave the strongest 4-6 per block and remove the rest so that all the energy in the block fattens giant logs.
5. Phase 5: Firm Texture Cropday 32 - 36
Harvest when the edge of the brown cap begins to flatten and the trunk reaches its maximum firm thickness.
Expert Grower Tips:
The "plastic collar" 10 cm above the block is the secret of Japanese growers to create that 1200 ppm CO₂ microclimate that fattens the foot like a ticket.
Slightly scratching the surface layer of the block with a disinfected fork before inducing fruiting synchronizes the emergence of primordia.
Subtropical Primary Saprophyte (Lignin/Cellulose)Single Cut Filter Bags or Perforated Cubes
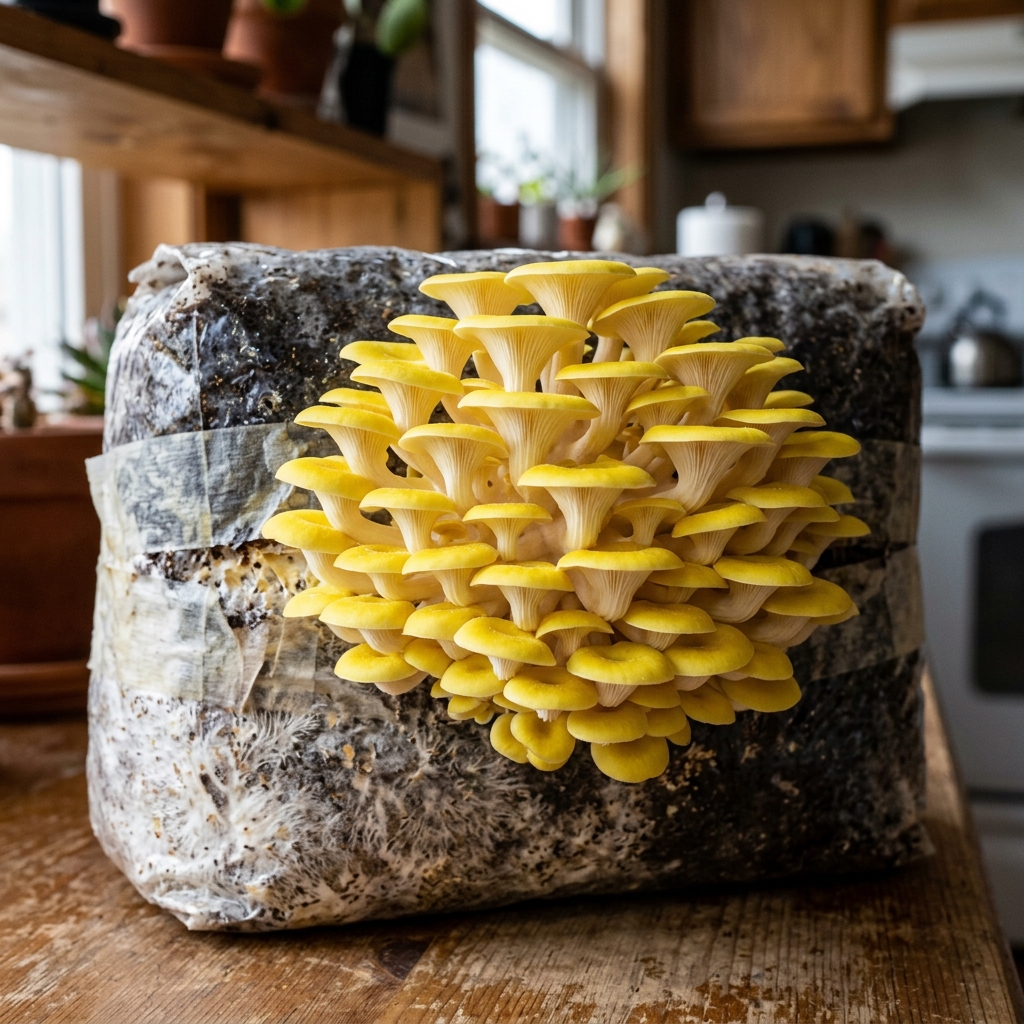
The Golden or Yellow Oyster is a visual and gastronomic jewel that forms bright lemon yellow floral bouquets. It grows optimally in warm ranges (20-26°C) and when cooked it develops an exquisite flavor of nuts and cashews.
layers
Bulk Substrate & Base RecipeMaster's Mix or Straw enriched with bran50% hardwood sawdust + 50% soybean hulls at 62% humidity, or pasteurized chopped wheat straw.
format_list_numberedView Step-by-Step Guide (5 phases) & Pro Tipsexpand_more
1. Phase 1: Grain Colonization8 - 12 days
Inoculate LC-sterilized grain at 26°C. Its white mycelium is very vigorous and usually climbs the walls of the glass.
2. Phase 2: Substrate Inoculation10 - 14 days
Sow in blocks of supplemented sawdust or pasteurized straw. Compact the substrate well to promote dense bouquets.
3. Phase 3: Small Cut Openingday 20
Make a single 2 cm "X" cut on each face of the block. Small cuts force the mushroom to concentrate all its energy into a large bouquet.
4. Phase 4: Fruiting with Intense Light4 - 6 days
Maintain between 20-25°C with good lighting (12h/day) to achieve an intense golden yellow and high humidity (90%).
5. Phase 5: Delicate Harvestday 25
Cut the base of the bouquet before the cups become infundibuliform (funnel-shaped), since their blades are fragile.
Expert Grower Tips:
It greatly appreciates supplemented substrates (Master's Mix): in pure straw the caps come out thinner and more brittle, while in sawdust with soy they come out fleshy.
Handle the clusters from the white fleshy base because the yellow caps are delicate raw.
Tropical Primary Saprophyte (Lignocellulosic)Bags with side cut or tropical cubes
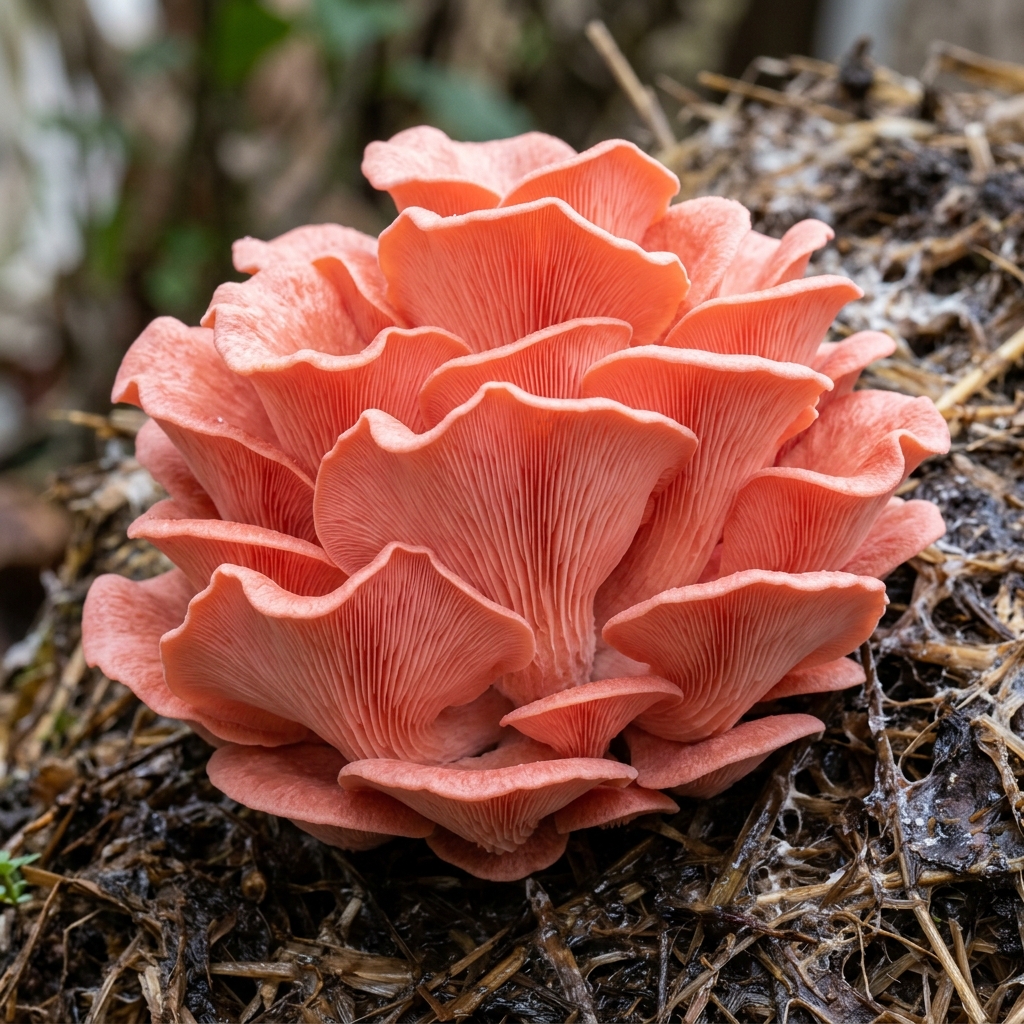
The Pink Oyster (Flamingo Mushroom) is a tropical species with ultra-fast growth and a hypnotic coral pink color. It is capable of fruiting in the middle of summer (up to 30°C) and when it passes through the frying pan over high heat it acquires a crunchy texture and a smoky flavor reminiscent of bacon.
layers
Bulk Substrate & Base RecipeCereal straw or tropical hardwood sawdust70% hydrated wheat straw with 2% calcium carbonate, or hardwood sawdust with 15% bran.
format_list_numberedView Step-by-Step Guide (5 phases) & Pro Tipsexpand_more
1. Phase 1: Tropical Grain Inoculation7 - 10 days
Inoculate grain at 27°C. The mycelium itself turns salmon pink tones as it matures: don't confuse this with lipstick mold contamination!
2. Phase 2: Sowing in Straw or Sawdust8 - 10 days
Transfer the pink grain to the pasteurized substrate. In just a week the block will be completely compact.
3. Phase 3: Lateral Incisionday 16
Make a 3cm vertical slit in the side of the bag as soon as neon pink nodules appear.
4. Phase 4: Ultrarapid Tropical Development3 - 5 days
Keep at 23-28°C with high humidity (90%) and good lighting to enhance the deep pink carotenoid pigment.
5. Phase 5: Harvest and Immediate Consumptionday 20
Harvest when the stalks are still flexible and bright pink (before they pale). Cook them the same day or the next day.
Expert Grower Tips:
NEVER put Pleurotus djamor mycelium or blocks in the refrigerator (<6°C): being strictly tropical, the cold kills its mycelium in a few days. Keep it at room temperature.
Healthy P. djamor mycelium stains deep pink on agar and grain; It is its natural pigmentation.
Known as Summer Oyster or Phoenix Oyster, it is the perfect alternative to Pleurotus ostreatus when spring or summer temperatures rise above 20°C. It does not need cold thermal shock and fruits extremely quickly with aniseed aromatic notes.
layers
Bulk Substrate & Base RecipePasteurized cereal straw or Master's MixWheat or barley straw at 70% moisture, or a mixture of hardwood sawdust with 15% wheat bran.
sanitizerThermal pasteurization at 70°C (90 min) or alkaline bath with hydrated lime (14 hours).Pasteurization Guideopen_in_new
Incubation22°C - 28°C
Fruiting18°C - 25°C
CO₂ Limit< 1000 ppm
format_list_numberedView Step-by-Step Guide (5 phases) & Pro Tipsexpand_more
1. Phase 1: Straw or Block Preparationday 1
Pasteurize chopped straw in hot water (70°C) or hydrated lime bath and drain to optimal field capacity.
2. Phase 2: 10% inoculationday 2
Mix with grain colonized with P. pulmonarius in tubular bags or 12L perforated buckets.
3. Phase 3: Warm Colonization9 - 12 days
Incubate at 24-26°C. Its mycelium is very fast and gives off a light and pleasant sweet-anise aroma.
4. Phase 4: Fruiting Without Cold Shock4 - 6 days
Go directly to fruiting conditions (18-24°C, 85-90% RH and plenty of fresh air). It matures much faster than the winter oyster.
5. Phase 5: Early Harvestday 15 - 18
Harvest when the edges are still slightly curved downward; If you wait for them to flatten completely, the meat loses firmness.
Expert Grower Tips:
It is the ideal species to grow at home from May to September without spending on air conditioning.
Check the clusters twice a day during fruiting: with heat it can go from bud to overripe in just 36 hours.
Secondary Saprophyte (Fermented Compost)Deep Trays or Boxes with Mandatory Peat Casing
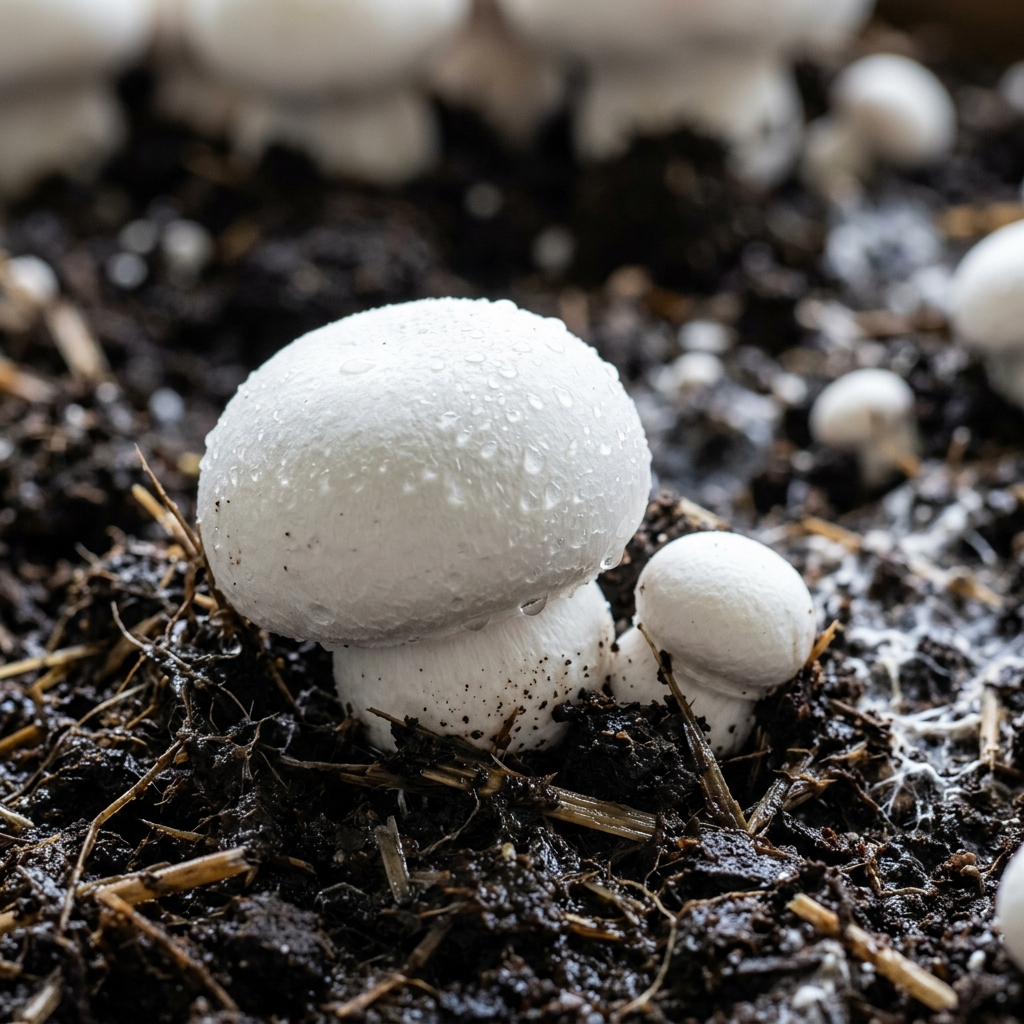
The White Paris Mushroom is a secondary decomposer: unlike wood or fresh straw mushrooms, it requires a substrate previously fermented by bacteria and thermophilic fungi (Phase II Compost) and a covering layer (casing) of alkaline peat whose microbiota triggers the formation of buttons.
layers
Bulk Substrate & Base RecipeCompost Phase II of wheat straw and equine/poultry manureMatured aerobic compost (C:N ratio 17:1) with straw, composted manure, 5% calcium sulfate (gypsum) and 68% humidity.
sanitizerControlled pasteurization in Phase II at 58-60°C (6h) and conditioning at 48°C until all traces of free ammonia (<5 ppm) are eliminated.Pasteurization Guideopen_in_new
Incubation23°C - 25°C
Fruiting15°C - 18°C
CO₂ Limit< 1200 ppm
format_list_numberedView Step-by-Step Guide (5 phases) & Pro Tipsexpand_more
1. Phase 1: Compost ConditioningPrevio
Use Phase II compost free of ammonia odor (it should smell like sweet forest soil and have 68% humidity). Never autoclave compost or you will kill the beneficial bacteria that feed Agaricus.
2. Phase 2: Sowing and Colonization of Compost14 - 16 days
Mix 5-8% of colonized grain in a tray or monotub with 15-20 cm depth of compost. Incubate at 24°C until the bluish-white mycelium invades the entire block.
3. Phase 3: Application of Casing and Scratching (Ruffling)10 - 12 days
Spread 4 cm of moist peat buffered with calcium carbonate (pH 7.6) without weighing it down. After 7 days, when the mycelium appears through the valleys, gently stir the surface ("ruffling") to even out the emergence.
4. Phase 4: Air Sweep and Cold Shock4 - 6 days
Sharply lower the air temperature to 16-17°C and ventilate to lower the CO₂ from >3000 ppm to <900 ppm. The mycelial cords will condense into hundreds of round buttons.
5. Phase 5: Harvest with Closed Veilday 32 - 36
To obtain the authentic Paris White Mushroom, harvest by turning each bud when it measures 3-5 cm with the lower veil completely closed and taut.
Expert Grower Tips:
Agaricus bisporus does NOT fruit on coconut fiber or sterile sawdust: it needs humic acids and the Pseudomonas putida bacteria present in non-sterile peat to form primordia.
Maintain fine waterings on the peat during casing invasion, but discontinue them as soon as the buds are the size of a pea to avoid staining the white caps.
Secondary Saprophyte (Fermented Compost)Deep Trays or Grow Boxes with Peat Casing
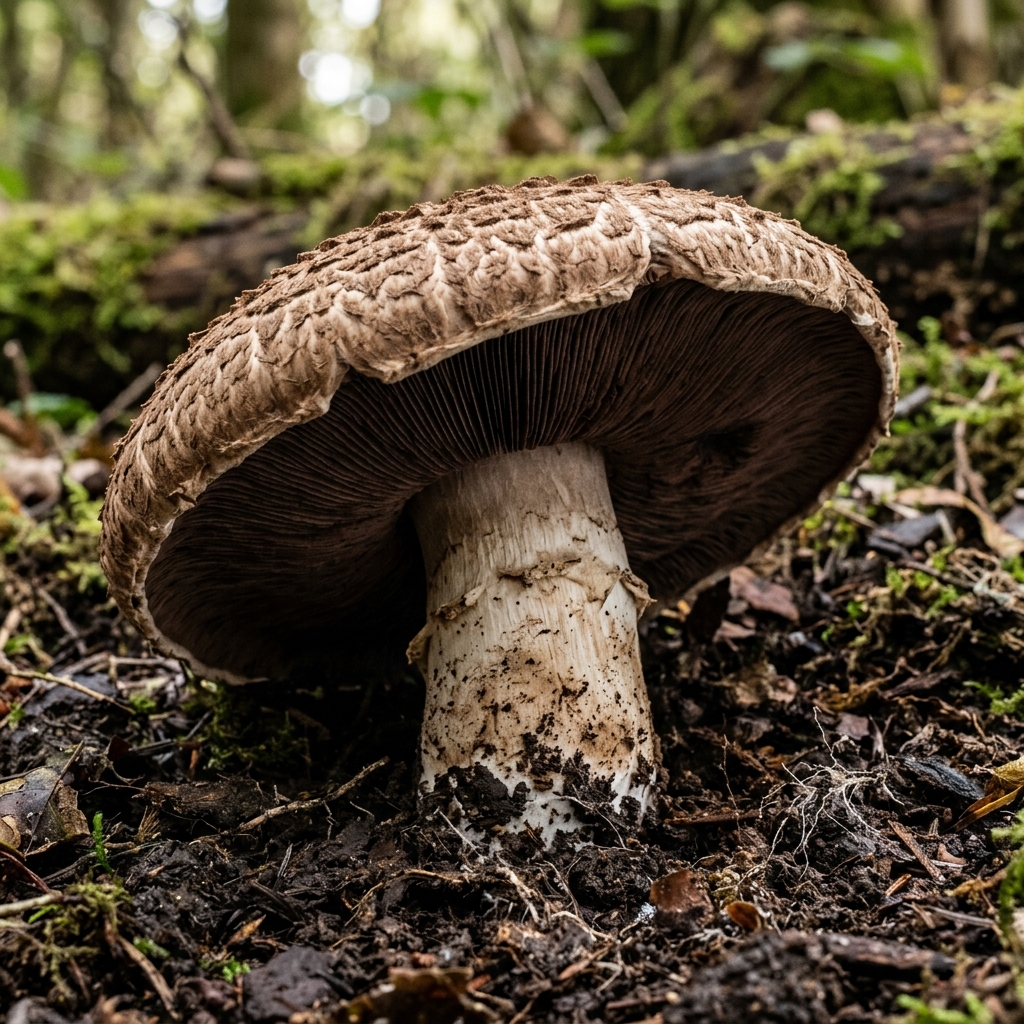
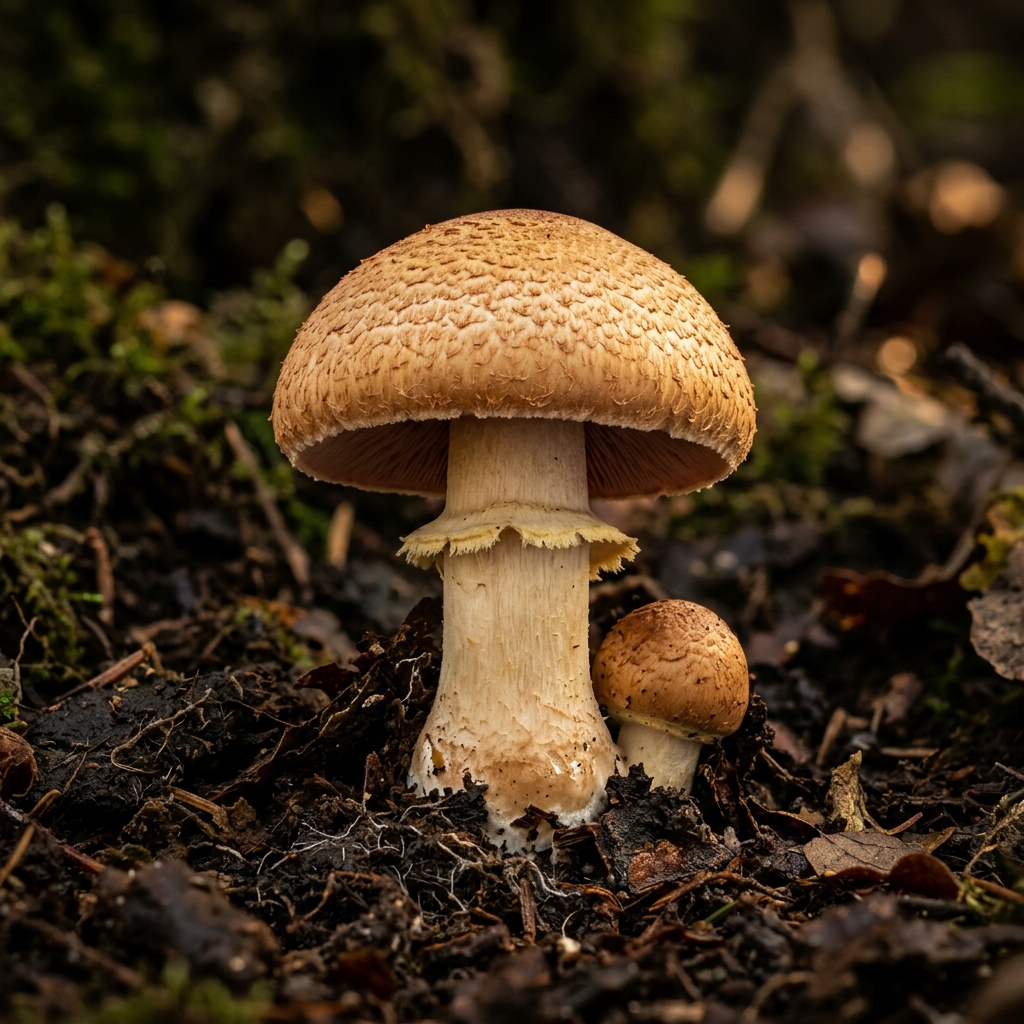
Portobello (and its young phase Cremini) is the ancestral chestnut variety of Agaricus bisporus. Unlike the commercial white mushroom that is harvested closed, the Portobello is left to mature and expand in a tray with a lower density of buttons to achieve giant flat caps of up to 15 cm with a meaty texture.
layers
Bulk Substrate & Base RecipePasteurized horse manure and straw compostStraw-bedded horse manure fermented in aerobic compost with agricultural gypsum (Compost Phase II).
format_list_numberedView Step-by-Step Guide (5 phases) & Pro Tipsexpand_more
1. Phase 1: Compost Colonization Phase II14 - 18 days
Inoculate the mature compost with Heirloom Brown strain grain at 24°C, compacting the substrate well in 20 cm deep trays.
2. Phase 2: Deep Peat Cover (5 cm)10 - 12 days
Apply a thick layer of well-hydrated casing (peat + limestone at pH 7.6). Because Portobellos are huge and take more days to mature, they draw most of their water from this peat reserve.
3. Phase 3: Induction by Thermal Descent and CO₂5 days
Lower the temperature to 17°C and introduce fresh air (<850 ppm CO₂) to set the brown buds.
4. Phase 4: Thinning for Portobello Caliberday 30 - 35
Harvest some young buttons (such as Cremini mushroom) to leave physical space between the remaining specimens so that they can open 10-15 cm caps without colliding.
5. Phase 5: Full Expansion and Harvestday 36 - 40
Allow the veil to break and the hat to flatten, showing its dark chocolate-colored blades. Harvest before the edges curl up.
Expert Grower Tips:
Harvesting 40% of the buttons in the Cremini phase (small and closed) allows the remaining 60% to become authentic giant restaurant Portobellos.
By lowering the humidity from 90% to 80% in the last 3 days, the hat takes on that slightly flaky texture and a much more concentrated umami flavor.
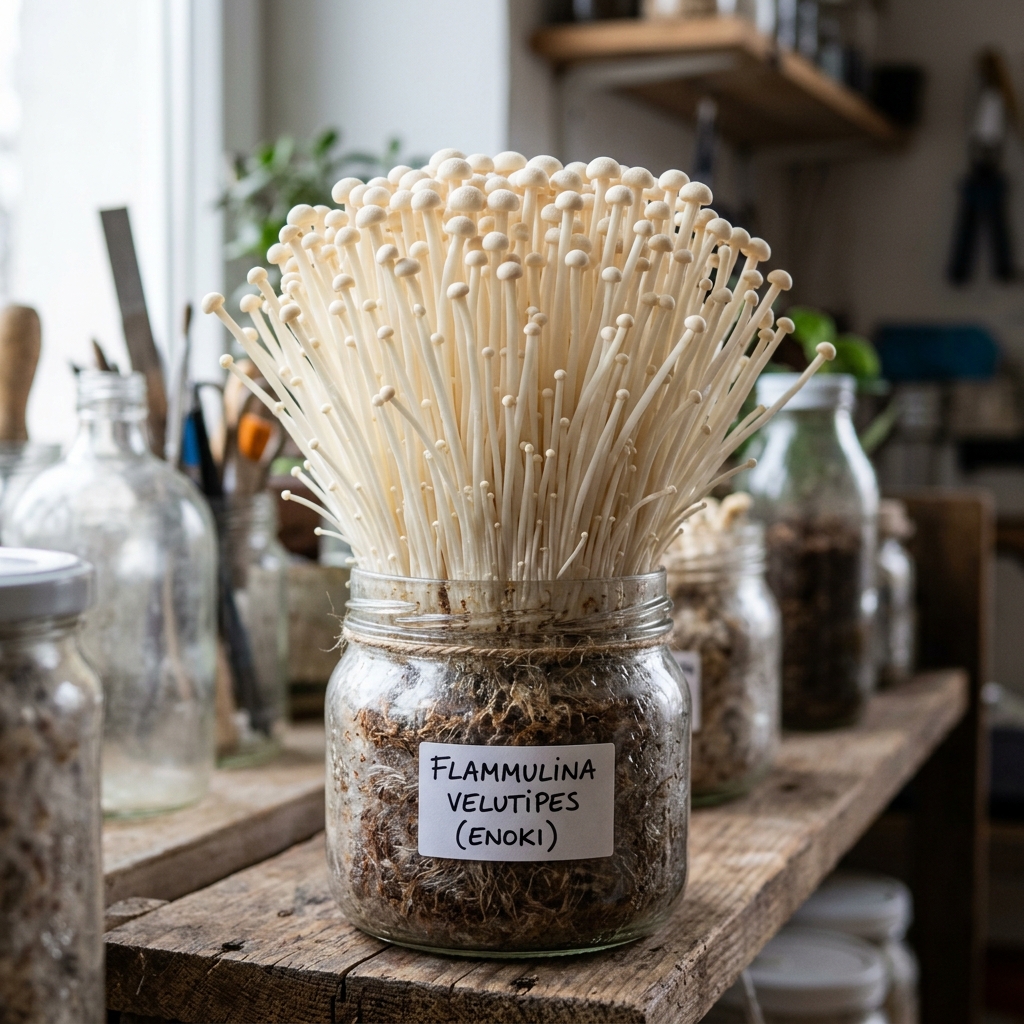
The Enoki keeps the greatest morphological secret of mycology: in the forest it is an orange-brown mushroom with a short, velvety foot, but when grown in extreme cold (10°C), darkness and with a collar that traps CO₂ (>2500 ppm), it is transformed into those long crispy white noodles of Japanese cuisine.
layers
Bulk Substrate & Base RecipeFine hardwood sawdust supplemented with rice bran (75/25)75% fine hardwood sawdust + 23% rice or wheat bran + 2% calcium carbonate at 62% humidity.
format_list_numberedView Step-by-Step Guide (5 phases) & Pro Tipsexpand_more
1. Phase 1: Filling and Sterilization of Jarsday 1
Fill wide-mouth glass jars (750 ml - 1L) with the supplemented sawdust up to 2 cm from the edge, make a central hole with a rod to the bottom for aeration and sterilize at 15 PSI.
2. Phase 2: Colonization at Temperate Temperatures20 - 25 days
Inoculate with LC or colonized grain and maintain at 22°C until the entire jar is colonized.
3. Phase 3: Kaki-Kinzoku (Scratch) and Frozen Shock5 - 7 days
Uncover the jar, scrape off the top 3 mm of old mycelium and place it in a cold room or bottom floor of a modified refrigerator at 8-12°C and 90% humidity.
4. Phase 4: Placement of the CO₂ Collar8 - 12 days
When the white stems reach 2 cm above the rim of the jar, wrap the mouth of the jar with a 12 cm high cone or cylinder of wax paper or acetate. The darkness and the CO₂ retained inside the tube will stretch them straight and white.
5. Phase 5: Collar Removal and Harvestday 40 - 45
Remove the collar when the bouquet reaches 12-15 cm and tear off the entire block from the base.
Expert Grower Tips:
You can choose which mushroom to harvest with the same genetics: in darkness + cold (9°C) + collar you will get white ramen Enoki; With light + 15°C + fresh air you will obtain the wild golden velvet mushroom, much more fleshy and aromatic.
It is perfect for growing in garages or unheated basements in the middle of winter.
Temperate Lignicultural Saprophyte (Poplar / Poplar / Willow)Bags open at the top (Top-Fruiting), Bottles or Poplar Logs
The Poplar Mushroom (Pioppino) is a Mediterranean classic with a velvety brown cap, crisp white stem and a heady aroma of rancid wine and toasted hazelnut. It is very appreciated both in bags of sawdust indoors and inoculated with dowels on poplar or willow stumps in the garden.
layers
Bulk Substrate & Base RecipePoplar / poplar / beech sawdust enriched with bran (80/20)80% deciduous wood sawdust + 18% wheat bran + 2% gypsum at a humidity of 62%.
format_list_numberedView Step-by-Step Guide (5 phases) & Pro Tipsexpand_more
1. Phase 1: Grain Colonization10 - 14 days
Inoculates brown rice, rye or wheat grain at 24°C. The mycelium is dense, creamy white and over time takes on light ocher tones.
2. Phase 2: Sawdust Block Incubation18 - 24 days
Sow in bags of hardwood sawdust with 20% bran. Wait until the block is completely compacted.
3. Phase 3: Superficial Scratching and Inductionday 25
Open the top of the bag, lightly scrape off the top millimeter of old mycelium, and spray with clean water to hydrate.
4. Phase 4: Bouquet Emergency8 - 10 days
At 17-19°C and 90% humidity, compact bouquets with dozens of small dark brown heads will emerge.
5. Phase 5: Harvest before Sporulatingday 34 - 36
Cut the bouquet at the base when the caps turn from dark brown to hazelnut ocher and the lower veil begins to peel away (before they release their abundant tobacco-colored spores).
Expert Grower Tips:
If you have a stump or freshly cut logs of poplar, poplar or willow, drill holes every 15 cm, insert Cyclocybe aegerita plugs and seal them with wax: you will have poplar mushrooms every spring and autumn for 4 years.
In cooking, the white feet of young specimens are tender and sweet; don't discard them.
Viscous Lignicolous Saprophyte (Beech/Oak Wood)Open Top Bags (Top-Fruiting) or Wide Mouth Jars
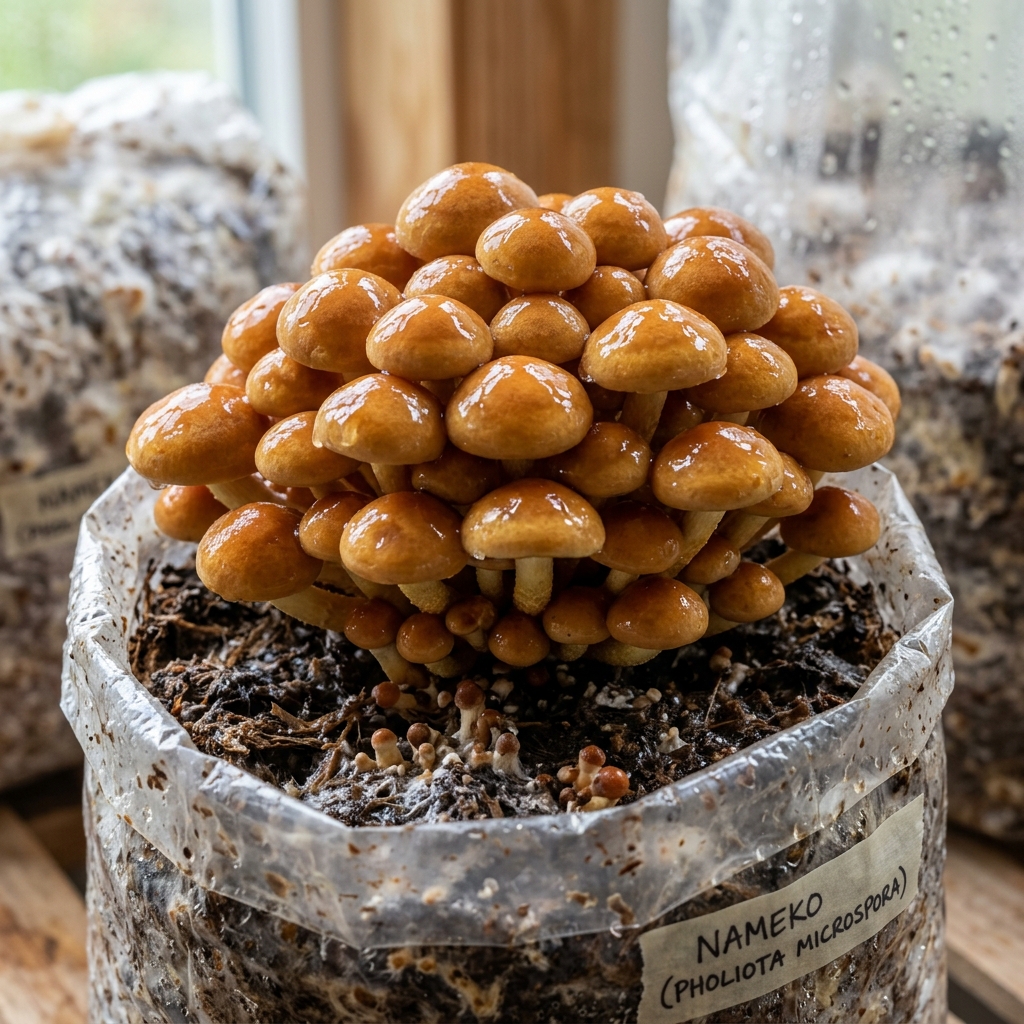
Nameko (Pholiota microspora) is one of Japan's most beloved mushrooms, famous for its bright amber-orange cap covered in a silky natural mucilage (soluble polysaccharides) that thickens miso soups and risottos in an extraordinary way.
layers
Bulk Substrate & Base RecipeHardwood sawdust supplemented with bran (80/20)80% beech or oak sawdust + 18% wheat or rice bran + 2% gypsum at 64% humidity (appreciates slightly more humid substrates).
format_list_numberedView Step-by-Step Guide (5 phases) & Pro Tipsexpand_more
1. Phase 1: Colonization and Maturation of the Block25 - 35 days
Inoculate bags of supplemented sawdust at 64% humidity and maintain at 22°C. After covering 100%, let it mature for an extra 10 days until the surface forms orange-brown spots.
2. Phase 2: Superior Opening and Hydrationday 35
Cut the top of the bag 5 cm above the substrate and spray clean water forming a thin wet film on the crown.
3. Phase 3: Cool Induction (12-16°C)7 - 10 days
Take it to a cool fruiting chamber (14°C) with very high humidity (92-95%). Tight bouquets of bright caramel-colored pearls will emerge.
4. Phase 4: Amber Mucilage Development4 - 6 days
Maintain a constant fine mist; Unlike other mushrooms, Nameko loves to have shiny, wet caps.
5. Phase 5: Harvest with Partial Veilday 48 - 50
Cut the bouquets with scissors when most of the hats are still hemispherical and the lower white veil is beginning to open.
Expert Grower Tips:
Unlike the Lion's Mane or the Champignon, the Nameko enjoys the direct spray of fine water on its caps during fruiting: this activates the production of its natural gastronomic gelatin.
Do not wash Namekos under the tap before cooking or you will lose their umami polysaccharide coating.
Saprophyte of Nitrogenous Grasslands / CompostDeep boxes or tall bags with mandatory Casing
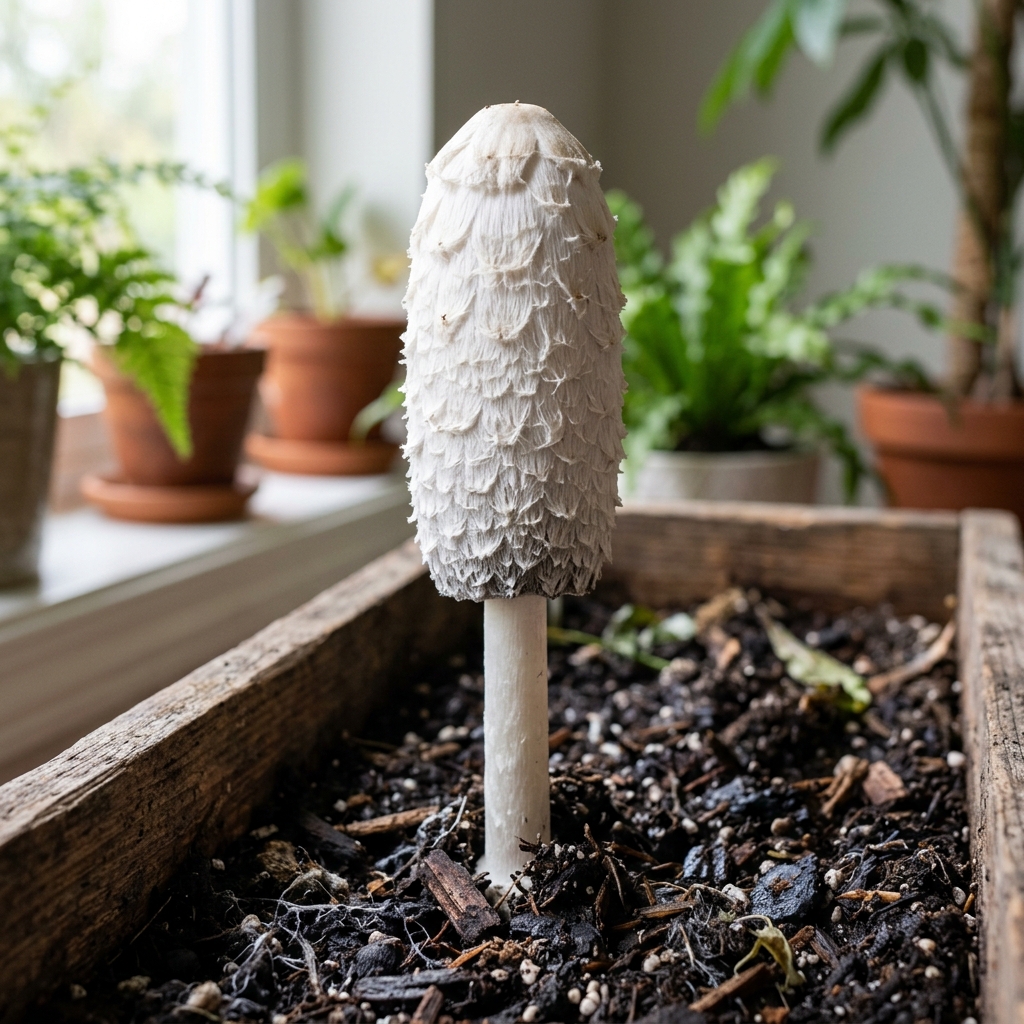
Barbuda or Matacandil (Shaggy Mane) is an ephemeral gastronomic delight that is difficult to find in stores because it self-digests into black ink (deliquescence) a few hours after being harvested. Growing it at home is the only way to enjoy its melting texture freshly cut.
layers
Bulk Substrate & Base RecipeManure-composted straw or supplemented straw70% chopped wheat straw + 25% compost or mature equine manure + 5% agricultural gypsum at 68% humidity.
format_list_numberedView Step-by-Step Guide (5 phases) & Pro Tipsexpand_more
1. Phase 1: Rich Substrate Preparationday 1
Pasteurize the mixture of chopped straw and compost or mature manure at 68°C for 2 hours and allow to cool to 25°C.
2. Phase 2: Vegetative Colonization14 - 18 days
Inoculate 10% with colonized grain in deep containers. The cottony white mycelium is very vigorous.
3. Phase 3: Land/Peat Cover (Casing)8 - 10 days
Cover with 3-4 cm of moist casing (peat + vermiculite + limestone). Coprinus comatus needs to feel the physical weight and flora of the soil to trigger fruiting.
4. Phase 4: Emergence of Scaly Cylinders4 - 6 days
Lower the temperature to 16-18°C with good ventilation. White cylinders covered with woolly scales will sprout.
5. Phase 5: Immediate Harvest in White Phaseday 28 - 32
Harvest when the cylinder is firm and the inner sheets are 100% white or slightly pink. Cook them within the next 3 hours.
Expert Grower Tips:
Conservation trick: as soon as you start a Coprinus comatus, unscrew and separate the stem from the hat immediately; That interrupts the hormonal signal that triggers the conversion to black ink and gives you several extra hours of margin.
You can also bury colonized blocks in the garden under 4 cm of moist soil in spring or autumn.
Primary Soil and Chip Saprophyte (Garden/Permaculture)Outdoor garden beds, associated gardens or shaded flower pots
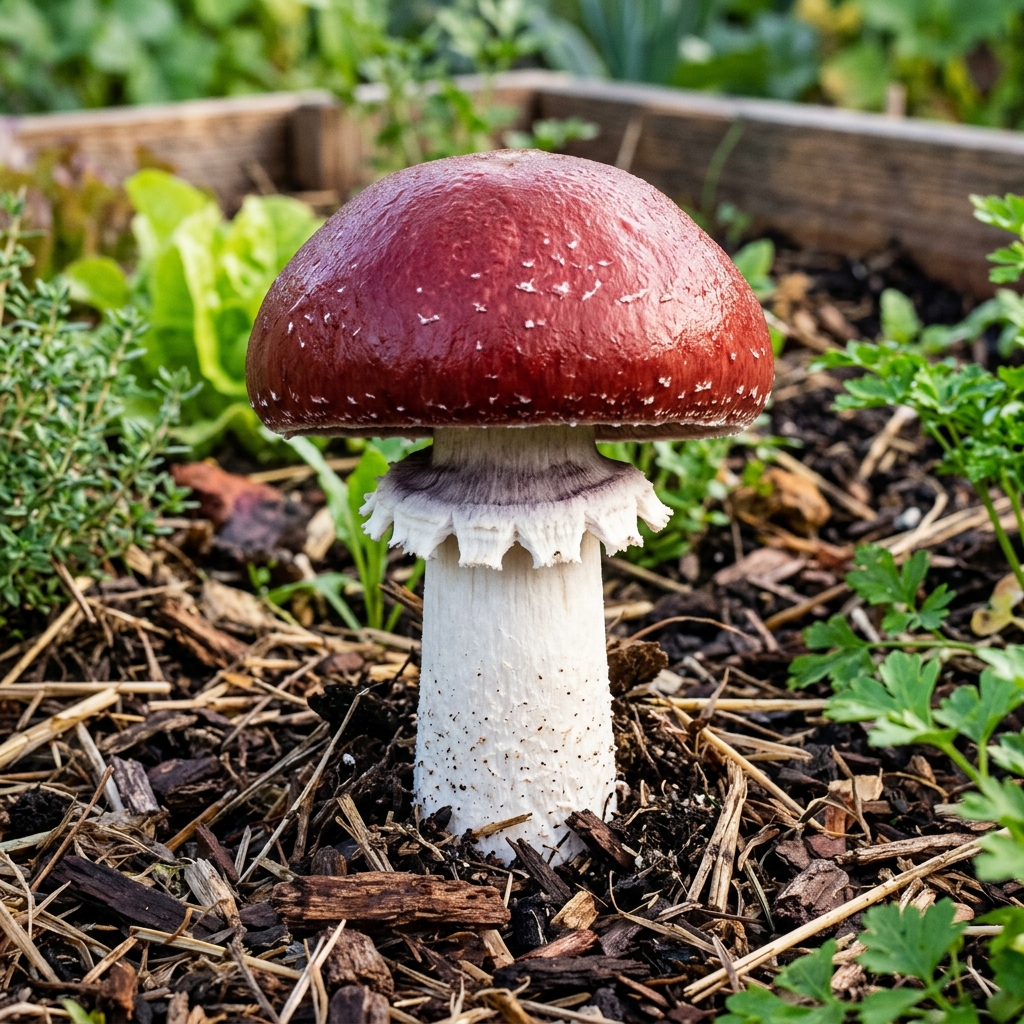
Stropharia Real (Wine Cap or Garden Giant) is the absolute queen of outdoor cultivation in orchards and gardens. It does not need an autoclave or a sterile laboratory: it is sown directly in beds of wood chips and straw in the shade of your garden plants, improving the soil and giving away giant burgundy mushrooms.
layers
Bulk Substrate & Base RecipeOutdoor Hardwood Chip and Straw Beds70% fresh chips or shavings from deciduous trees (oak, beech, poplar, fruit trees) + 30% cereal straw.
sanitizerDoes not require sterilization or chemical pasteurization. It is hydrated with a hose directly on the outdoor terrace.Pasteurization Guideopen_in_new
Incubation15°C - 26°C
Fruiting12°C - 20°C
CO₂ Limit< 800 ppm
format_list_numberedView Step-by-Step Guide (5 phases) & Pro Tipsexpand_more
1. Phase 1: Choosing the Corner in Semi-ShadowPrimavera u Otoño
Choose an area of the garden or orchard in semi-shade (or between rows of corn/tomatoes). Place a base of uninked brown cardboard directly on top of the soil to discourage weeds and attract worms.
2. Phase 2: Splinter and Spawn Lasagna Assemblyday 1
Place an 8 cm layer of previously soaked hardwood chips, spread the shavings or grain mycelium on top (500g per m²), and cover with another 8 cm layer of chips mixed with straw.
3. Phase 3: Living Land Cover and Irrigationday 1
Cover the bed with 3 cm of fertile garden soil and a thin layer of straw or dry feuilles to conserve moisture. Water abundantly.
4. Phase 4: Expansion of Rhizomorphic Cords4 - 8 weeks
If you lift one sliver a month, you'll see thick white cords like roots ("rhizomorphs") weaving throughout the soil.
5. Phase 5: Harvest of Wine-Colored GiantsPrimavera y Otoño
After the fresh rains, massive mushrooms with a red wine-colored cap and a cogwheel ring will emerge. Cut when the cap is still convex and the blades are grey-whitish (before turning black).
Expert Grower Tips:
Association in permaculture: plant zucchini, tomatoes or corn in the same bed; Stropharia breaks down wood, releasing nitrogen and phosphorus directly to the roots of your vegetables.
When you harvest, cut off the earthy base of the stem with its white threads and bury it in a pot or new corner with chips: it will clone the bed for free.
Medicinal Lignicolous Polypore (Hardwood)Closed Bags (for Antlers) or Open Bags (for Fans/Conks)
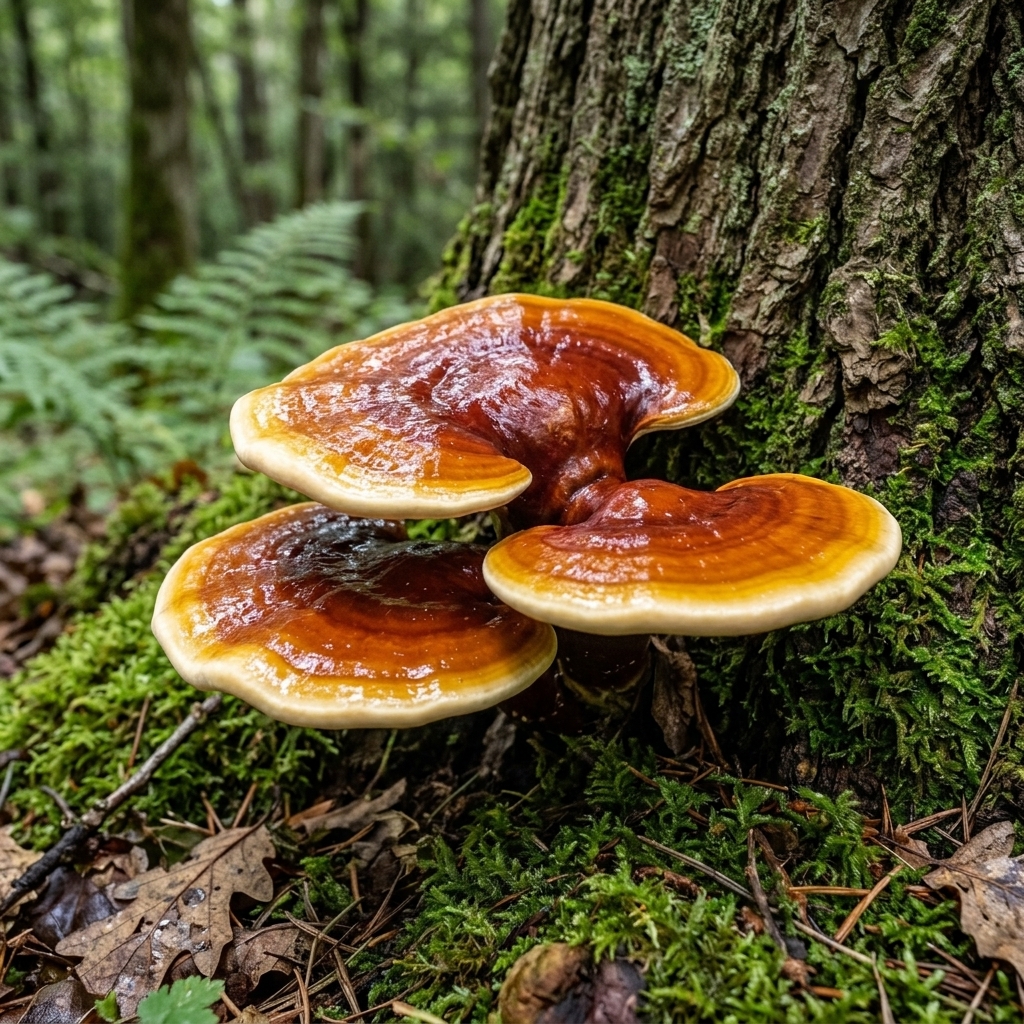
Reishi (Ganoderma lucidum), revered as the "Mushroom of Immortality", allows the grower to sculpt his physical form by controlling CO₂: if you keep the bag closed with high CO₂ (>2500 ppm) it will grow upwards forming "Deer Antlers" (Antler Reishi) rich in triterpenes; If you open the bag to fresh air (<1000 ppm), those tips will open into classic red lacquered fans.
layers
Bulk Substrate & Base RecipeHardwood sawdust supplemented with bran (80/20) or Oak logs80% oak/holm/beech pellets + 18% wheat bran + 2% agricultural gypsum at 62% humidity.
format_list_numberedView Step-by-Step Guide (5 phases) & Pro Tipsexpand_more
1. Phase 1: Voracious Block Colonization18 - 24 days
Inoculate bags of supplemented oak sawdust and keep at 25-27°C. The Ganoderma mycelium is very fast, forms a hard white crust and resists competitors very well.
2. Phase 2: Antler Growth inside the Bag (High CO₂)20 - 30 days
WITHOUT opening the bag, put it under light (12h/day) at 25°C. The combination of light and high CO₂ accumulated inside the bag will cause vertical cylinders with a lacquered mahogany red base and active white tip ("Antlers") to emerge.
3. Phase 3: Morphological Decision: Antlers or Fans?day 45
If you want Antler Reishi (maximum concentration of ganoderic acids), let them grow closed for 3 more weeks. If you want classic fans ("Conks"), cut the top of the bag and place them in a humid chamber (88% RH) with fresh air (<1000 ppm CO₂).
4. Phase 4: Lacquered Hat Expansion25 - 35 days
Upon receiving oxygen, the white tips widen horizontally, forming bright yellow and red concentric rings with white pores beneath.
5. Phase 5: Margin Ripening and Drying for Double Extractionday 75 - 90
You will know the Reishi has finished growing when the white outer edge disappears and the entire cap is mahogany red and releasing brown dust (spores). Cut with a serrated knife, laminate fresh before it hardens like wood and dehydrate at 50°C.
Expert Grower Tips:
Cut the Reishi into thin slices the same day you harvest it: once dry it becomes literally as hard as oak wood and you will need a saw to cut it into pieces.
The cocoa brown dust that covers the caps at the end of the cycle is not dirt or mold: it is Reishi spores, the most triterpene-rich part of the entire mushroom.
Domesticated Entomopathogenic Ascomycete in Nutritious Rice500 ml glass jars with lid with 0.22 µm microporous filter
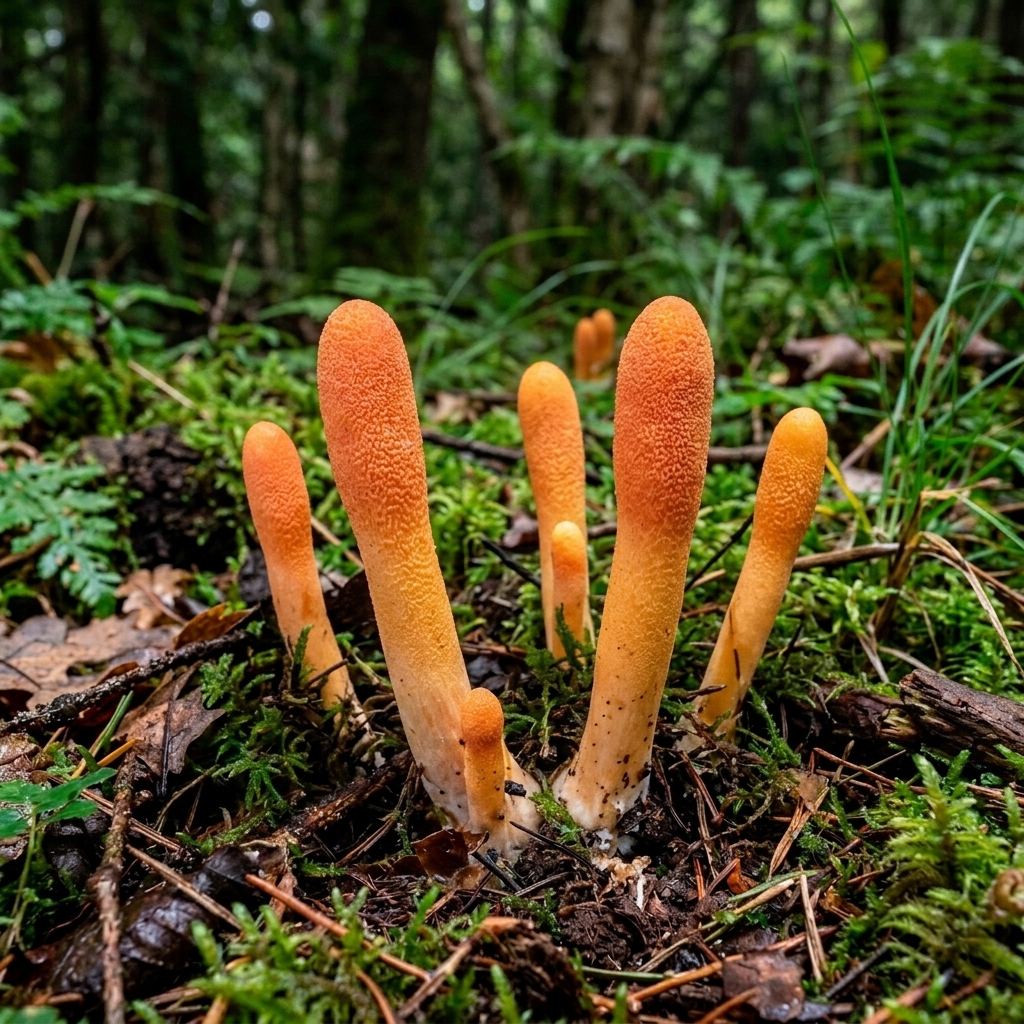
Cordyceps militaris is a gem of fungal biotechnology: while Ophiocordyceps sinensis requires parasitizing live caterpillars in Tibet at 4,000 meters, C. militaris is grown 100% vegan in glass jars with brown rice and a nutritious broth, producing neon orange stromas with cordycepin and adenosine levels higher than the wild fungus.
layers
Bulk Substrate & Base RecipeBrown rice supplemented with nutritious broth in glass jarsFor each 500 ml jar: 35g of brown rice + 55 ml of nutrient broth (per liter of distilled water: 15g glucose or malt extract, 10g vegetable/soy peptone, 5g yeast extract, 1g magnesium sulphate, 1g monopotassium phosphate).
sanitizerAutoclave sterilization at 15 PSI (121°C) for 35-40 minutes (do not exceed so as not to caramelize the sugars or weigh the rice).Pasteurization Guideopen_in_new
Incubation19°C - 21°C (Oscuridad total)
Fruiting16°C - 19°C (Ciclo de luz LED)
CO₂ Limit< 1200 ppm
format_list_numberedView Step-by-Step Guide (5 phases) & Pro Tipsexpand_more
1. Phase 1: Preparation and Autoclave of the Jarsday 1
You weigh exactly 35g of brown rice and 55ml of nutritious broth into each wide 500ml jar. Closes with lids provided with injection port and 0.22 µm filter. Sterilize for 35 minutes at 15 PSI and let cool without stirring the rice.
2. Phase 2: Generous Liquid Inoculationday 2
In laminar flow or SAB, inject 6 to 8 ml of young Cordyceps militaris Liquid Culture, distributing the liquid in a spiral over the entire surface of the rice so that colonization is instantaneous and uniform.
3. Phase 3: Incubation in Absolute Darkness7 - 10 days
Store the jars in total darkness at 20°C. In a week a cottony white carpet will cover all the rice.
Lower the temperature to 17-18°C and turn on LED lights (cold/blue or white spectrum 6500K, 500-1000 lux) on a 14h light / 10h dark cycle. In 48 hours the white mycelium will turn intense coral orange and dozens of tips will sprout.
5. Phase 5: Stroma Elongation and Harvestday 20 - 60
Over the next 5 weeks the orange fingers will grow until they touch the lid of the jar. When the tips grow club-shaped and have fine points (peritecia), open the jar and pluck the Cordyceps forest with clean tweezers.
Expert Grower Tips:
Monitor genetic senescence: Cordyceps militaris degenerates very quickly if you make more than 3 consecutive passes from agar to agar (it stops fruiting). Always use F1 mother stocks or clone from sexual spores.
Do not exceed 22°C during fruiting: above 23°C cordycepin synthesis is inhibited and the stromas abort.
The colonized rice block below ("spent substrate") also contains cordycepin and beta-glucans: you can dehydrate it and grind it into powder.
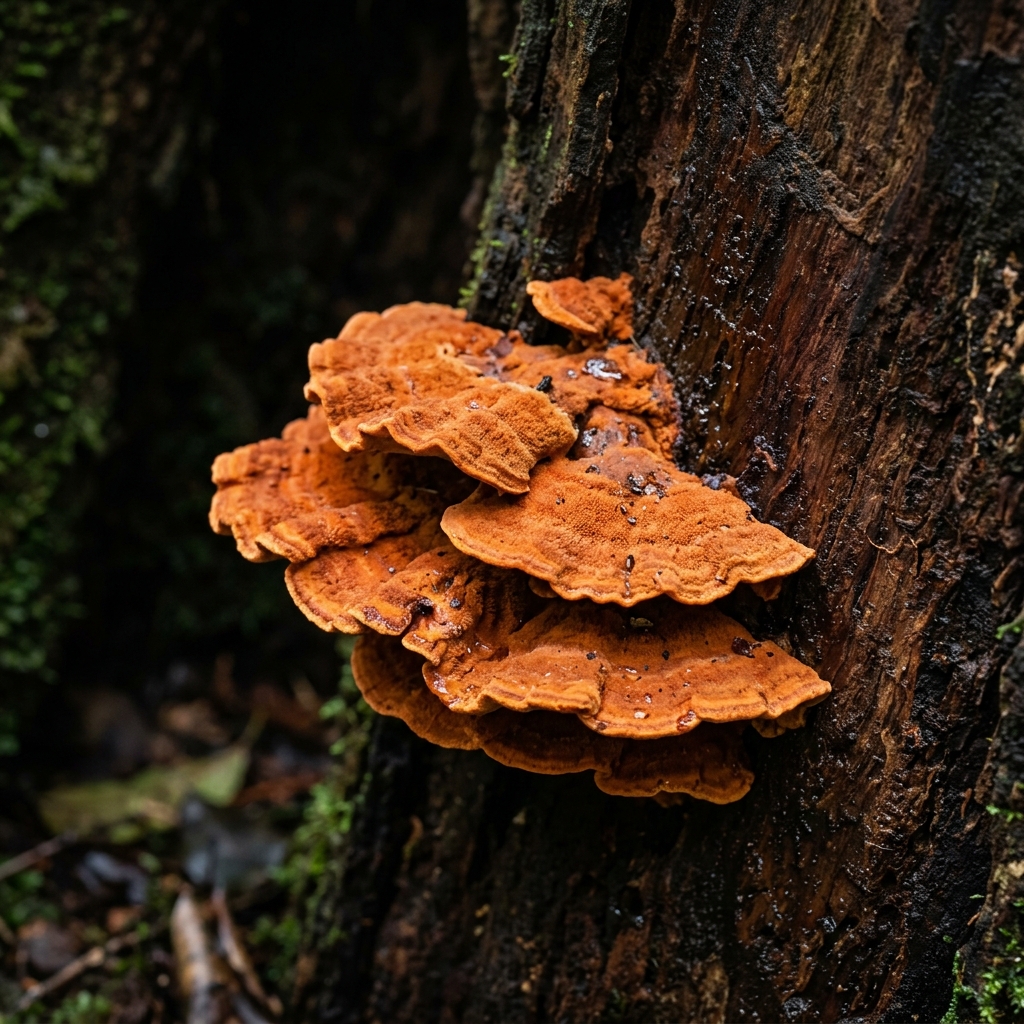
White Rot Lignicolous PolyporeBags with horizontal incisions or Hardwood trunks
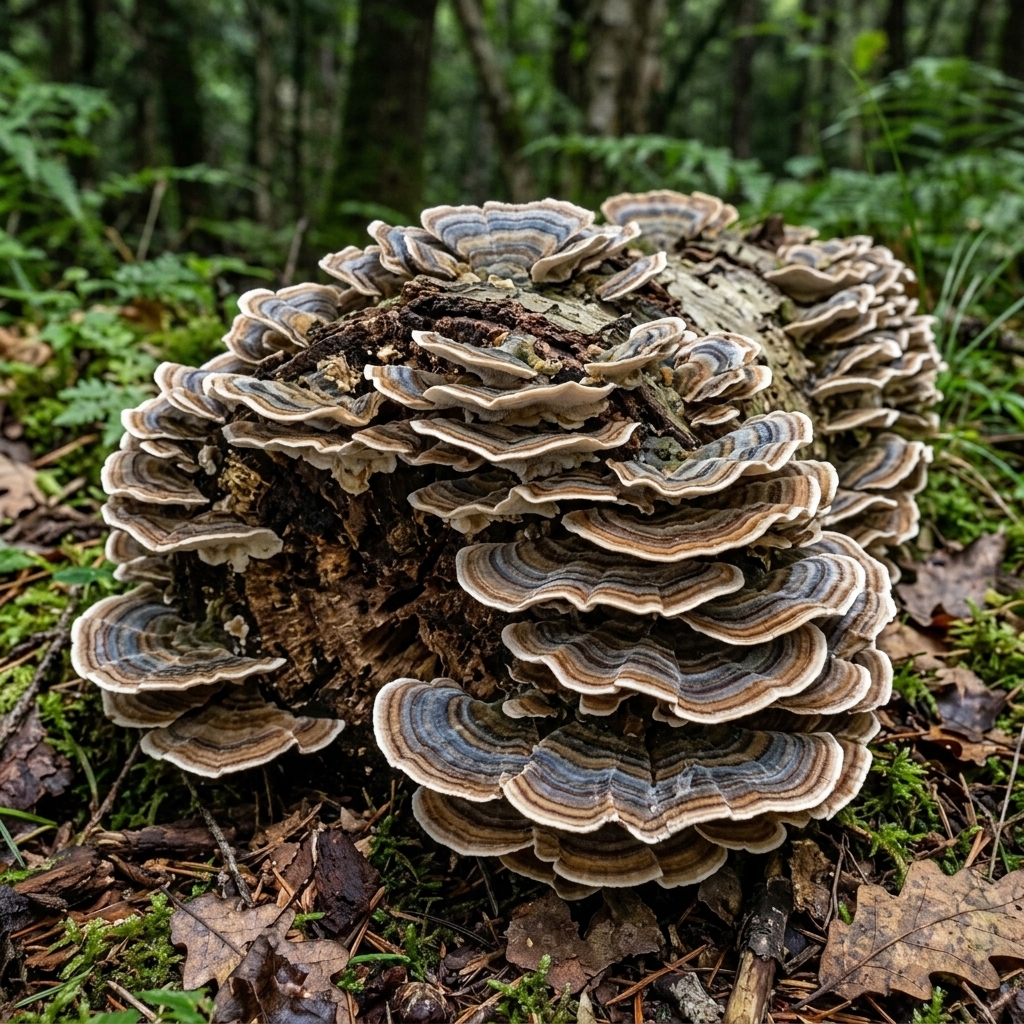
Turkey Tail (Trametes versicolor) is one of the most studied medicinal mushrooms on the planet (source of the immunomodulatory polysaccharides PSK and PSP). Its mycelium is so voracious and resistant that it is very easy to grow in hardwood sawdust, displaying beautiful velvety rosettes with concentric bands of colors.
layers
Bulk Substrate & Base Recipe15% supplemented hardwood sawdust or oak/beech logs85% hardwood sawdust + 14% wheat bran + 1% gypsum at 60% humidity.
format_list_numberedView Step-by-Step Guide (5 phases) & Pro Tipsexpand_more
1. Phase 1: Rapid Colonization in Grain and Sawdust12 - 18 days
Inoculates hardwood sawdust blocks with colonized grain. Trametes versicolor forms a very dense and leathery pure white mycelium.
2. Phase 2: Maturation of Internal Primordials5 days extra
Let the block consolidate for 5 more days until you see small creamy bumps under the plastic.
3. Phase 3: Horizontal Cuts in Smileday 22
Make 3 or 4 4 cm horizontal cuts in the bag and bring it to fruiting conditions (18-22°C, 88% RH and good lighting).
4. Phase 4: Deployment of Concentric Bands15 - 25 days
In good light and gentle humidity fluctuations, the white nodules will fan out showing brown, gray, bluish and cream rings.
5. Phase 5: Harvesting and Drying for Decoctionday 45
Harvest when the white outer edge stops expanding and the underside shows tiny white pores. Dry at 45°C to prepare decoctions or extracts.
Expert Grower Tips:
Light with the blue/UV spectrum and slight fluctuations in humidity between 80% and 90% are responsible for the appearance of its spectacular colored rings; With fixed humidity at 99% and little light they come out almost white.
It is excellent for inoculating old stumps in the garden.
Oak/Chestnut Base Lignicultural PolyporeBags with single top cut or partial burial on the outside
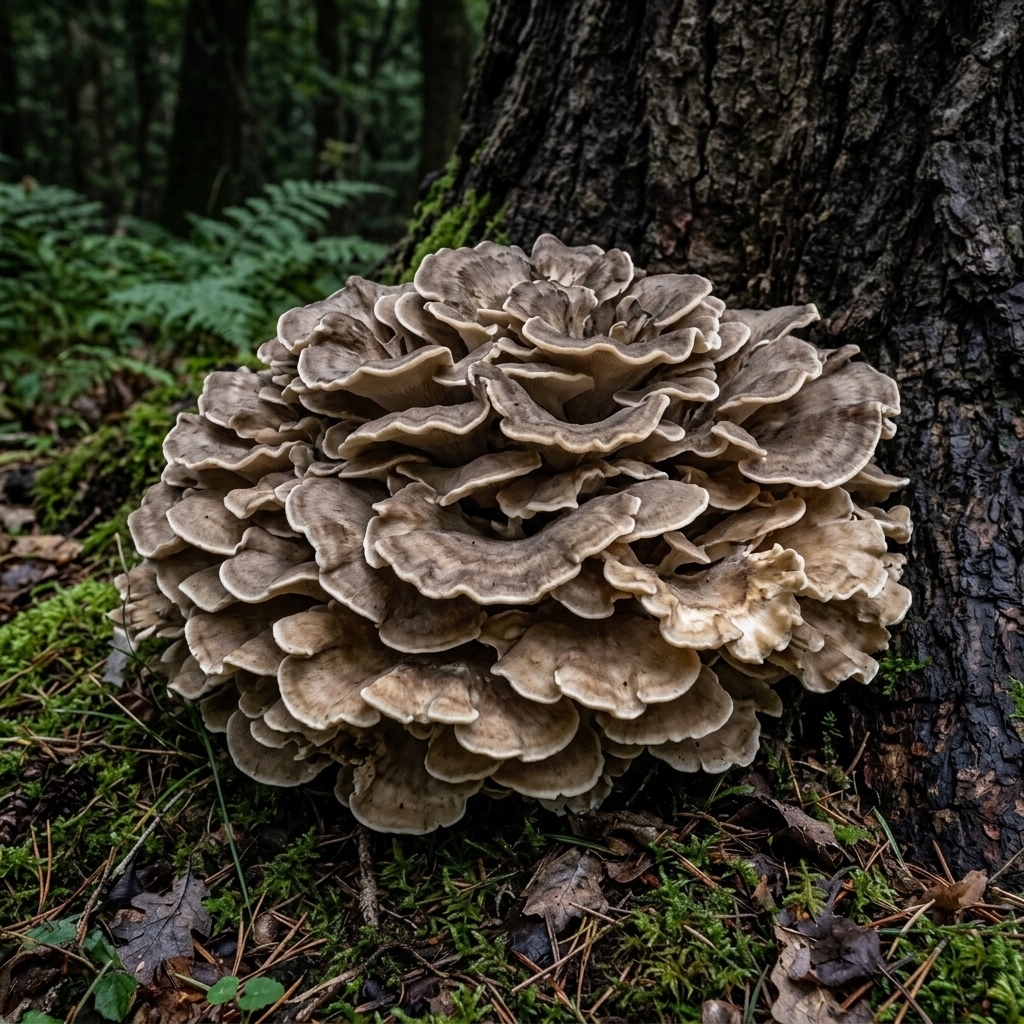
Maitake (Grifola frondosa, "Dancing Mushroom" or "Hen of the Woods") forms majestic curly bouquets of gray-brown caps with an unmatched forest aroma and powerful metabolic and immunological properties (Fraction D). It requires patience in incubation and fine control of oxygen when breaking the primordium.
layers
Bulk Substrate & Base RecipeOak sawdust supplemented with bran and corn flour78% oak or chestnut sawdust + 15% wheat bran + 5% corn flour + 2% agricultural gypsum at 62% humidity (slightly acidic pH 5.5 - 6.0).
format_list_numberedView Step-by-Step Guide (5 phases) & Pro Tipsexpand_more
1. Phase 1: Colonization and Amber Exudate35 - 45 days
Incubate the oak sawdust block at 22°C in the dark. The mycelium will take about 5 weeks to consolidate and will form amber metabolite droplets on top.
2. Phase 2: Formation of the Cerebriform Primordium in the Bag7 - 10 days
DO NOT open the bag yet: lower the temperature to 16°C and give it soft light (12h/day). A large gray-white nodule resembling a cauliflower will form inside the closed bag.
3. Phase 3: Opening in Cross on the Primordiumday 50
Only when the primordium is the size of a golf ball and shows dark gray folds, make a cross cut in the plastic just above it to expose it to fresh air (<750 ppm CO₂).
4. Phase 4: Flowering Petals ("Hen of the Woods")10 - 14 days
With 85% humidity, plenty of light and plenty of ventilation, the nodule will unfold into dozens of wavy graphite-gray petals.
5. Phase 5: Bouquet Harvestday 62 - 65
Cut the basal trunk when the petals are extended and the lower white pores are visible, before it releases white spores.
Expert Grower Tips:
The master secret of Maitake is to let the primordium form INSIDE the closed bag before cutting the plastic; If you open the bag before the primordium exists, the surface dries out and does not bear fruit.
When you put your spent Maitake blocks in the garden at the foot of an oak tree or in a shady pot in autumn, they often give up a huge second bunch.
Thermophilic Secondary Saprophyte (Sun Fungus)Compost Trays or Monotubs with Soil/Peat Casing
Agaricus subrufescens (A. blazei Murill or "Cogumelo do Sol"), originally from Piedade (Brazil), is a first cousin of the mushroom but with a delicious aroma of bitter almond (benzaldehyde), very high concentration of immunomodulatory beta-glucans and preference for warm fruiting temperatures (22-26°C).
layers
Bulk Substrate & Base RecipePasteurized horse manure and straw compostCompost Phase II of wheat/cane straw and composted manure with 4% agricultural gypsum at 68% humidity.
format_list_numberedView Step-by-Step Guide (5 phases) & Pro Tipsexpand_more
1. Phase 1: Sowing in Warm Compost18 - 22 days
Mix 6-8% of colonized grain into Phase II compost. Incubate at 26°C. When you open the incubator you will notice an unmistakable smell of marzipan and almonds.
2. Phase 2: Non-Sterile Casing Application10 - 12 days
Cover with 4 cm of peat and moist calcium carbonate mixture. Keep at 25°C until the white beads reach the surface.
3. Phase 3: Induction by Ventilation and Gentle Oscillation5 - 7 days
Lower the temperature slightly to 22-23°C and introduce fresh air (<850 ppm CO₂) maintaining 88% humidity.
4. Phase 4: Golden Scaly Hats Fattening5 - 7 days
Robust mushrooms with a thick white stem and an almond-shaped golden brown cap will sprout.
5. Phase 5: Harvest with Veil Intactday 38 - 42
Harvest just before the lower veil breaks to preserve its maximum polysaccharide density and crunchy texture.
Expert Grower Tips:
Unlike the common mushroom that requires cold (16°C), the Sun Mushroom fruits wonderfully in spring-summer at 23°C.
Its almond aroma in the mycelium is the best proof of the strain's authenticity.
Gelatinous Lignicolous Heterobasidiomycete (Elderwood / hardwood)Hanging bags with microperforations or Trunks in humid shade
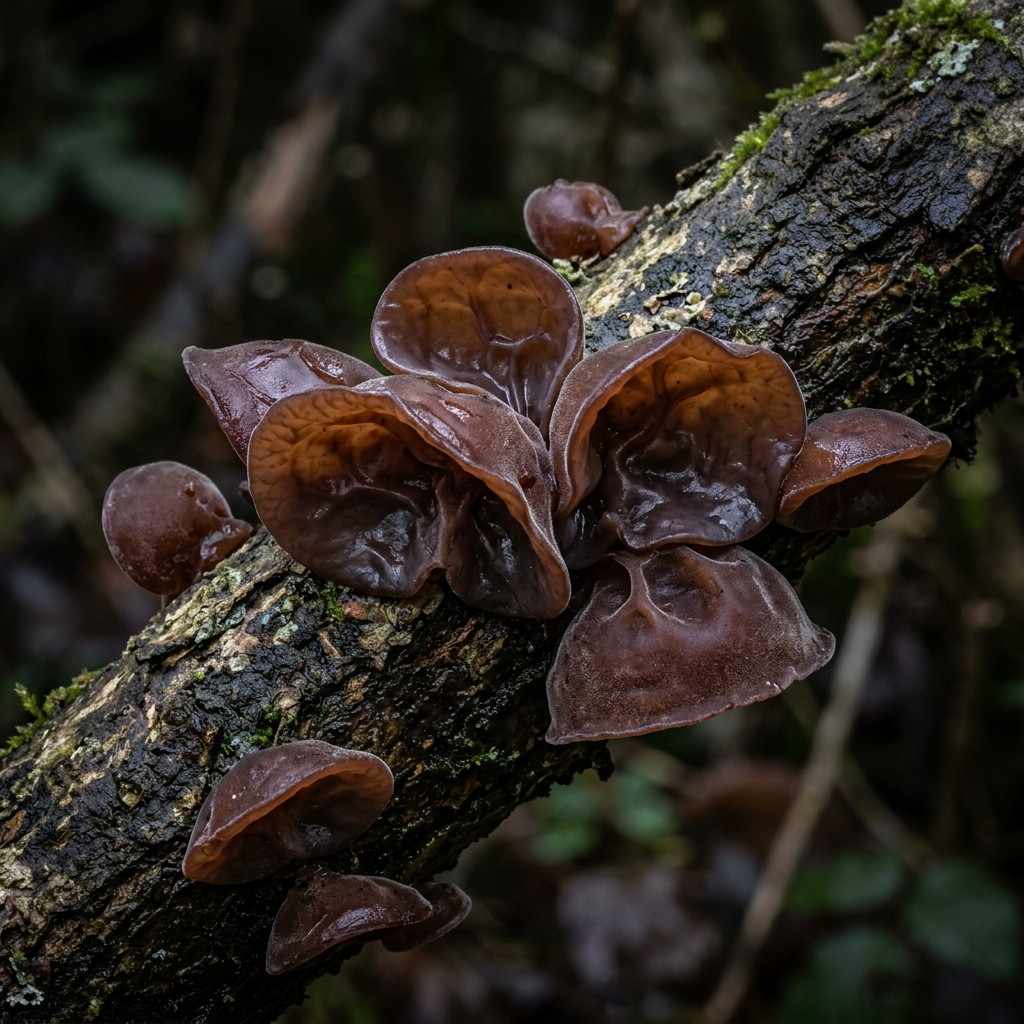
Judas Ear (Wood Ear / Kikurage) is a gelatinous mushroom with extraordinary anticoagulant and prebiotic properties, essential in ramen and Asian stir-fries due to its crunchy cartilaginous texture. It loves very high humidity and tolerates drying and rehydration cycles without dying.
layers
Bulk Substrate & Base RecipeHardwood sawdust (elderberry, beech, oak) with 18% bran80% fine hardwood sawdust + 18% wheat or rice bran + 2% calcium carbonate at 63% humidity.
format_list_numberedView Step-by-Step Guide (5 phases) & Pro Tipsexpand_more
1. Phase 1: Colonization of the Sawdust Block22 - 28 days
Inoculate cylindrical bags of supplemented sawdust and incubate at 25°C until dense white mycelium covers 100%.
2. Phase 2: Hung and "V" Groovedday 30
Hang the bags vertically in the fruiting chamber and make 15-20 small "V" shaped cuts (1.5 cm) around the entire cylinder.
3. Phase 3: Intense Nebulization12 - 16 days
Keep at 20-24°C with 90-95% humidity. Unlike leafy mushrooms, Auricularia appreciates being sprayed directly with clean water once a day.
4. Phase 4: Wet/Dry Alternation3 - 5 days
Alternating hours of intense fog (95% RH) with hours of ventilation (82% RH) stimulates the elastic growth of the amber-violet lobes.
5. Phase 5: Reversible Harvesting and Dehydrationday 45
Pluck the ears when they reach 5-8 cm and their edge is wavy. They dry very quickly and when rehydrated in warm water they recover 100% of their original shape and texture.
Expert Grower Tips:
Auricularia is revitalizing: if one day the humidity in the tent is low and your ears shrink, they are not dead; When the humidity rises again to 92%, they swell again and continue to grow.
Elder (Sambucus nigra), maple and beech are their favorite woods.
Mycoparasitic Jelly Fungus (Symbiosis with Annulohypoxylon stygium)Bags of sawdust inoculated with Dual Culture (Tremella + Host Fungus)
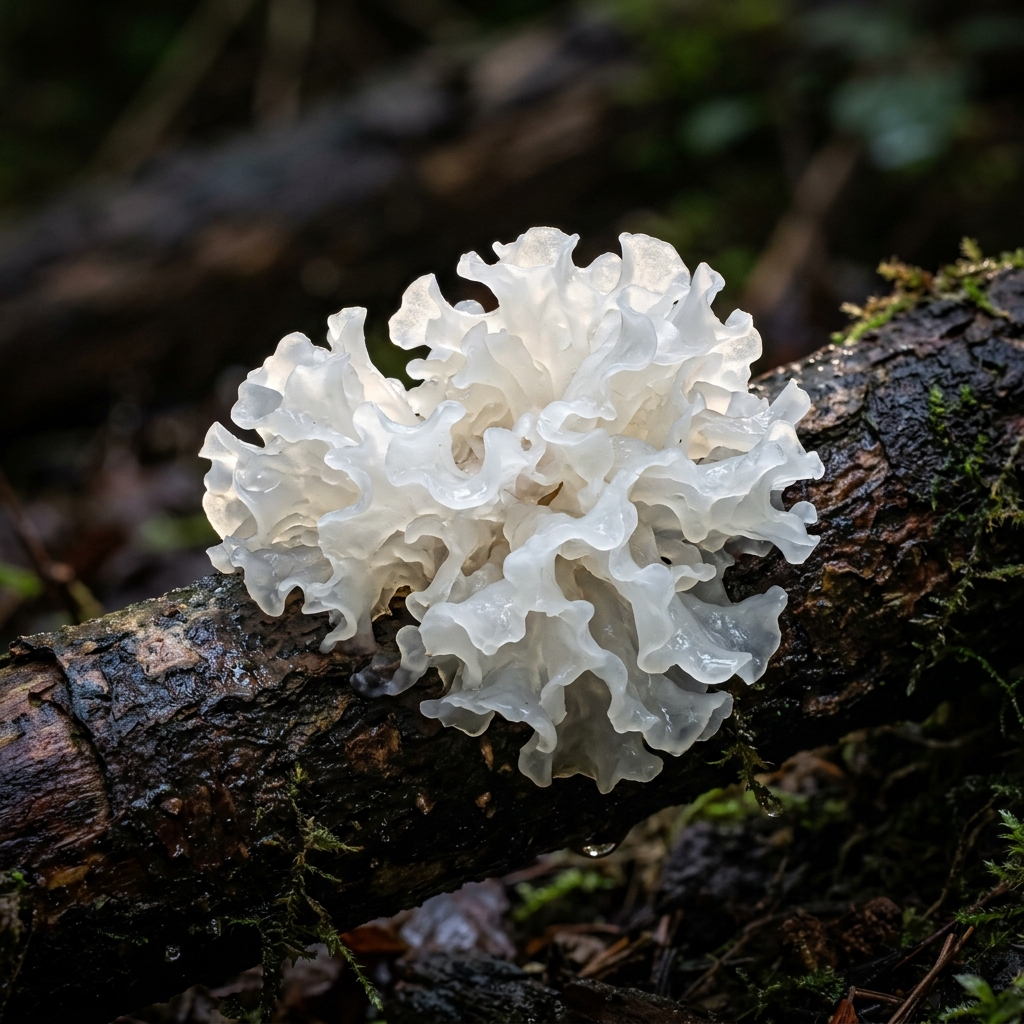
The Snow Fungus or "Silver Ear" (Tremella fuciformis), famous in cosmetics and longevity for retaining more water than hyaluronic acid, has a fascinating biological secret: it cannot digest wood on its own. To grow it, a dual symbiotic inoculum is used that contains both Tremella and its companion fungus (Annulohypoxylon), whose enzymes unlock the food so that the translucent white pom pom blooms.
layers
Bulk Substrate & Base RecipeHardwood sawdust + Cotton seed or Wheat bran78% fine hardwood sawdust + 20% wheat bran or cotton seed hulls + 2% agricultural gypsum at 62% humidity.
format_list_numberedView Step-by-Step Guide (5 phases) & Pro Tipsexpand_more
1. Phase 1: Dual Inoculum AcquisitionPrevio
Be sure to purchase dual culture blanks that include both Tremella fuciformis and its ascomycete symbiont Annulohypoxylon stygium (a pure plate of Tremella alone will grow as yeast and will never mushroom).
2. Phase 2: Inoculation in Specific Holes25 - 30 days
In cylindrical bags of sterilized sawdust, make 3 1.5 cm holes, insert the dual mother sawdust into each hole and cover them with microporous tape. Incubate at 25°C.
3. Phase 3: Patch Removal and Hydrationday 30
When you see a yellowish gelatinous nodule peeking out from under the patches and the feather mycelium of Annulohypoxylon has invaded the block, remove the patches and move to 23°C and 92% humidity.
4. Phase 4: White Chrysanthemum Flowering10 - 14 days
With constant 90% humidity and fresh air, each hole will unfold a 10-15cm curly white translucent rosette.
5. Phase 5: Harvest and Gentle Dryingday 42 - 45
Cut the rosette at its yellowish base when the petals are completely open and springy.
Expert Grower Tips:
Never try to isolate Tremella by cloning a piece of commercial mushroom on agar alone: without the filamentous mycelium of Annulohypoxylon, Tremella remains in its single-celled yeast phase and is unable to form the fruiting body.
It is delicious simmered in traditional Asian desserts with pear and goji berries.
Sanghwang or Mesima (Phellinus linteus) is one of the most precious medicinal polypores in the Korean and Japanese pharmacopoeia due to its very high content of hispidin and anti-tumor beta-glucans. It is a mushroom of Zen patience: its slow fruiting cycle sculpts golden-brown hooves of great density.
layers
Bulk Substrate & Base RecipeMulberry (Morus alba) or oak sawdust supplemented at 15%83% mulberry, beech or oak sawdust + 15% wheat bran + 2% agricultural gypsum at 62% humidity.
Taiwan Endemic Medicinal Polypore (Niu-Chang-Chih)Grain Culture/Solid State Agar (SSC) or Long-Term Blocks
Known as the "Taiwan Forest Ruby", Antrodia cinnamomea grows in the wild exclusively inside hollow trunks of Cinnamomum kanehirae. In the laboratory it is cultivated through solid state fermentation on red rice/wheat or special blocks for several months to synthesize its invaluable hepatoprotective triterpenoids (antcins).
layers
Bulk Substrate & Base RecipeSupplemented brown rice (Solid-State Culture) or flavored sawdustWheat/rice grain enriched with glucose, peptone and citrus extracts, or long-term hardwood sawdust.
format_list_numberedView Step-by-Step Guide (4 phases) & Pro Tipsexpand_more
1. Phase 1: Multiplication in Agar/LC15 - 25 days
Culture on malt-yeast agar plates at 25°C. The mycelium soon acquires a characteristic reddish-orange color and camphorous aroma.
2. Phase 2: Sowing in Solid State Jars30 - 60 days
Inoculate jars of wheat or brown rice supplemented with a 0.22 µm filter.
3. Phase 3: Synthesis of Antcins (Red Pigmentation)month 2 al 4
Keep at 24°C in the dark; The mycelium will form a porous resupinated crust of intense ruby red color that is very bitter (a sign of high richness in triterpenes).
4. Phase 4: Harvest and Alcoholic Extractionday 120
Dehydrate the red scab and prepare hydroalcoholic extract.
Expert Grower Tips:
The intensely bitter flavor of the red scab is the direct indicator of its richness in antcins and zhankuic acids.
Underground Sclerotia-Forming Polypore (Zhu Ling)Bags of sawdust with branches buried in forest bed
Polyporus umbellatus (Zhu Ling) is famous in traditional Eastern medicine as a diuretic and renal immunomodulator, in addition to producing spectacular umbrella-shaped bouquets with dozens of caps from a black underground sclerotia.
layers
Bulk Substrate & Base RecipeSawdust and short hardwood branches (beech, oak, maple)70% coarse sawdust and oak/beech chips + 28% forest humus + 2% gypsum.
Polypore Forming Giant Sclerotia in Pine (Fu Ling)Large bags of pine wood or buried pine logs
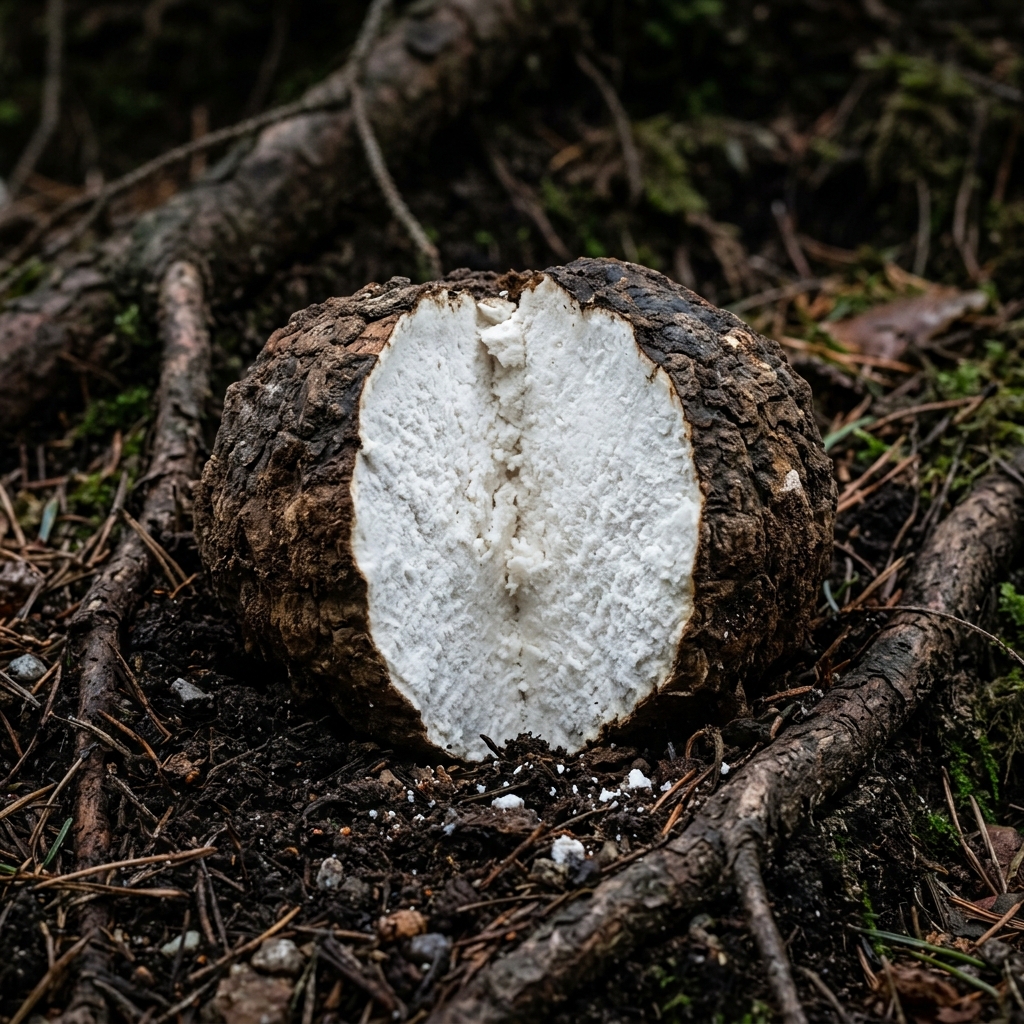
Wolfiporia Extensa (Poria cocos or Fu Ling) is one of the rare mycological exceptions that prefers resinous pine wood (Pinus spp.). It is mainly grown to harvest its large white underground sclerotia ("pine coconuts"), used for two millennia as a calming, digestive and diuretic tonic.
layers
Bulk Substrate & Base RecipePine wood blocks and sawdust (Pinus massoniana / sylvestris)80% sun-dried pine wood chips and plugs + 18% rice/wheat bran + 1% sugar + 1% gypsum at 60% humidity.
format_list_numberedView Step-by-Step Guide (4 phases) & Pro Tipsexpand_more
1. Phase 1: Pine Wood Preparationday 1
Hydrate thick shavings and short blocks of debarked pine with bran and sterilize them in large polypropylene bags.
2. Phase 2: Rapid Warm Colonization25 - 30 days
Inoculate with Wolfiporia extensive LC and maintain at 26°C. Its white mycelium is very vigorous in conifers.
3. Phase 3: Fattening of the Sclerotium (Fu Ling)month 2 al 5
In darkness at 22-24°C (or buried in a sandy terrace), the mycelium condenses the sugars of the pine wood, forming a hard tuberous mass with a snowy white interior and rough brown skin.
4. Phase 4: Harvest, Peel and Cut into Cubesmonth 5 - 6
When the bag or soil cracks due to swelling of the sclerotium, remove it, peel its brown bark, and cut it into white slices or dice before dehydrating.
Expert Grower Tips:
It is one of the very few medicinal species that transforms pine wood into therapeutic biomass without the need for a humidity chamber.
Coprophilous Saprophyte / Adaptable SubtropicalMonotub / Dubtub / Shoebox (6L - 54L) with 100% Coco or CVG
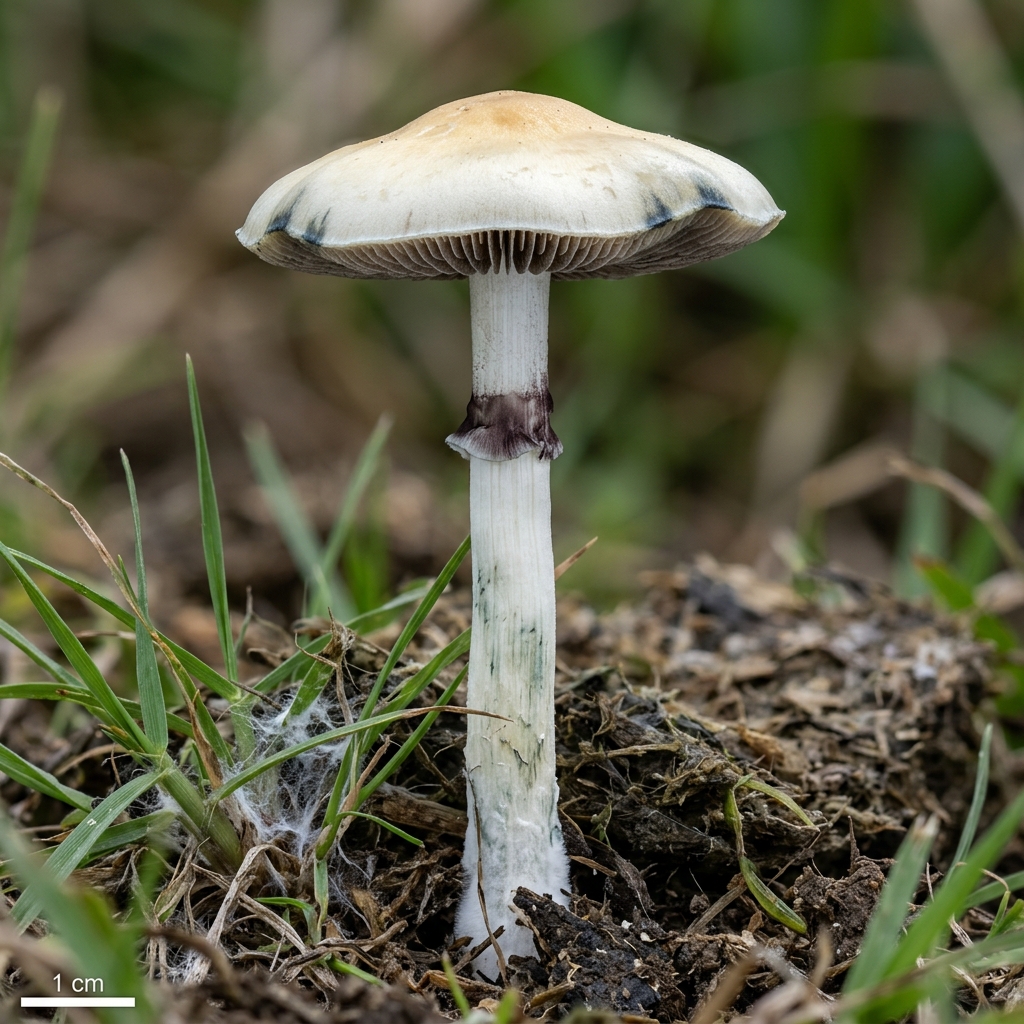
Psilocybe cubensis is the model and most appreciated species for the study of indoor mycology. Its extraordinary adaptability allows successful cycles through multiple methodologies: there is no single closed dogma. Each grower must find the technique that best suits their local resources, time and equipment. From home methods without a pressure cooker (such as steamed brown rice in a traditional pot / Broke Boi Tek) to autoclave laboratories (rye or oats), and from minimalist substrates based on 100% pure coconut fiber (Bucket Tek) to the classic CVG formulation (Coconut + Vermiculite + Gypsum) with or without a covering layer (casing).
layers
Bulk Substrate & Base Recipe100% Pure Coconut Fiber or CVG Blend (Coconut + Vermiculite + Gypsum)Multiple valid options depending on your objectives:
• Option A (Minimalist and Ultra-Effective - Coconut Fiber Only): 1 650g block of dehydrated coconut fiber hydrated with ~3.2L to 3.5L of boiling water. It is the cleanest, most economical method with the lowest rate of bacterial contamination.
• Option B (Classic CVG Formula): 650g coconut fiber + 2L medium grain vermiculite + 1 cup (50-100g) of agricultural gypsum (calcium sulfate). Hydrate with 3.8L to 4.2L of boiling water to field capacity.
• Golden Rule of Field Capacity: When squeezing a handful of prepared bulk with full strength, only 2 to 3 drops of water should seep between your knuckles. If water streams continuously, it will suffocate mycelium and trigger bacterial rot; if nothing drips, it will cause premature drying and aborted pins.
sanitizerMultiple pasteurization methods valid according to your possibilities (see Pasteurization Technical Guide)Pasteurization Guideopen_in_new
Incubation24°C - 27°C (Critical: do not exceed 27.5-28°C; triggers Bacillus sour rot and impervious stroma/overlay)
Fruiting21°C - 24°C
CO₂ Limit< 1000 ppm
format_list_numberedView Step-by-Step Guide (5 phases) & Pro Tipsexpand_more
1. Phase 1: Grain Choice and Hydration (Brown Rice vs. Hard Grains)day 1 - 2
Choose the grain according to your possibilities and equipment:
• Route A (Brown Rice / Broke Boi Tek - No autoclave required): No prior soaking required. Boil brown rice in boiling water for 10-12 minutes (it should be "al dente", cooked on the outside but firm in the core, without opening or turning into mush). Drain thoroughly in a colander, let it cool and evaporate the surface moisture for 15-20 minutes until the grains no longer stick to your fingers. Fills jars 75% with lids provided with a hole with a micropore filter. You can sterilize in a traditional pot with a steam lid for 90-100 minutes (or 60-90 minutes in a pressure cooker at 15 PSI).
• Route B (Rye, Oats, Wheat or Popcorn): Soak hard grains for 12-24 hours (optionally with 1 tablespoon of gypsum to prevent sticking). Boil for 15-20 minutes until the interior is hydrated without bursting the shell. Drain on screens until the external moisture is dry and sterilize in jars with a filter in a pressure cooker or autoclave at 15 PSI for 90-120 minutes.
2. Phase 2: Aseptic Inoculation and Shake at 30% (Break & Shake)10 - 15 days
In a laminar flow hood or still air box (SAB), inoculate each jar using your chosen method: 1.5 - 3 ml of Liquid Culture (LC), colonized agar wedges, grain-to-grain transfer (G2G) from a master jar, or a multi-spore syringe (MSS) (note that spores take 5 to 10 extra days to germinate). Incubate at 24-26°C in darkness. Once you observe 25-30% snow-white colonization, shake the jar vigorously (Break & Shake) to redistribute inoculum points: full colonization will accelerate, finishing in just 3 to 5 more days.
3. Phase 3: Bulk Sowing (Spawn to Bulk: Only Coco or CVG)7 - 10 days
Check the field capacity of your pasteurized substrate (when you squeeze a handful with your hand with full force, only 1 or 2 drops of water should come out between your fingers). Mix your colonized grain with 100% coconut fiber or CVG mix in a 1:2 or 1:3 ratio inside your Monotub or Shoebox. Gently level the surface and lightly press the edges to avoid side pins. Optionally apply a "pseudo-casing" of 3-5 mm of coconut or vermiculite to cover any exposed grains. Keep closed at 23-25°C until the mycelium colonizes the dough.
4. Phase 4: Surface Conditions, Microdroplets and Induction Triggers5 - 8 days
Lower the temperature slightly to 21-23°C and introduce passive ventilation through the holes with micropore tape. The biological key to fruiting is not to spray water on a schedule, but to keep the surface dotted with thousands of tiny microdroplets of dew that shine under the light. The slow and constant evaporation of these microdroplets, stimulated by fresh air, is the exact physical trigger that transforms hyphal nodes into primordia (pins).
5. Phase 5: Harvest Right When Tightening the Veil and Hydration for Wavesday 28 - 35
Harvest by twisting and gently pulling from the base of the foot just when the partial veil covering the blades begins to stretch or break (before the purple-black spore falls on the bread). After removing the fruits, immerse the block in cold water for 4 to 8 hours (dunking) to restore all the lost hydration and prepare for the 2nd, 3rd and 4th waves.
Expert Grower Tips:
Don't get bogged down with dogma: growing with 100% pure coconut fiber (Bucket Tek) gives spectacular yields and minimizes the chances of failure for beginners. If you are looking for extra water retention for late flushes, add vermiculite and gypsum (CVG formula).
Brown rice is the most grateful and accessible grain if you do not have an autoclave or professional pressure cooker: it is bought in any supermarket and responds wonderfully to steam sterilization in a traditional pot.
The role of vermiculite: it is an inert mineral that does not provide calories to the fungi but acts as a biological sponge. You can mix it with the coconut in the bulk to increase water retention, or reserve it exclusively to create a moist surface layer (casing) that protects the microclimate of the primordia.
Learn to read the surface of the substrate: do not spray according to a fixed routine, but only if the tiny pearls of dew that shine on the mycelium disappear.
The 30% "Break & Shake" in grain not only shortens colonization times: it acts as an infallible early detector of hidden bacterial contamination (a healthy grain recovers in 24-48 hours; if it stops or smells sour, it was contaminated).
South African Subtropical Grassland SaprophyteHigh-ventilation Monotub (High-FAE Monotub)
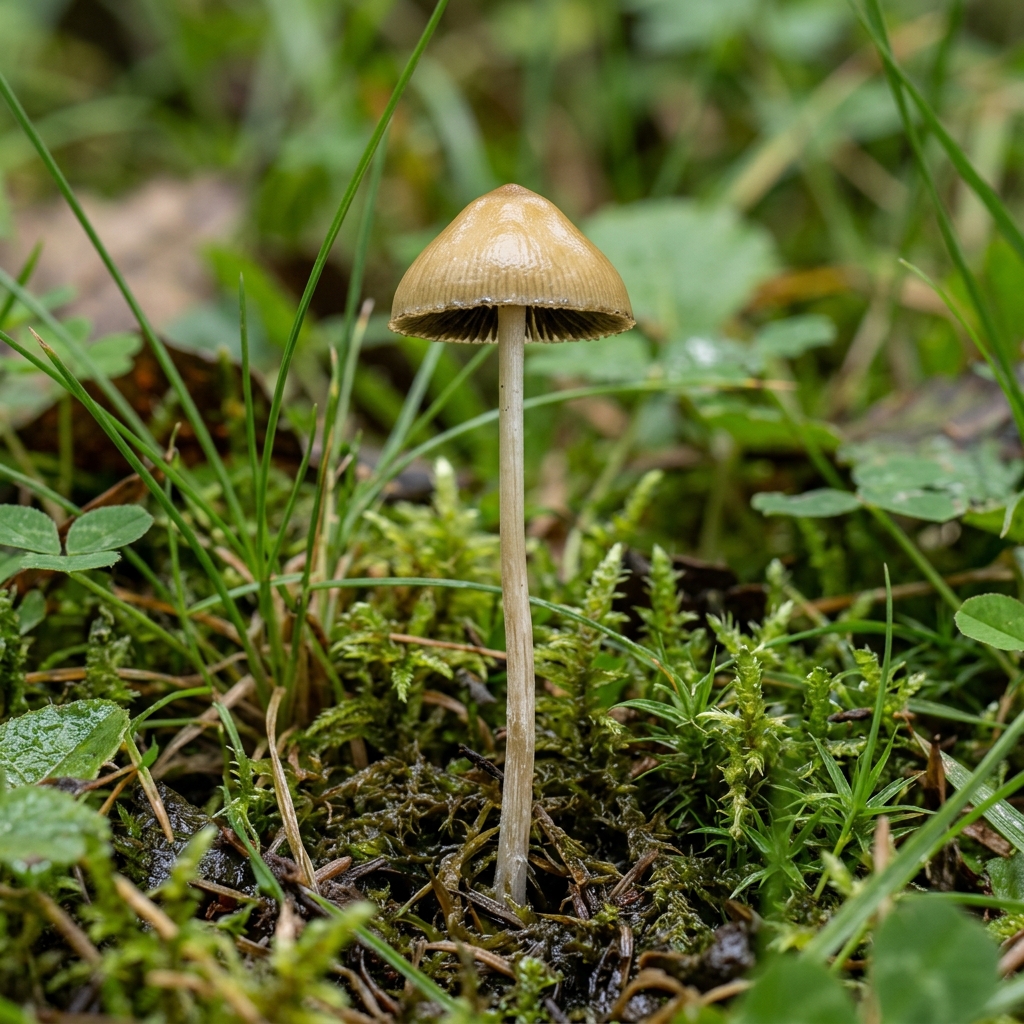
Originally from KwaZulu-Natal (South Africa) and recently reclassified as Psilocybe ochra, this species has revolutionized home cultivation: it is extraordinarily adaptable and is grown in both 100% pure coconut fiber and CVG substrate. Its rhizomorphic mycelium is so aggressive and voracious that it surpasses P. cubensis in speed and devours incipient contaminations. Its only agronomic peculiarity is to require twice as much fresh air and a high substrate ratio (1:3 to 1:4) to avoid its famous cottony mantle ("overlay").
layers
Bulk Substrate & Base Recipe100% Pure Coconut Fiber or CVG Blend in High Ratio (1:3 or 1:4)Performs at the highest level with only pure pasteurized coconut fiber (650g hydrated with 3.5L boiling water) or with CVG formula (coconut + vermiculite + gypsum). The golden rule with P. natalensis is to use abundant substrate: mix 1 part of colonized grain with 3.5 to 4 parts of substrate at field capacity to dilute nutrition and promote primordia instead of vegetative stroma.
sanitizerPasteurization by thermal infusion in an isothermal bucket (Bucket Tek) for 6-8 hours or thermal pasteurization in steam/water bath at 65-75°C for 90 min (see Pasteurization Guide).Pasteurization Guideopen_in_new
Incubation24°C - 28°C
Fruiting21°C - 25°C
CO₂ Limit< 800 ppm
format_list_numberedView Step-by-Step Guide (5 phases) & Pro Tipsexpand_more
1. Phase 1: Lightning Grain Colonization7 - 10 days
Inoculate jars of steamed brown rice, oats or rye at 26°C. Its rhizomorphic mycelium colonizes up to 30% faster than P. cubensis.
2. Phase 2: Sowing with Ratio 1:3 or 1:4 in Coco or CVG6 - 8 days
Don't use a 1:1 ratio (too much nutrition triggers the overlay); Mix 1 part grain with 3.5 to 4 parts coconut fiber alone or CVG at field capacity, and cover with 1 cm of clean coconut.
3. Phase 3: Immediate Introduction of Fresh Airday 14
It transitions to fruiting conditions (high FAE) from the first days or as soon as the mycelium appears on 70% of the surface.
4. Phase 4: Patience before the Mycelium Clouds7 - 10 days
Even if some white surface foam forms, do not fork tek: in good continuous fresh air, the ocher cap primordia will break through the cloud on their own.
5. Phase 5: Late Harvest after Flattening the Hatday 25 - 30
Unlike cubensis, P. natalensis continues to grow long after breaking the veil: wait for the cap to flatten, acquire turquoise edges and the blades to darken to harvest the maximum weight.
Expert Grower Tips:
P. natalensis is extremely noble with substrates: it does not require complicated formulas, with only coconut fiber it performs at the highest level as long as it has abundant ventilation.
Using a 1:4 ratio (less grain and more coconut fiber) is the definitive trick to avoid excess aerial mycelium and achieve clean canopies.
If a dense white mycelium cushion forms before fruiting, that aerial mycelium itself is active and the primordia will end up coming out through it if you increase ventilation.
Strict Tropical Coprophilous Saprophyte (Blue Meanies)Low Trays in Automated Martha Store or Double Tray "GordoTEK" System with Aquarium Heater
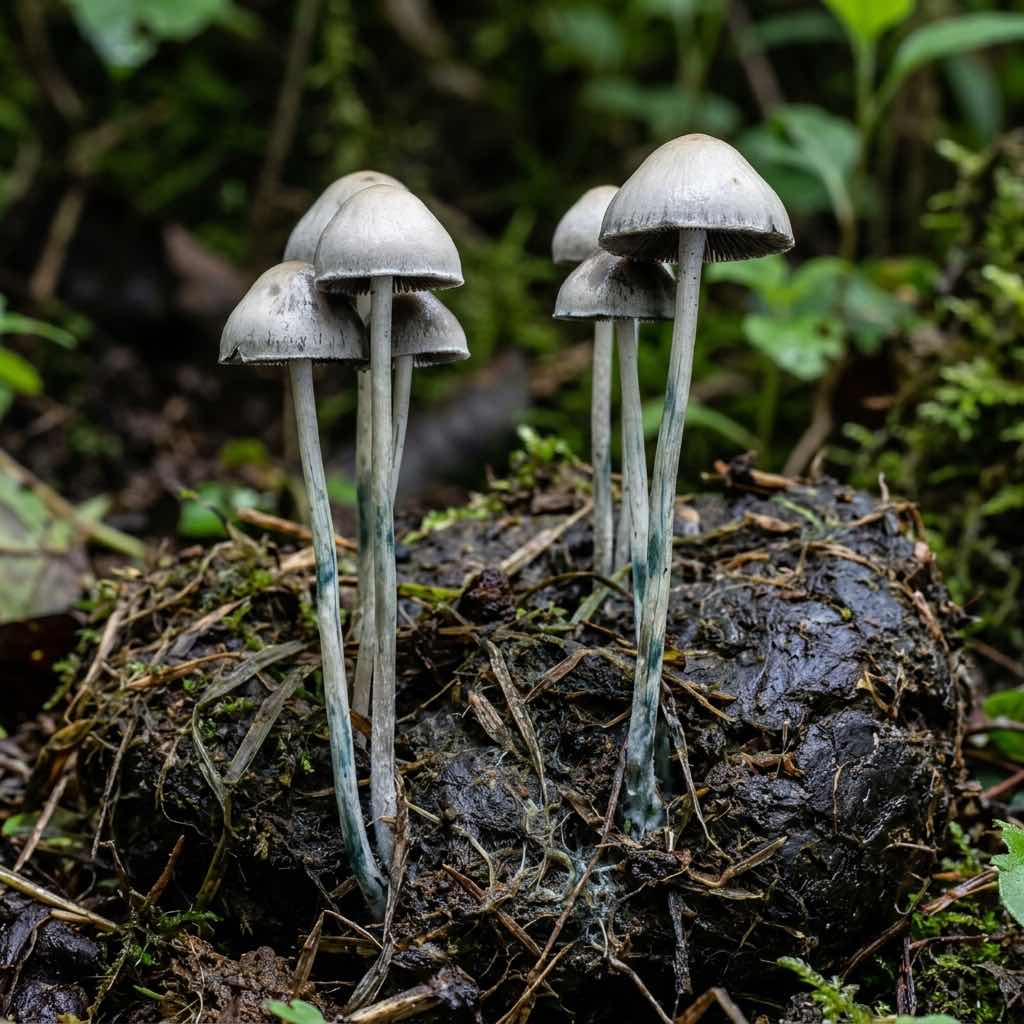
Panaeolus cyanescens (Copelandia) is considered the summit of tropical mycological cultivation. It triples the power of P. cubensis, but takes no shortcuts: it requires composted equine manure, a mandatory thin layer of alkaline casing, and a constant balance between tropical heat (26°C), ultra-fine fog (95% RH), and continuous ventilation to emulate a humid breeze after a tropical storm.
layers
Bulk Substrate & Base RecipeAged equine manure + Chopped straw + Vermiculite / Coconut50% sun-dried and leached horse manure (field aged manure) + 30% vermiculite (key to aerate the manure and retain available water) + 20% coconut fiber or chopped straw + 3% calcium sulfate (gypsum).
sanitizerStrict thermal pasteurization at 65-72°C for 90-120 minutes (steam or probe-controlled water bath). IT IS PROHIBITED to sterilize at 121°C in a pressure cooker the manure needs to preserve its thermophilic bacteria that protect against green mold (see Pasteurization Technical Guide).Pasteurization Guideopen_in_new
Incubation26°C - 29°C
Fruiting24°C - 27°C
CO₂ Limit< 650 ppm
format_list_numberedView Step-by-Step Guide (5 phases) & Pro Tipsexpand_more
1. Phase 1: Small Grain Colonization7 - 10 days
Inoculate millet, brown rice or rye at 27°C. The mycelium of Pan Cyan is greyish, thin and cottony (it never forms thick white ropes like cubensis).
2. Phase 2: Actual Substrate Pasteurization with Manureday 10
Place the mixture of horse manure, vermiculite and gypsum in bags or jars in a controlled water bath at 68°C (measured in the center of the substrate with a probe) for 90 minutes. Let cool to 28°C.
3. Phase 3: Sowing in Shallow Trays (5 cm)5 - 6 days
In aluminum trays or low tupperware (only 4-5 cm substrate thickness to avoid overheating), mix 15-20% of colonized grain and incubate at 27°C covered with perforated aluminum foil.
When the surface is covered with white hair, sprinkle without crushing a layer of just 5 mm of peat + vermiculite (pH 8.0) previously pasteurized. Moisten with a fine spray.
5. Phase 5: Tropical Fog and Evaporation Cycle4 - 6 days
Transfer to the Martha chamber or box with mosquito net at 25-26°C, alternating 15 minutes of humidifier with ventilation cycles every hour. In 3 days, hundreds of white needles will sprout, opening pearl gray caps in just 48 hours.
Expert Grower Tips:
Double function of vermiculite in Pan Cyan: it is mixed in the bulk substrate to fluff the pasty manure and avoid anaerobic zones, and it is also used at 50% in the fine casing layer to retain moisture against intense air renewals.
Use shallow trays (4-5 cm of substrate) instead of thick blocks: Panaeolus cyanescens loves large surfaces with very high area/volume ratios.
The thickness of the casing is critical: if you put 2 cm of peat as in a mushroom, the fine mycelium of Pan Cyan cannot penetrate it; put only 5 mm (so that the substrate underneath can almost be seen).
Subtropical Praticultural Saprophyte and Sclerotia Producer (Teonanácatl)Grain Jars/Bags (for Truffles) or Trays with Casing in a humid chamber (for Mushrooms)
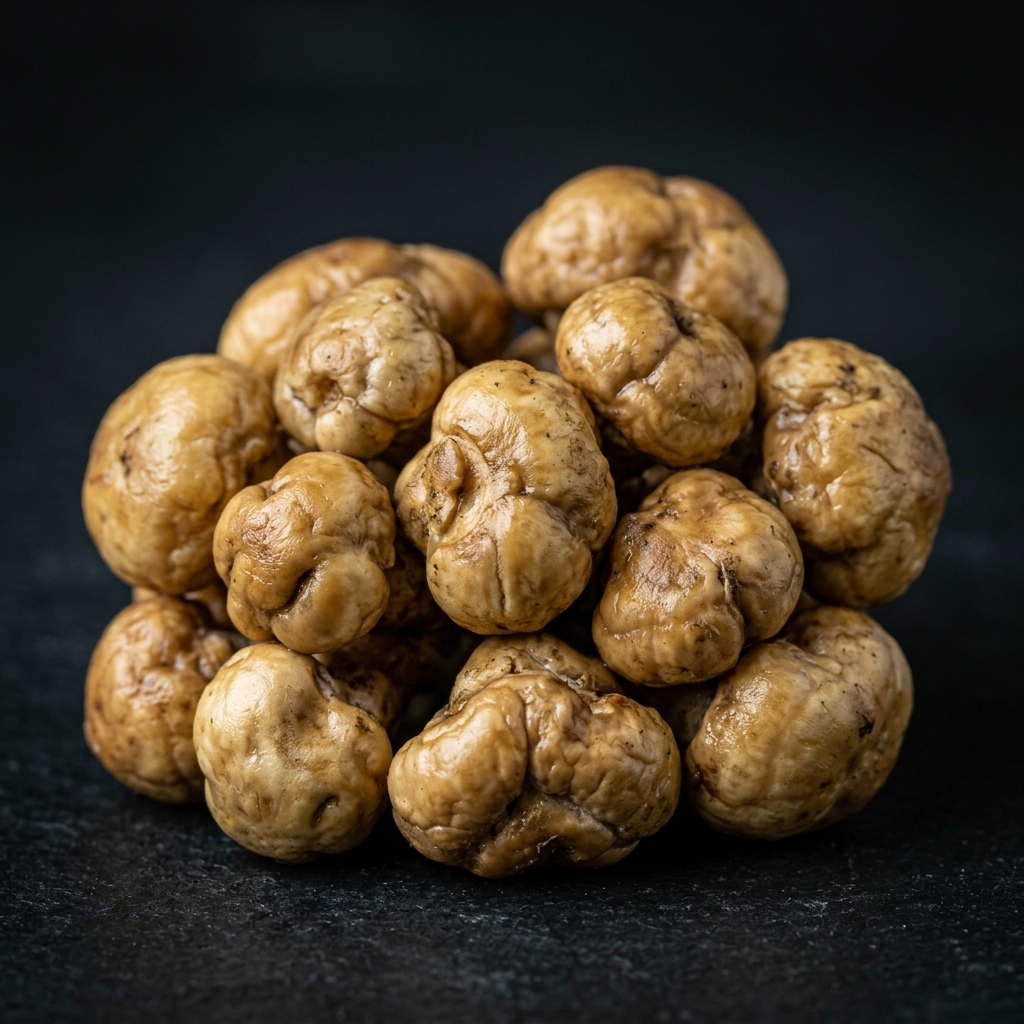
Psilocybe mexicana, the sacred "Teonanácatl" of the Mesoamerican cultures where Albert Hofmann first isolated psilocybin in 1958, offers a unique double cultivation: within the grain jar itself it produces underground sclerotia ("magic truffles"), and if planted in a substrate with casing and high ventilation it gives delicate bell-shaped mushrooms and a second harvest of truffles underground.
layers
Bulk Substrate & Base RecipePure grain (for Sclerotia) or Coconut Fiber / supplemented CVG (for Mushrooms)For truffles: Brown rice, rye or oats hydrated at 55% with 1% gypsum. For mushrooms: 100% coconut fiber or CVG mix (50% coconut + 30% vermiculite + 20% manure/humus optional) pasteurized at field capacity.
sanitizerSterilization in grain jars; pasteurization at 70-75°C (90 min) for the fruiting substrate.Pasteurization Guideopen_in_new
Incubation22°C - 26°C
Fruiting19°C - 23°C
CO₂ Limit< 800 ppm
format_list_numberedView Step-by-Step Guide (5 phases) & Pro Tipsexpand_more
1. Phase 1: Slightly Wetter Grain Inoculationday 1
Prepare jars of brown rice (boiled 10 min), rye, oats or grass seed with 5% more hydration than for cubensis. Sterilize in jars with filter and inoculate with LC.
2. Phase 2: Route A — Sclerotia Cultivation (Forget in Darkness)month 1 al 4
If you are looking for truffles, DO NOT shake the jar after day 7. Store in the dark at 22-24°C for 3-4 months. From the third week you will see dense walnut-colored stones forming stuck to the glass.
3. Phase 3: Route B — Sowing in a Mushroom Tray10 - 12 days
If you are looking for the fruiting bodies ("Little Birds"), mix the colonized grain (or the residual grain after harvesting truffles) with coconut fiber alone or CVG mix (with or without 15% pasteurized manure/humus) in a low tray.
4. Phase 4: Fine Casing and High Ventilation8 - 12 days
Apply 1 cm of peat and vermiculite casing and expose to 20-22°C with 92% humidity and plenty of ventilation (like a Panaeolus).
Harvest the delicate bell mushrooms in 3 waves and, before throwing away the spent block, crumble it: you will find dozens of giant sclerotia formed under the ground.
Expert Grower Tips:
Double prize! When growing sclerotia in a jar, after 3 months wash the truffles with cold water in a strainer and DO NOT throw away the loose myceliated grains: mix them with pasteurized coconut fiber or CVG and they will give you a full harvest of mushrooms for free.
To fruit P. mexicana aerial mushrooms, both 100% coconut fiber and CVG work excellently; The determining biological key is the 1 cm casing layer (peat + alkalized vermiculite) and the continuous flow of fresh air.
Do not shake the jars of truffles once the nodules have started to condense or you will stop their fattening.
Subtropical Saprophyte Producer of Sclerotia ("Philosopher's Stones")Glass jars or Bags with filter for Sclerotia ("Set and Forget")
Discovered in a single wild specimen in Tampa (Florida) in 1977 by Steven Pollock and Gastón Guzmán, Psilocybe tampanensis is the simplest and most discreet cultivation method that exists: it does not require a fruiting chamber, lights, or humidity control. Simply inoculate a jar of sterilized grain, store it in a dark cupboard for 12 weeks, and harvest your famous "Philosopher's Stones."
layers
Bulk Substrate & Base RecipeGrain of brown rice, rye, oats or grass seed enriched with 1% gypsumAl dente brown rice, rye grain, oats or ryegrass seed (Lolium) hydrated to 55-58% humidity + 1 teaspoon of calcium sulfate (gypsum) per jar.
Fruiting20°C - 24°C (Maduración de esclerocios en oscuridad)
CO₂ Limit< 3000 ppm
format_list_numberedView Step-by-Step Guide (5 phases) & Pro Tipsexpand_more
1. Phase 1: Preparation of Grain Jarsday 1
Hydrate brown rice (boiled 10 min), rye or grass seed (ryegrass produces giant truffles), fill jars to 75% of their capacity and sterilize with a filter.
2. Phase 2: Aseptic inoculationday 2
Inject 3 ml of P. tampanensis or P. galindoi/ATL#7 Liquid Culture through the self-healing injection port.
3. Phase 3: White Colonization and Initiation of Nodulesday 3 - 25
In 2 weeks the grain will be covered with fluffy white mycelium that will begin to darken to cream and tan tones in certain spots.
4. Phase 4: Silent Ripening ("Set and Forget")week 4 a 16
Leave the jars undisturbed on a dark shelf at 21-24°C. The cream nodules will absorb the starch from the grain and turn into 2 to 5 cm hard stones, squeezing out drops of amber liquid.
5. Phase 5: Washing and Harvesting of Philosophers' Stonesmonth 3 a 5
Open the jar, pour the block into a metal strainer and rub under cold running water to separate the grain hulls from the solid truffles.
Expert Grower Tips:
The longer you wait (between 3 and 5 months), the denser, larger and more powerful the truffles will be and the less grain remains they will have inside.
Grass seed (Ryegrass seed) mixed 50% with rye or oats doubles the weight yield of sclerotia.
Psilocybe azurescens ("Flying Saucers"), native to the coastal dunes of the Columbia River in Oregon, holds the record for potency within the Psilocybe genus. It is a strictly autumn-winter lignicolous species: it does not bear fruit in temperate indoor monotubs because it needs the soil microbiota and night frosts of 4-10°C to activate its fruiting.
layers
Bulk Substrate & Base RecipeOutdoor beds of hardwood chips (Alder, Beech, Oak, Poplar)80% non-resinous hardwood chips (preferably red alder Alnus rubra, beech or oak) + 20% fine moist sawdust in a 15-20 cm deep bed.
sanitizerThe initial inoculum is sterilized in sawdust bags; The final bed of chips in the garden is soaked in cold water for 24 hours without sterilizing.Pasteurization Guideopen_in_new
Incubation15°C - 22°C (Primavera - Verano)
Fruiting4°C - 12°C (Otoño tardío - Invierno)
CO₂ Limit< 650 ppm
format_list_numberedView Step-by-Step Guide (5 phases) & Pro Tipsexpand_more
1. Phase 1: Spawn Preparation Indoors (Winter)Enero - Marzo
At home, inoculate grain jars with P. azurescens LC and transfer them to sterilized bags of sawdust and beech/alder shavings. In 6 weeks you will have several kilos of completely white wood.
2. Phase 2: Construction of the Outdoor Terrace (Spring)Abril - Mayo
Choose the shady, humid and cool corner of your garden (north facing). Dig a 15cm deep trench, lay a base of damp corrugated cardboard and alternate layers of soaked beech/oak chips with your colonized sawdust.
3. Phase 3: Summer Soil ColonizationMayo - Septiembre
Cover with 2 cm of leaf litter or thin bark and water in dry weeks so that the bed never dehydrates in summer. The mycelium will weave a very hard white network that unites all the splinters.
4. Phase 4: The Winter Trigger (6-10°C Shock)Octubre - Noviembre
With the arrival of cold autumn rains and nights of 5-8°C, white primordia with caramel-colored heads will appear.
5. Phase 5: Harvesting and Feeding PerennialNoviembre - Diciembre
Harvest by cutting with scissors when the hats acquire their classic flying saucer shape with a central umbo. In March add a fresh 5cm layer of chips on top so that the bed lives indefinitely.
Expert Grower Tips:
Cloning in cardboard without a laboratory: lignicorous species such as P. azurescens and P. cyanescens devour the cellulose of wet cardboard. Wrap a couple of fresh foot bases with white hairs in damp corrugated cardboard inside a tupperware and in 2 weeks you will have mycelium ready to expand to splinters.
Never use cedar, pine, or cypress chips; Use beech, alder, oak, poplar or apple.
Lignicolous Saprophyte of Mulches and Gardens (Wavy Caps)Outdoor terraces made of hardwood chips or wide flower pots on a cold terrace
Psilocybe cyanescens ("Wavy Caps") is a prolific wood chip eater from temperate and oceanic climates. It is faster and more adaptable than P. azurescens in gardens and outdoor terrace containers, forming dense mats of caramel-colored caps with sinuous margins in autumn.
layers
Bulk Substrate & Base RecipeHardwood chips and shavings (Beech, Alder, Oak, Eucalyptus)100% mixed caliber deciduous wood chips (fine and coarse) hydrated for 24 hours in water.
sanitizerInitial inoculum in sterilized sawdust; external expansion in non-sterile soaked chips.Pasteurization Guideopen_in_new
Incubation15°C - 23°C
Fruiting7°C - 14°C
CO₂ Limit< 700 ppm
format_list_numberedView Step-by-Step Guide (4 phases) & Pro Tipsexpand_more
1. Phase 1: Multiplication of Mycelium in Beech Chips4 - 6 weeks
Inoculate bags of beech shavings (chipsi terrarium substrates work wonders) with grain or colonized cardboard.
2. Phase 2: Implantation in Spring in the Garden or FlowerpotPrimavera
Create a 15cm shaded bed of hardwood chips or use wide geotextile planters on a north-facing balcony.
3. Phase 3: Summer Rhizomorphic FabricVerano
Maintain humidity with periodic watering. You'll see thick white cords holding the splinters together like glue.
4. Phase 4: Autumn Fruiting in WavesOtoño (10-12°C)
When temperatures drop below 12°C after the autumn rains, bunches of caramel caps will emerge, rippling as they open.
Expert Grower Tips:
Commercial beech wood shavings for terrariums (Beech chips) are the cleanest, cheapest and most effective substrate for multiplying P. cyanescens at home before taking it outside.
Spring Woodlover SaprophyteWet outdoor beds or ventilated wood chip containers
Psilocybe ovoideocystidiata ("Ovoids") is the great exception among wood species: while P. azurescens and P. cyanescens require winter cold and fruit in November, P. ovoideocystidiata fruits in SPRING (April-June) at much milder temperatures (15-20°C), being the easiest and fastest lignicolous species to grow.
layers
Bulk Substrate & Base RecipeSoft/hard wood chips (Maple, Willow, Poplar, Beech) + Straw75% chips and twigs of riverside hardwoods + 25% straw or dry vegetable stems.
Urban Lignicultural Saprophyte of the Temperate CoastHardwood or Eucalyptus Chip Outdoor Beds
Genetic sister of P. cyanescens officially described in 2012, Psilocybe allenii colonizes wood chips with enormous vigor, distinguished by its regular convex caramel-colored caps and its predilection for eucalyptus, oak and alder chips in cool humid climates.
layers
Bulk Substrate & Base RecipeHardwood chips or aged eucalyptusChips and crushed bark of deciduous woods or washed and hydrated eucalyptus.
Southern Lignicolous Saprophyte (Eucalyptus and Hardwoods)Outdoor beds of chips and bark in temperate/cold climates
A mycological emblem of Australia and New Zealand and a close evolutionary relative of P. cyanescens, Psilocybe subaeruginosa thrives on bark, eucalyptus twigs and hardwood chips during the cold, rainy autumn-winter months.
layers
Bulk Substrate & Base RecipeHardwood chips and eucalyptus/oak litter80% hardwood chips + 20% bark and hydrated aged leaf litter.
format_list_numberedView Step-by-Step Guide (3 phases) & Pro Tipsexpand_more
1. Phase 1: Indoor Chip Expansion4 - 6 weeks
Transfers colonized grain to bags of hardwood shavings or washed eucalyptus.
2. Phase 2: Sowing in Wet ShadePrimavera
Establish the 15 cm bed in a wooded area or shady garden.
3. Phase 3: Winter FruitingOtoño - Invierno
Abundant sprouting after cold rains (<12°C).
Expert Grower Tips:
If you use eucalyptus chips, make sure they are aged (dried for several months outdoors) and soak them, changing the water to remove excess fresh antifungal oils.
Saprophyte of Wet Ravines and Clay/Lignocellulosic SoilsDeep trays in Tienda Martha with mineral/peat Casing and constant fog
Venerated by the Zapotec peoples as "Badao Zoo" or "Hongo de la Corona de Cristo", Psilocybe zapotecorum is a majestic species of cloud forests that reaches enormous sizes and very high potency. It is completely cultivable indoors if you imitate its cloudy ravine habitat: coconut fiber substrate enriched with fine sawdust, a porous casing and prolonged fresh fog.
layers
Bulk Substrate & Base RecipeCVG enriched with hardwood sawdust and humus (50/30/20)50% coconut fiber + 30% fine beech/alder sawdust + 15% vermiculite + 5% worm castings + 2% calcium sulfate at high field capacity.
format_list_numberedView Step-by-Step Guide (5 phases) & Pro Tipsexpand_more
1. Phase 1: Grain Colonization (Cottonous Mycelium)14 - 18 days
Inoculate millet or rye at 23°C. Its mycelium forms small dense nodules similar to tiny white sclerotia.
2. Phase 2: Sowing in Mixed Coconut-Sawdust Substrate14 - 20 days
Mix 1:2 with the coconut substrate and well-hydrated hardwood sawdust.
3. Phase 3: Mineral-Peat Casing Applicationday 20
Cover with 1.5 cm of moist casing (peat + vermiculite + sand/akadama) and place in the Martha chamber at 18°C and 94% RH.
4. Phase 4: Slow Development of Wavy Colossi20 - 30 days
Be very patient: unlike a cubensis that matures in 5 days, P. zapotecorum primordia grow slowly for 3 weeks without rotting, forming hard scaly stems and sinuous caps.
5. Phase 5: Harvest of Adult Specimensday 45 - 55
Harvest when the cap has spread its irregular margins and the blades are dark violet.
Expert Grower Tips:
Don't be scared by how slowly the primordia grow: a P. zapotecorum mushroom can take 20 days from the moment the pin appears until it reaches its final size without aborting as long as it has fresh fog.
Adding 20% of coarse washed sand or akadama to the casing imitates the mineral slopes of Oaxaca and multiplies the number of primordia.
Terrestrial and Lignocellulosic Saprophyte ("Landslides")Martha Store Trays or Ventilated Monotub with Casing
Historically venerated in Huautla de Jiménez by María Sabina under the name "Derrumbes" or "Los Niños", Psilocybe caerulescens is a surprisingly docile species in indoor cultivation: it colonizes with a vigorous rhizomorphic mycelium on coconut fiber mixed with sawdust or straw, and when a layer of cover is applied it gives fleshy fruits with a silvery-blue metallic shine.
layers
Bulk Substrate & Base RecipeCVG supplemented with 25% hardwood sawdust or chopped straw55% coconut fiber + 25% hardwood sawdust or chopped straw + 20% vermiculite + 2% agricultural gypsum.
format_list_numberedView Step-by-Step Guide (4 phases) & Pro Tipsexpand_more
1. Phase 1: Grain Colonization12 - 16 days
Inoculate grain at 24°C. It develops a very clean and aromatic silky white mycelium (intense farinaceous smell of fresh cucumber or freshly ground flour).
2. Phase 2: Sowing in Coconut + Sawdust/Straw12 - 15 days
Mix 1:2 with the pasteurized substrate and incubate until complete colonization.
3. Phase 3: Casing and Induction10 - 15 days
Apply 1.2 cm of moist casing and proceed to fruiting (21°C, 92% RH and good air exchange).
4. Phase 4: Silver Hat Harvestday 38 - 44
Harvest when the convex caps show their characteristic burnished olive-brown luster with silver-blue reflections.
Expert Grower Tips:
It is one of the best sacred Mexican species to make the leap from P. cubensis to exotic species without extreme difficulty.
Cosmopolitan Saprophyte of Compost, Straw and Grasslands (Banded Mottlegill)Monotub or Trays with Compost/CVG+Manure and Casing
Panaeolus cinctulus (formerly P. subbalteatus) is the most resistant, cosmopolitan and easy to grow Panaeolus. Unlike the delicate tropical P. cyanescens, it tolerates much wider temperate temperatures (18-24°C) and thrives very easily on mixtures of coconut fiber, straw and compost.
layers
Bulk Substrate & Base RecipeMixture of Coconut Fiber, Straw and Compost/Manure (40/30/30)40% coconut fiber + 30% chopped straw + 30% compost or horse manure + 2% gypsum.
Asian Tropical Coprophilous Saprophyte (Suphanburi / Hawaiian Pan)Low trays in Martha Store or Double Tray System at 26°C
Closely related to P. cyanescens and native to the water buffalo grasslands of Southeast Asia and Hawaii, Panaeolus cambodginiensis stands out for its even more aggressive colonization in equine manure and a spectacular instantaneous blue-black reaction to the slightest touch.
Primary Dead Wood Saprophyte (Laughing Gym)Open-top bags of supplemented sawdust or buried blocks
Gymnopilus luteofolius is a lignicolous species of extraordinary chromatic beauty: it displays bouquets of scaly caps of purple-wine and raspberry color with bright gold-yellow plates. Unlike the wooden Psilocybe that require winter cold and outdoor soil, Gymnopilus easily fruits indoors on sawdust blocks just like a gourmet mushroom.
layers
Bulk Substrate & Base RecipeAged hardwood or coniferous sawdust with 15% bran83% hardwood sawdust (or mixed with aged pine) + 15% wheat bran + 2% gypsum at 62% humidity.
Southern Purple Bunch SaprophyteSawdust/chip bags in wet chamber or outdoor terraces
Native to the southern hemisphere and acclimatized in European parks on wood chips, Gymnopilus purpuratus is possibly the most ornamentally beautiful species in this catalog: caps upholstered with magenta and royal purple scales, saffron yellow blades and a base that bluish in emerald green tones.
layers
Bulk Substrate & Base RecipeSawdust and hardwood or pine shavings weathered with 15% bran80% sawdust and fine shavings + 18% wheat bran + 2% gypsum at 62% humidity.
Willow, Alder and Beech Wood Saprophyte (Willow Shield)Sawdust/Willow Chip Blocks or Shade Inoculated Logs
Pluteus salicinus ("Willow Shield") is a taxonomic rarity among psilocybin mushrooms: it belongs to the family Pluteaceae, has free blades that produce salmon-pink spores (rather than purple or black) and grows directly on moist dead wood of willows, alders and beech without requiring extreme frosts.
layers
Bulk Substrate & Base RecipeCoarse sawdust and willow (Salix), alder or beech shavings supplemented at 15%80% sawdust and willow/beech shavings + 18% wheat bran + 2% gypsum at 64% humidity.
format_list_numberedView Step-by-Step Guide (3 phases) & Pro Tipsexpand_more
1. Phase 1: Grain Colonization14 - 18 days
Inoculate rye or millet at 22°C.
2. Phase 2: Sowing in Willow or Beech Shavings20 - 28 days
Transfer to bags of sawdust and shavings of deciduous softwood (willow, poplar or beech) with high humidity (64%).
3. Phase 3: Wet Temperate Fruiting10 - 15 days
Open the top of the bag at 16-18°C and 92% humidity. Mushrooms will emerge singly or in small groups with a silky pearl gray cap with a bluish scaly center and blades that turn salmon pink when ripe.
Expert Grower Tips:
Unlike Psilocybe lignicolas that only fruit outdoors in winter, Pluteus salicinus does fruit indoors at 17°C on blocks of willow or beech sawdust.
Calibrate bulk ratios, true casing requirements, FAE, and kinetics based on your chosen genetic.
search
tips_and_updatesYou are viewing the generic species guide. Click on any of the strains in the catalog above to calibrate exact microclimate parameters.
fact_checkDifferences Only Mode Active: Exclusively isolating parameters and critical adjustments that differ from standard cultivation.
balanceGrain : Substrate Ratio
Higher grain density (1:1.5 - 1:2) to provide sufficient nutritional reserves for thick stems or coral blobs.Standard ratio (1:3 to 1:4) promotes faster colonization and lowers risk of overlay or thermal stalling.
Calculate exact weights of grain spawn, dry coir, vermiculite, gypsum, and boiling water for your tub.
1. Colonized Grain Spawn
100% colonized grain jars or bags (brown rice, whole rye, oats, or millet) ready to spawn.
2. Wet CVG Bulk Substrate
Dry Coco Coir:
Medium Vermiculite:
Agricultural Gypsum:
Boiling Water:
3. Buffered Casing (+15% Vol)
Sphagnum Peat Moss:
Medium Vermiculite:
Hydrated Lime (pH 7.8 Buffer):
Apply 1.5 cm layer once colonized to prevent first-flush blobs and suppress Trichoderma mold.
format_list_numbered
Chronological Step-by-Step Protocol
updateTimelines tailored to:
verifiedExpert Grower Secrets
warningCommon Mistakes to Avoid
compare_arrows
Side-by-Side Technical Comparator
Compare kinetic timelines, nutritional ratios, casing requirements, and FAE demand between 2 strains.
Strain A:
Kinetic Timeline
Grain colonization:
Pinning:
Total cycle:
Grain : Substrate Ratio
Casing Layer
FAE Demand
Harvest Criterion
Speed
Yield
Resilience
Strain B:
Kinetic Timeline
Grain colonization:
Pinning:
Total cycle:
Grain : Substrate Ratio
Casing Layer
FAE Demand
Harvest Criterion
Speed
Yield
Resilience
Strain-Specific Architecture & Precision
Cultivation Guide: Psilocybe cubensis Strains
"Every P. cubensis strain has its own sheet: ventilation, ratios, casing and real cultivation timelines."
Strains & Varieties
Lineages & Species
Real Kinetics & Timelines
Overrides vs Species Baseline
sciencePsilocybe cubensis & Allied Species
Cultivation Guide: Psilocybe cubensis Strains
Precision mycology for Psilocybe cubensis isolates and mutations. This section also integrates dedicated technical protocols for key allied cultivable species such as Psilocybe tampanensis (in-jar sclerotia and magic truffle production) and Panaeolus cyanescens (Copelandia Hawaiian, strict coprophilous species of extreme potency). Differentiated grain:substrate ratios, true casing requirements to prevent blobs, real fruiting kinetics, and tactile harvest criteria.
Esta cepa calibra sus parámetros sobre la biología base de su especie. Para la preparación aséptica y pasteurización del sustrato bulk (CVG), consulta la guía técnica.
←→Navigate between strain sheets using ← and → keyboard arrows
compare_arrows
Side-by-Side Cultivation Comparator
Cepa A
Cepa B
Linaje
Linaje
Dificultad
Dificultad
Colonización Grano
Colonización Grano
Ratio Recomendado
Ratio Recomendado
Casing
Casing
Demanda FAE
Demanda FAE
Criterio Cosecha
Criterio Cosecha
Bioseguridad, Esterilidad y Asepsia
lightbulb
In a nutshell
Cleanliness accounts for 90% of mycology success. For beginners, a Still Air Box (SAB) is mandatory to eliminate ambient drafts. Never use attached arm gloves (they create a piston effect that sucks contaminated air), and always sanitize tools with 70% isopropanol or flame sterilization.
El cultivo de hongos saprófitos no es jardinería; es microbiología. Debes aprender a trabajar en un entorno estéril para tener éxito sostenido.
warning
La Regla de Oro:
La micología es 90% limpieza y 10% micelio. Los nutrientes que damos a nuestros hongos son un festín para billones de esporas de moho y bacterias que flotan en el aire de tu casa.
Técnicas de Espacio de Trabajo
SAB (Still Air Box)
Caja de Aire Inmóvil. Una caja de plástico transparente (ej. 60 litros) boca abajo con dos agujeros para meter los brazos. No debe llevar guantes adheridos, ya que el movimiento de estos crea un "efecto pistón" que empuja el aire sucio. Su propósito no es filtrar el aire, sino detener por completo las corrientes de aire para que las esporas de moho y bacterias caigan al fondo por gravedad. Es la herramienta obligatoria para novatos.
Flujo Laminar (HEPA Flow Hood)
El estándar profesional absoluto. Consiste en un ventilador de alta presión (tipo "squirrel cage") emparejado con un filtro HEPA verdadero (99.99% de eficiencia a 0.3 micras). El aire se purifica y fluye de manera uniforme (laminar) hacia el operador, manteniendo el área de trabajo libre de contaminantes y permitiendo trabajar a tubo abierto sin restricciones de movimiento.
Alcohol Isopropílico al 70%
Nunca uses alcohol al 90% o 100%. El alcohol requiere agua para penetrar la pared celular de las bacterias y desnaturalizar sus proteínas. Al 70%, tarda más en evaporarse y destruye los patógenos eficazmente. Todo lo que entra en tu SAB debe ser rociado con alcohol al 70%.
Esterilización Térmica (Olla a Presión / Autoclave)
Hervir agua (100°C) no mata las endosporas bacterianas (las "semillas" acorazadas de las bacterias). Solo la presión puede elevar la temperatura del vapor. Necesitas alcanzar 15 PSI (Libras por Pulgada Cuadrada), lo cual equivale a 121°C (250°F).
El Purgado: Es vital dejar salir el vapor por la válvula durante 10 minutos antes de poner la pesa. Si queda aire dentro, no se alcanzará la temperatura estéril, solo presión falsa.
El Agar es una gelatina derivada de algas marinas que solidifica a temperatura ambiente. Al añadirle nutrientes, creamos "Placas Petri", el lienzo del micólogo.
Why Agar is Indispensable
Spore syringes are never 100% clean. Injecting spores directly into grain is contamination Russian roulette. On 2D agar, mycelium germinates cleanly and any mold or bacteria is pinned in an isolated corner, allowing you to transfer clean hyphal tips to fresh plates.
calculateInteractive Tool & SOPs
Master Guide & Media Calculator for Agar & LC
Calculate scaled stoichiometric recipes for 12 formulations (MEA, PDA, Black Agar, Water Agar, Slants, Liquid Culture, and 5% Dextrose), prophylactic additives, and Stacking pouring protocols.
MEA / LME Agar: 10g Agar en polvo + 10g Extracto de Malta Ligero (LME). El estándar absoluto de la industria moderna. Promueve un crecimiento rizomórfico rápido y vigoroso.
PDA (Potato Dextrose Agar): Hervir 150g de patatas 30 min, usar esa agua + 10g Dextrosa + 10g Agar. Excelente alternativa casera para aislamientos robustos.
Placas Antibacterianas (Uso de Antibióticos): Al trabajar con esporas salvajes o impresiones sucias, los profesionales añaden una pizca de Gentamicina o Cloranfenicol al agar líquido tibio justo antes de verter las placas. Esto inhibe el 99% de las bacterias permitiendo que el micelio crezca libremente.
Nota Pro: Añade 2-3 gotas de colorante alimentario azul o verde oscuro al preparar tu agar. El contraste visual te permitirá detectar colonias de bacterias (amarillas/lechosas) o mohos grises muchísimo antes que en agar transparente.
Morfología y Monocultivos (Isolates)
En la placa verás dos tipos de crecimiento simultáneo:
Tomentoso (Algodonoso): Bola de algodón difusa. Crece lento pero absorbe bien nutrientes.
Rizomórfico (Cuerdas): Hilos gruesos como raíces que avanzan ferozmente. Este micelio está en "modo ataque", es veloz y tiene genética superior para colonizar grano.
Aislamientos (Monocultivos): A través de transferencias sucesivas de los sectores más rizomórficos a placas nuevas, logras un "Isolate" (una sola cepa dicariótica). Esto asegura "canopies" (oleadas de fructificación completas) de hongos idénticos, madurando todos el mismo día y a la misma altura.
Clonación Perfecta (Tejido a Agar): No clones usando un cuchillo en el exterior del hongo (arrastrarás bacterias ambientales). En tu SAB/Flujo Laminar, rompe el tallo del hongo por la mitad con las manos enguantadas. Con un bisturí esterilizado al rojo vivo, arranca un micro-pedazo del tejido interno y ponlo en agar. Germinará un clon genético exacto de ese espécimen "trofeo".
Mutaciones y Genéticas Estériles
En la micología moderna, algunas de las genéticas más exóticas...
La Biología detrás de la Esterilidad
La ausencia de esporas suele deberse a endogamia severa...
Perfiles Morfológicos
Enigma (y formas de coral): Una anomalía celular...
Familia Penis Envy (PE, APE, Melmac): Aunque desarrollan sombreros...
Frequently Asked Questions
How do I cultivate Enigma if it's impossible to get spores?expand_more
You must acquire a live culture (already formed mycelium). It is distributed globally through colonized agar plates or Liquid Culture (LC) syringes. You will never see authentic Enigma spore syringes.
What is the best technique to extract genetics from a Penis Envy?expand_more
The sterile swab technique (Swabbing). It involves vigorously rubbing a medical cotton swab between the gills of the mature mushroom to physically rip out the trapped spores, and then streaking the cotton onto an agar plate.
Can I clone a sporeless mushroom directly to grain?expand_more
It is not recommended due to the extremely high risk of bacterial contamination. The correct protocol is to split the stem in a SAB chamber, extract a piece of inner tissue with a scalpel, and isolate it first on an Agar plate.
Inoculants: Spores vs. Liquid Culture (LC)
Para inyectar vida a tus granos necesitas un vehículo. Existen dos formas líquidas, y confundirlas es el error más común del novato.
Jeringa de Esporas (MSS)
Multi Spore Syringe. Son millones de esporas flotando en agua destilada. Las esporas no tienen vida activa todavía. Deben encontrar pareja (compatibilidad mating-type) dentro del grano, germinar y formar micelio. Tardan semanas en colonizar. Son genéticas aleatorias (lotería fenotípica).
Cultivo Líquido (LC)
Liquid Culture. Es una solución de agua azucarada (4% LME o Miel) donde flota micelio vivo y clonado. Al inyectarlo, el hongo ya está "comiendo" y colonizará el grano en días, saltándose la germinación. Proviene de una genética aislada, lo que garantiza cosechas masivas (canopies).
Biotecnología del Cultivo Líquido (LC)
Mezcla 600ml de agua destilada con 1 cucharada sopera rasa (~12g) de Jarabe de Maíz Claro, Miel o LME. Si te excedes del 4-5% de concentración de azúcares, el micelio no podrá procesarlo y morirá por choque osmótico.
Vierte en un tarro Mason y añade una Barra Agitadora Magnética (Magnetic Stir Bar). A nivel profesional, se usa un agitador magnético para triturar el micelio diariamente sin necesidad de agitar a mano y correr el riesgo de mojar el filtro.
Modifica la tapa con dos puertos: Un puerto de inyección de silicona autosellante y un filtro de jeringa sintético (0.22µm) que es impermeable (PTFE) para el intercambio de gases.
Esteriliza a 15 PSI por exactamente 20-30 minutos. Si excedes este tiempo, el azúcar se caramelizará (reacción de Maillard), volviendo el líquido oscuro y tóxico para el hongo.
Una vez a temperatura ambiente, en tu Flujo Laminar, deja caer un pedazo pequeño de tu placa de agar (monocultivo clonado).
warning
Prueba de Control de Calidad (QC Test):
Jamás inyectes LC directamente al grano sin probarlo antes. Extrae 1cc de tu cultivo líquido ya turbio y dispáralo sobre una placa de agar nueva. Espera 4 días. Si crece micelio puro y no hay manchas gelatinosas ni colores extraños, tu LC está limpio y tienes un suministro infinito (100+ jeringas) para inocular grano masivamente.
Frequently Asked Questions
How to tell if liquid culture is contaminated or healthy mycelium?expand_more
Healthy Psilocybe cubensis mycelium looks like white suspended clouds or threads floating in the liquid. If the liquid becomes cloudy (like dirty water), shows odd colors (green, black, pink), or has a thick milky film on the surface, it is contaminated by bacteria or molds.
How long does liquid culture last in the fridge?expand_more
Stored properly between 2°C and 6°C in a sterile syringe or jar, a liquid culture can last 6 to 12 months while remaining viable. It is vital not to freeze it, as this destroys the mycelium cells.
What is better for liquid culture: honey or malt extract?expand_more
Light Malt Extract (LME) at 2-4% is the gold standard in mycology because it is easy to standardize and produces a clear broth. Honey works well (at 4%), but its variable composition means a higher risk of caramelization during sterilization.
Why is my liquid culture not growing?expand_more
The main reasons are: the broth has too much sugar (over 4% chokes the mycelium), sterilization was too long and caramelized the sugars, lack of gas exchange (clogged filter), or incubation temps are too low (below 20°C).
Phase 1: Grain Spawn
lightbulb
In a nutshell
Hydrated, sterilized grain serves as the mycelium's primary caloric fuel. With the "Broke Boi" method, you can use brown rice steam-sterilized in an ordinary stockpot without needing an expensive pressure cooker. Shake the jar at ~30% visible white colonization to redistribute growth points and speed up progress.
El grano actúa como el vector nutricional (Spawn) y batería calórica. El micelio se comerá el grano, lo colonizará al 100% y utilizará esa energía para fructificar. La preparación general exige: hidratación celular profunda, secado superficial riguroso, y esterilización obligatoria.
Grano Profesional (Requiere Olla a Presión a 15 PSI)
Centeno (Rye Berries)
El rey del cultivo comercial. Retiene gran humedad interna mientras el exterior queda seco, reduciendo contaminaciones. Requiere remojo previo de 12-24h y hervor ligero de 10 min antes de esterilizar a 15 PSI por 120 min.
Mijo / Alpiste (Millet)
Granos diminutos. Tienen 5 veces más puntos de inoculación por gramo que el centeno. Al agitar el tarro, distribuyes decenas de miles de pequeños "focos" de micelio, acelerando la colonización drásticamente.
Avena Entera con Cáscara (Whole Oats)
Alimento para caballos (tractor supply). Masivamente barata ($15 por 25kg). La cáscara exterior es resistente y evita que los granos revienten (bursts) y liberen almidón pegajoso, haciéndola casi inmune a la pudrición húmeda (Wet rot).
Maíz Palomero (Popcorn)
Fácil de conseguir en el supermercado. Fácil de hidratar sin que se pase. Sus granos grandes dejan menos puntos de inoculación pero es ideal para principiantes que no encuentran centeno.
Broke Boi Tek (Sin Olla a Presión - Grano Casero)
Diseñado por Pastywhyte y popularizado por PhillyGoldenTeacher. Utiliza Arroz Integral (Brown Rice).
Hierve el arroz integral en agua durante exactamente 10-12 minutos (debe quedar semicocido: blando por fuera pero firme con un punto blanco duro en el centro al morderlo).
Lava con agua fría para frenar la cocción y escurre en colador durante 20-30 minutos hasta que al tocarlo con papel de cocina no lo moje.
Llena botes Mason dejando 3cm libres. Tapa dada la vuelta (flip lid) con 1/4 de vuelta suelta.
Esterilización al Vapor (Olla Normal): Coloca una rejilla o trapo en el fondo de una olla grande, añade 5cm de agua y mete los botes. Tapa la olla y déjala hervir a fuego medio generando vapor continuo durante 90 minutos. El vapor constante basta para pasteurizar/esterilizar el arroz integral casero con un 95% de éxito.
info
Uncle Ben's Tek (Spider-Man Tek):
El método de entrada definitivo. Consiste en comprar bolsas de arroz integral precocinado (tipo Uncle Ben's Ready Rice Whole Grain) que ya vienen pre-esterilizadas de fábrica. Se inyecta 0.5cc de LC o esporas y se crea un corte superior tapado con micropore para intercambio de gases. Cero necesidad de ollas o instrumental.
Frequently Asked Questions
Can you prepare mushroom grain without a pressure cooker? (Broke Boi Tek)expand_more
Yes, by using whole brown rice. Lacking the tough outer hull found on rye or wheat, brown rice can be steam-sterilized in a standard lidded stockpot (steam bath) for 90 to 120 minutes, making it the most accessible tek for beginners.
How do you check if grain has the correct moisture level before sterilization?expand_more
The golden rule is 'hydrated on the inside, dry on the outside'. Placing a handful of cooked grain on a clean paper towel for 10 seconds should leave no wet water marks. If the paper gets damp, excess surface moisture will trigger bacterial rot inside the jar.
What happens if grains burst during boiling?expand_more
If overcooked and the hulls burst, gelatinized starches are released. This free starch causes grains to clump into a dense, anaerobic paste inside the jar, creating the ideal environment for heat-resistant bacteria (Bacillus / Wet Spot).
What is the best grain for beginners: brown rice, oats, or rye?expand_more
For beginners without a pressure cooker, brown rice is undoubtedly the easiest. If you own a 15 PSI pressure cooker, whole feed oats or rye berries are the industry favorites due to their cost efficiency, durability, and resistance to bursting.
What is the Grain to Grain (G2G) technique and how much does it speed up growth?expand_more
It is a mass expansion method where one master jar of 100% colonized grain is split into 10 new jars of sterile grain (1:10 ratio). It slashes full colonization time down to just 7-12 days, multiplying your grain supply exponentially without starting from spores.
Phase 2: Bulk Substrates
lightbulb
In a nutshell
Bulk substrate provides the immense water reservoir required for mushroom fruit bodies (90% water), not food nutrients. The CVG formula (coco coir + vermiculite + gypsum) pasteurized with boiling water is the gold standard: squeeze tightly until only a few drops drip out ("field capacity").
Una vez que tienes tu "Spawn" (arroz/centeno colonizado 100% como un bloque blanco duro), tienes que expandirlo en un sustrato. El sustrato no da comida, proporciona millones de micro-reservorios de agua para que el hongo construya las setas (que son 90% agua) y una estructura para expandir su red.
La Sagrada Fórmula "CVG" (Coco, Vermiculita, Yeso)
La fibra de coco de reptiles/plantas carece de nutrientes biológicos. Por eso, al mezclar tu grano (con mucha energía pero colonizado por el micelio que lo protege) con Coco (sin energía), los mohos verdes (Trichoderma) no tienen comida libre para atacar. Es una receta casi a prueba de fallos.
Fibra de Coco: 1 bloque comprimido (650 gramos). Retiene la humedad maravillosamente.
Vermiculita: 2 cuartos de galón (2 Litros) de grado grueso o medio. Es un mineral volcánico esponjoso que guarda agua extra y crea bolsas de aire, evitando que el coco se apelmace.
Yeso Agrícola (Gypsum): 1 taza. Sulfato de calcio. Aporta Calcio y Azufre al micelio y evita que el sustrato se compacte como arcilla.
scienceBulk Substrate Pasteurization Methods (Options to Experiment)
There is no single dogma for pasteurization: the biological objective is eliminating competing pathogens while preserving beneficial thermophilic bacteria. Each grower can select and experiment according to their kitchen or lab setup:
water_drop1. Bucket Tek (Thermal Infusion)
Best for: 100% Pure Coco Coir or standard CVG mix. Protocol: Place dry brick in food-grade bucket, pour boiling water (100°C), snap lid on immediately and wrap in heavy blankets for 8–12h. Highly reliable and accessible.
device_thermostat2. Hot Water Bath / Steam (65°C - 75°C)
Best for: Manure, compost or straw blends (Panaeolus, Agaricus). Protocol: Maintain core temperature at 65°C to 75°C for 90–120 minutes. Preserves thermophilic bio-allies (Bacillus subtilis) that actively suppress green mold (Trichoderma).
eco3. Cold Hydrated Lime Bath (pH > 12)
Best for: Cereal straw and raw plant fibers (Pleurotus, Stropharia). Protocol: Submerge substrate in cold water with low-magnesium hydrated lime (<10% Mg) for 12–16h. Biological sterilization via alkaline pH spike without heating.
oven_gen4. Kitchen Oven Tek
Best for: Medium CVG or potting soil batches. Protocol: Place moist substrate in oven roasting bags or foil-sealed trays at 75°C–80°C for 2 hours monitored with a meat probe thermometer.
💡 Deep Dive: Access our dedicated technical guide with interactive tub-volume substrate calculator, thermal pasteurization curves, and contamination triage:Open Bulk Pasteurization Guidearrow_forward
Sustratos Suplementados (Estiércol / Salvado)
Los profesionales buscan maximizar el peso (Yield) de la cosecha. Para ello, añaden "comida" al coco.
Estiércol (Caballo/Vaca/Elefante): Añade nitrógeno masivo, generando hongos gigantes. Requiere Verdadera Pasteurización Térmica (Mantener el sustrato a 60-71°C en un horno o baño maría por exactamente 2 horas). Si se esteriliza en olla a presión, se matan las bacterias termófilas beneficiosas y el sustrato se contaminará de verde instantáneamente al abrirlo.
Salvado de Trigo o Café: Suplementos explosivos. Al ser tan ricos, fuerzan a que el sustrato ya no se pueda pasteurizar, sino que debe esterilizarse a 15 PSI por 150 minutos en bolsas de cultivo (Mushroom bags). Es una técnica avanzada de alto riesgo/alta recompensa.
Field Capacity (Capacidad de Campo)
Antes de mezclar el sustrato con el grano, la hidratación debe ser matemáticamente exacta. Coge un puñado de sustrato y apriétalo con máxima fuerza. Solo deben caer unas pocas gotas continuas (como lluvia fuerte, no un chorro). Si chorrea sin apretar, se asfixiará (Wet Rot). Si no cae nada, abortarán por deshidratación.
Phase 3: Fruiting Conditions
El Cambio de Entorno
Ya has mezclado el grano colonizado (Spawn) con el sustrato CVG en un contenedor (normalmente proporción 1:2 o 1:3). Ahora, para que el hongo decida que es hora de reproducirse (hacer setas), necesita "creer que ha llegado a la superficie y es otoño".
Los 3 Detonantes Universales de la Fructificación (FC)
Evaporación Superficial: El factor más importante de todos. Al evaporarse microgotas de la superficie del micelio, se envían señales hormonales para crear "Primordios" (nudos hifales que serán setas). Necesitas miles de perlitas de agua diminutas en la superficie.
Intercambio de Aire Fresco (FAE): Los hongos inhalan Oxígeno y exhalan CO2, igual que los humanos. El CO2 es pesado y se asienta en el fondo. Si hay mucho CO2, los hongos desarrollarán tallos larguísimos, delgados y peludos en la base (Fuzzy feet) tratando de "escapar" buscando oxígeno arriba.
Luz: Los hongos no hacen fotosíntesis. La luz ambiental (ciclo 12h/12h, incluso una bombilla led suave o luz indirecta de ventana) simplemente les indica "arriba" para que los tallos crezcan rectos hacia el cielo.
Cámaras de Cultivo
Shoebox (Caja de Zapatos)
Contenedores pequeños de plástico (6-15 L). Permiten diversificar riesgos; si una caja se contamina, las demás se salvan. Se incuban tapadas y luego se les da la vuelta a la tapa (flip-lid) para permitir flujo pasivo de aire para fructificar. Ideales para novatos.
DubTub
Evolución del Shoebox. Cuando los frutos crecen tanto que tocan la tapa plana, se retira la tapa y se coloca otro Shoebox vacío boca abajo encima del primero. Actúa como una cúpula alta que protege el microclima mientras permite a los hongos gigantes desarrollarse sin restricciones.
Monotub (Modificado / Unmodified)
Modificado: Tinas masivas (54-66 Qt) con agujeros precisos tapados con micropore. Automatizan el intercambio de aire (FAE) por convección térmica, sin necesidad de abanicar a mano.
Unmodified (Bod's Tek): Tina estándar sin agujeros. Se logra el FAE simplemente desplazando y volteando la tapa calibradamente.
Martha Tents / Greenhouses
Nivel comercial. Invernaderos verticales interiores de varios niveles. Emplean humidificadores ultrasónicos canalizados, ventiladores de extracción automatizados, y sensores de controladores ambientales para mantener la Humedad Relativa (HR) al 90-95% con altísimo FAE constante. Cultivo tipo "dosel" continuo.
El Proceso Día a Día
Día 1-10 (Incubación/Colonización): El sustrato se pone blanco entero. Mantén la tapa cerrada.
Introducción de FC (Fruiting Conditions): Das la vuelta a la tapa o la abres ligeramente, y empiezas a "abanicar" con la tapa 2 veces al día para mover el CO2.
Misting (Rocío): Si ves la superficie mate y seca, usa un vaporizador de niebla muy fina (flairosol) rociando hacia arriba y dejando caer la niebla sobre la superficie. NUNCA rocíes las setas directamente con gotas gruesas, eso causa abortos inmediatos.
Primordios a Cosecha: De nudos blancos pasan a "Pines" (cabecitas marrones diminutas), y en apenas 3-5 días desde que ves los pines, estallan en monstruos listos para cosechar.
Harvesting, Drying, and Storage
¿Cuándo cosechar? El Velo Roto
El momento matemáticamente perfecto para cosechar *Psilocybe cubensis* es justo antes o en el mismo momento en que el velo se rompe. El velo es esa fina membrana blanca debajo del capuchón que protege las branquias.
Si cosechas antes (cuando están cerrados): Tienen máxima concentración de alcaloides por peso, pero pierdes masa/tamaño.
Si cosechas después (abiertos del todo): La seta sigue ganando peso en agua, pero ha dejado de producir psilocibina, por lo que su potencia *por gramo seco* es estadísticamente menor. Además, vomitará millones de esporas negras manchando todo tu sustrato, lo cual puede inhibir cosechas (flushes) futuras.
Excepción: Variedades mutantes como Penis Envy, Yeti, Jack Frost u otros albinos densos. Estas rara vez tienen velo tradicional o tiran esporas. Se cosechan cuando el tallo debajo del capuchón se siente suave como un malvavisco (marshmallow) al tacto.
El Secado (Dehydrating) - "Cracker Dry"
Las setas frescas se pudren en 3-5 días en la nevera. Deben secarse. El secado con ventilador, al sol (¡destruye la psilocibina!) o sobre radiadores es inadecuado y provoca pérdida masiva de potencia por oxidación y fermentación enzimática.
warning
Deshidratador de Alimentos:
Es obligatorio. Seca tus frutos a 50°C - 55°C (125°F-130°F) durante 12-24 horas ininterrumpidas. El objetivo absoluto es el estado "Cracker Dry" (Seco como galleta cracker). El tallo debe partirse con un "chasquido" nítido y doloroso; si se dobla aunque sea un poco como cuero, le queda agua, y en semanas aparecerá moho tóxico perdiendo toda su magia.
Almacenaje a Largo Plazo
Los tres enemigos de la Psilocibina seca son el Oxígeno, la Humedad y la Luz UV.
Botes de cristal con cierre hermético y goma (Mason Jars).
Llenar con las setas "Cracker Dry".
Añadir varios paquetes grandes de Gel de Sílice (Silica Gel) descante (comprado, nunca el de cajas de zapatos viejas).
(Opcional para años): Añadir un absorbedor de oxígeno (Oxygen absorber de grado alimentario).
Guardar en un armario totalmente oscuro y fresco. Bajo estas condiciones, la degradación es inferior al 3% anual.
Genetics and Long-Term Preservation
Cuando aíslas una genética perfecta en agar (un hongo masivo, rápido y potente), quieres guardar ese clon para siempre. Si mantienes el cultivo en placas de Petri a temperatura ambiente indefinidamente, el micelio envejecerá (senescencia) y perderá su vigor celular tras múltiples transferencias, dejando de fructificar.
Slants (Tubos Inclinados)
Los profesionales no guardan su biblioteca genética en placas planas, usan "Slants". Un slant es un tubo de ensayo de cristal con tapón de rosca.
Se vierte agar caliente en el tubo y se deja enfriar inclinado en ángulo (creando una gran superficie elíptica).
El Secreto: Se introduce un pequeño palo de madera (depresor lingual o brocheta de madera dura) en el agar antes de esterilizar.
Se inocula el slant con tu genética ganadora. El micelio colonizará la superficie del agar y, más importante, se infiltrará en la matriz de celulosa del palo de madera.
Una vez totalmente colonizado, se cierra bien el tubo y se almacena en la nevera a ~4°C (Nunca en el congelador).
Resultado: El micelio entra en éxtasis (hibernación térmica). Puede sobrevivir en el palo de madera, sin envejecer, de 1 a 3 años. Cuando quieras revivirlo, rascas un poco de madera y lo pones en una placa Petri nueva.
Pathology, Diseases, and Contamination
lightbulb
In a nutshell
Green mold (*Trichoderma*) is enemy #1: once green, it has already released billions of spores; immediately remove the container outdoors without opening it inside. Healthy mycelium smells of fresh earth or forest mushrooms; sour, vinegary, or fermented smells indicate bacterial rot.
La cruda realidad es que perderás cultivos. Aprender a identificar el problema y tirar el cultivo antes de que esporule tu casa entera es la marca del buen micólogo.
Trichoderma Harzianum (Moho Verde)
El enemigo número 1. Empieza como un parche blanco cegadoramente brillante y denso (a menudo más plano que el micelio cubensis). Al cabo de un día, de repente se vuelve Verde Esmeralda. Eso significa que ha soltado miles de millones de esporas. Si ves verde en tu tupper, es demasiado tarde. Nunca abras un tupper con Trichoderma dentro de casa. Tíralo entero o entiérralo en el jardín.
Cobweb Mold (Dactylium)
Muy sobre-diagnosticado por novatos (casi siempre es micelio tomentoso normal). El verdadero cobweb crece a una velocidad infernal (cubre el monotub entero en 24h), es de color grisáceo tenue, flota varios centímetros por encima del sustrato como nubes de hilo de azúcar, y tiene puntitos negros diminutos (esporangios). Si es cobweb real, se funde y desaparece instantáneamente al rociarlo con Agua Oxigenada (H2O2) al 3%.
Bacterias (Wet Spot / Bacillus)
Ocurre en la fase de grano (Ejem: exceso de líquido inyectado en el Uncle Ben's). El arroz o centeno adquiere un aspecto mojado, viscoso, se pega al cristal como vómito, y huele a manzana podrida, calcetín sucio o fermentación ácida. El micelio saludable huele exclusivamente a champiñón fresco y bosque húmedo. Tíralo de inmediato.
Metabolitos Miceliales (Pis de Micelio)
No es contaminación. Son gotas líquidas de color ámbar, amarillo oscuro o marrón claro exudadas por el micelio maduro. Significa estrés. El hongo está produciendo antibióticos para combatir un microbio menor, el sustrato está seco o lleva mucho tiempo fructificando. Inofensivo si no huele mal.
Abortos (Aborts)
Pequeños primordios (pins) que detienen su crecimiento repentinamente, volviéndose los capuchones de color azul marino muy oscuro o negros opacos. Causados por cambios drásticos de condiciones (exceso de agua, sequedad, falta de nutrientes). Son extremadamente potentes. Cosechalos a tiempo antes de que se pudran y atraigan contaminación.
Fuzzy Feet (Pies Peludos)
Crecimiento excesivo de micelio blanco, algodonoso y esponjoso trepando por la base de los tallos. Es el síntoma universal de asfixia por acumulación excesiva de CO2 (el hongo intenta extender micelio para buscar aire). Solución: Incrementar significativamente la frecuencia de FAE (abanicar más o aumentar la ventilación pasiva).
Aspergillus spp. (Moho Negro/Amarillo)
Peligro Biológico: Produce micotoxinas (aflatoxinas) extremadamente dañinas si se inhalan. Aparece como un polvo verde amarillento (A. flavus) o puntitos negros (A. niger). Es la causa de la "Enfermedad del Pulmón del Granjero". Si sospechas de Aspergillus, no abras el contenedor bajo ningún concepto. Tíralo entero.
Neurospora crassa (Lipstick Mold)
Un hongo increíblemente rápido y traicionero. Empieza como un micelio algodonoso y en un par de días desarrolla un polvo de color rosa fluorescente, naranja o rojo carmesí. Sus esporas son tan finas que pueden atravesar los filtros de papel Tyvek. Altamente contagioso para futuros cultivos en el mismo espacio.
Penicillium spp. (Moho Azul-Verde)
A menudo confundido con Trichoderma. Sin embargo, Penicillium tiende a ser más polvoriento, crece predominantemente sobre grano expuesto no colonizado, y su color tira más hacia el azul-grisáceo que el verde esmeralda brillante. Aunque no suele ser letal para humanos sanos, detendrá por completo la fructificación.
Verticillium (Dry Bubble Disease)
Un hongo parásito que ataca directamente al cuerpo fructífero. Los síntomas incluyen tallos bulbosos hinchados en la base, sombreros muy pequeños o deformes, y rayas o manchas marrones a lo largo del tallo. A diferencia del moho, infecta las setas que ya están creciendo. Requiere esterilización total del espacio.
Mycogone perniciosa (Wet Bubble Disease)
Quizás la enfermedad más perturbadora visualmente. El micelio infectado produce "setas" que nunca desarrollan tallo ni sombrero, formando en su lugar grandes masas blancas amorfas parecidas a un cerebro o coliflor gigante. Estas masas acaban pudriéndose y supurando un líquido de color ámbar y olor muy fétido.
El Mito de "Salvar el cultivo"
Cortar la parte verde de un tupper con un cuchillo esterilizado y echarle agua oxigenada o sal rara vez funciona, a menos que el Trichoderma esté en un rincón aislado de 1 centímetro en su fase blanca inicial. El moho verde tiene raíces microscópicas (hifas) extendidas por todo tu sustrato antes de que puedas verlo. La micología exige sacrificar a los caídos sin piedad para proteger el ambiente (tu cuarto de cultivo) de cara a futuros proyectos.
No cultivable en medios artificiales. Forma simbiosis obligada con raíces vivas de árboles huéspedes en ecosistemas silvestres. No intente fructificar sobre grano o sustratos bulk domésticos.
lens_blur Píleo (Sombrero)
Tamaño:
Forma:
Color:
Superficie:
Margen:
view_list Láminas (Himenio)
Inserción:
Color:
Espaciado:
straighten Estípite (Pie)
Dimensiones:
Color:
Superficie:
Anillo/Velo:
blur_circular Esporas (Microscopía)
Forma:
Dimensiones:
Esporada:
Pared:
Poro germinal:
colorize Carne
Color:
Azuleamiento:
Olor:
Sabor:
Perfil de Alcaloides (% Peso Seco)
Psilocibina
Psilocina
Baeocistina
Aeruginascina
Total máximo:
⚠️ Esta especie NO contiene triptaminas. Química basada en isoxazoles (mecanismo GABAérgico).
Ác. Iboténico
Muscimol
Fuentes
Hábitat y Ecología
🌍Tipo
ecoSustrato
⛰️Altitud
calendar_monthTemporada
Distribución Geográfica
⚠️ Especies Confusas (Lookalikes)
La confusión con estas especies puede ser peligrosa o fatal. Consulta siempre con un experto micólogo.
menu_book Referencias Científicas
psychiatryGuía Magistral y Parámetros de Cultivo
Protocolo agronómico paso a paso, sistema de cultivo y telemetría ambiental
deployed_code
dnaVariantes y Aislamientos Genéticos
Temp Fructificación: CO₂:
device_thermostatTemperatura de Incubación
Fase vegetativa en oscuridad
ac_unitTemperatura de Fructificación
airTolerancia a CO₂
format_list_numbered
Manual de Cultivo Paso a Paso (De Inoculación a Cosecha)
Legal and Harm Reduction NoticeMycoVerso is a database exclusively for academic research, biological identification, and harm reduction. By continuing to use the application, you confirm you are of legal age and accept our legal and medical disclaimer. We do not encourage consumption or illegal acts.
warning
Aviso Legal: Contenido para mayores de edad
MycoVerso es una enciclopedia botánica y micológica orientada a la investigación, reducción de daños y divulgación científica. La información sobre especies que contienen sustancias reguladas no promueve su consumo ni cultivo. ¿Eres mayor de edad (+18) en tu jurisdicción?
search
ESC
search_off
No se encontraron resultados para
arrow_forward
Reducción de Daños (SOS)
self_improvement
Estás a salvo. La psilocibina no es tóxica para tu organismo y esta experiencia es temporal. Todo volverá a la normalidad en unas horas.
Técnicas de anclaje (Grounding):
Respira: Inhala profundamente por la nariz durante 4 segundos, mantén 4 segundos, y exhala por la boca durante 6 segundos.
Cambia de entorno: A veces, simplemente moverte a otra habitación, encender una luz cálida o cambiar la música puede alterar por completo la experiencia.
Acepta: No luches contra lo que sientes. Visualízate como una piedra en el fondo de un río, dejando que la corriente (los pensamientos) pase sobre ti sin arrastrarte.
Hidrátate: Bebe un vaso de agua o come algo dulce.